Plant care
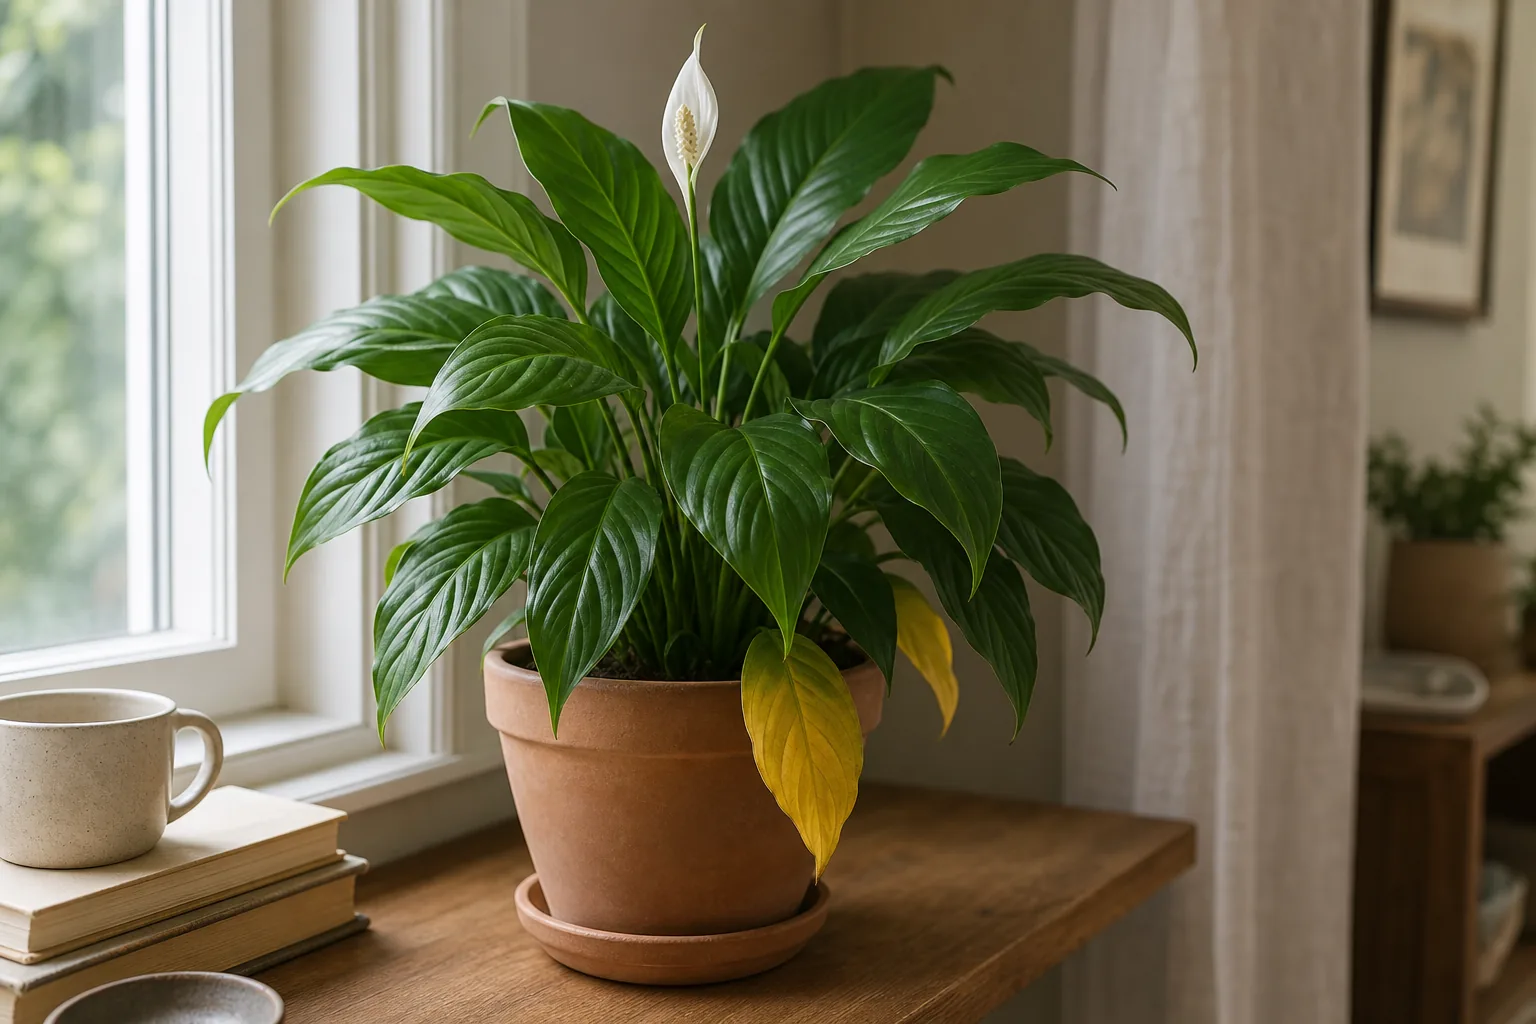
Peace lily leaves turning yellow: a pattern-first troubleshooting order
· Updated
Yellowing on a peace lily (Spathiphyllum) is a symptom, not a diagnosis. The most useful first move is to read the pattern on the plant — which leaves are turning, how fast, and where on the plant — then check the soil and watering rhythm, re-read the light at the current spot, look for any recent changes in the plant’s life, check temperature and drafts, and only then inspect for pests and root issues. Change one thing at a time and watch for new green growth as the recovery signal, since yellowed leaf tissue generally does not turn green again.
Why yellowing on a peace lily is rarely a single answer
Peace lilies are popular because they tolerate the conditions of ordinary rooms, including low light, irregular watering, and average humidity. That same tolerance is part of why yellowing is hard to read. A peace lily in the same pot can yellow from an underwatering rhythm, from sitting in a soggy pot, from a cold draft at night, from being root-bound, or simply from dropping an older leaf. The causes overlap, and several can show up on the same plant at once.
This is also why a single article focused only on the yellowing symptom is useful. Instead of trying to match a yellow leaf to one cause, you can run a short, ordered inspection and let the room and the plant narrow the answer for you. If the pattern does not look peace-lily-specific, the general yellow-leaves checklist covers other foliage plants in the same observation-first style. For the broader species hub, including how to read droop, moisture, and light together, the peace lily care guide is the page to come back to.
Step 1: Read the yellowing pattern on the plant
Before changing anything, spend a minute looking at the plant.
- One older, lower leaf yellowing at a time, with the rest of the plant glossy and pushing out new growth, is usually natural aging. A peace lily will shed its oldest leaves to redirect energy. This is rarely urgent.
- A wave of yellowing that includes new growth or several leaves at once is not normal aging. This pattern is more consistent with a watering, root, light, or environment shift the plant is reacting to all at once.
- Yellowing paired with soggy soil, a heavy pot, or a soft, mushy base near the soil is the most common overwatering picture. Sometimes the roots are involved.
- Yellowing paired with bone-dry soil, a very light pot, and droopy stems is the most common underwatering picture. Peace lilies droop dramatically when dry, so droop alone does not tell you which way the problem runs.
- Yellowing paired with brown leaf tips or crispy edges points toward a different set of conditions, including chronic underwatering, very dry air, or mineral buildup. The brown tips and crispy edges guide walks through that symptom pair in more depth.
Patterns are clues, not verdicts. They tell you which step to run next, not which product to buy.
Step 2: Check the soil and watering rhythm
Watering rhythm is one of the most common triggers of peace lily yellowing, and the trick is that overwatering and underwatering can produce similar yellow leaves. The deciding evidence is in the pot. The watering-without-a-schedule post covers the observation method in more detail, and the overwatered-vs-underwatered guide walks through how to tell the two apart.
A quick 60-second soil check:
- Push a wooden chopstick or your finger into the top inch or two of the mix. Wet and dark means wait. Cool and just barely damp is the usual sweet spot. Bone-dry all the way down means water.
- Lift the pot. A peat-based peace lily mix soaked in water is much heavier than the same pot when the mix has dried to the point of needing water. Learning the dry weight is more useful than any schedule.
- Look at the bottom of the pot. Is there a drainage hole, and is the pot sitting in a saucer or cachepot full of water? Sitting in standing water is one of the most common peace lily problems, and the drainage and pot setup post walks through the three indoor pot setups and why a no-hole decorative pot is the most common yellowing culprit. When soggy soil lines up with a wilting plant rather than a thirsty one, the wilting in wet soil post covers that overlap separately.
- Check the surface. A white crust on the soil or pot rim suggests mineral buildup from hard water or fertilizer residue. That is not the same thing as the cause of yellowing, but it is a clue that flushing the pot with plain water may help.
If the soil is wet and the leaves are yellowing, do not add more water; that is the opposite fix. If the soil is dry and the leaves are yellowing and droopy, water thoroughly until it drains, then let the pot come back to the dry side before watering again.
Step 3: Re-read the light at the current spot
Peace lilies tolerate low light but grow best in bright indirect light, according to university extension guidance. Low light that is just adequate looks like a healthy, slowly growing plant with deep green leaves. Low light that is too dim starts to look like a pale, leggy plant that rarely flowers and yellows its lower leaves to feed the newer ones. Established horticultural references make the same point another way: “low light” is not the same as “no light.”
The opposite problem also happens. A peace lily that has been in a dim corner for months and is suddenly moved into a sunny window can bleach or yellow the leaves that were previously shaded. The tell is a sharper timeline that matches the move.
The fix in both cases is to re-read the actual spot rather than guess. The guide to reading natural light in your room walks through the shadow test and the differences between north, east, and west-facing spots in more depth.
- At the brightest hour of the day, hold your hand where the canopy sits. A soft, fuzzy shadow means bright indirect light. A sharp, defined shadow means direct sun is reaching the leaves. No real shadow means the spot is dim.
- Watch the spot across a day, not just at noon. A north-facing window stays steady. An east-facing window gets morning sun. A west- or south-facing window can swing from dim to harsh across the year.
Step 4: Look for recent changes in the plant’s life
Most peace lily yellowing has a trigger, and the trigger is usually something that changed in the last two to four weeks.
- A recent purchase. Peace lilies often arrive from a greenhouse with a heavy peat mix, a crowded root ball, and bright, even light. Apartments are different. A few older leaves yellowing in the first two to four weeks after bringing one home is common and usually settles down. The acclimate a new houseplant post frames the first two weeks in more detail.
- A recent repot. Freshly repotted peace lilies often wilt and yellow for a short period while the roots re-establish. This is not the same as a failed repot. The after-repotting guide covers what the first few weeks typically look like.
- A move to a new room, a new window, or a different shelf. Even small changes in light or air flow can show up as yellow leaves.
- A season change. Heating cycles in fall and winter dry the air and shift the watering rhythm. A plant that was fine in October can yellow in January without anyone touching it.
- A change in watering person or routine. Someone else may be watering on a different schedule, or the pot may have moved to a spot that dries out faster.
If you keep a one-line note on the plant’s life, these patterns become obvious in hindsight.
Step 5: Check temperature, drafts, and humidity swings
Peace lilies prefer ordinary room temperatures and dislike sudden swings. Common trouble spots include a window that turns cold at night, a winter sill that drops well below the room temperature, a heating vent pointed at the pot, and air from an AC unit. The drafts, vents, and cold windows post walks through how to read the microclimate in the room.
Some sources mention cold tap water poured straight into the pot as a possible contributor to yellowing, though extension guidance does not treat it as a primary cause. Letting water come to room temperature first is a low-cost precaution.
None of this means a peace lily needs a special thermometer or a sealed room. It means the spot that looks fine to you may not be fine to the plant. Run a hand across the canopy at the coldest part of the night and at the brightest part of the day to feel what the leaves feel.
Step 6: Inspect the plant for pests and the roots for problems
Once watering, light, recent changes, and temperature have been checked, a short pest pass is worth doing even on an indoor plant.
Common pests on peace lilies
Peace lilies are commonly bothered by a small set of pests, and each one tends to show up in a particular place.
- Check the undersides of leaves and the leaf bases near the crown for small white, cottony masses. That points to mealybugs on houseplants, which cluster in the tight centers of peace lilies.
- Check the stems and leaf undersides for hard, brown, shell-like bumps. That points to scale on houseplants.
- Check leaf undersides in dry winter rooms for fine webbing and tiny pale specks. That points to spider mites on houseplants.
- Check the soil surface for small dark flies that hover when you water. That points to fungus gnats, which thrive in the evenly moist mix that peace lilies prefer.
Pest management on a houseplant should always start with identification and follow the product label. The site’s pest posts cover identification and a layered, indoor-safe response in more depth.
A quick root check when the soil stays wet
If yellowing is paired with soggy soil and a soft base, gently slide the rootball out of the pot and look at the roots. Firm, pale roots are healthy. Brown, mushy, smelly roots suggest rot, which is a different problem than routine yellowing. The repotting decision post covers how to read a crowded root ball and how to tell a routine refresh from an emergency repot.
Step 7: Make one change at a time and observe
The point of running the inspection in order is to keep the variables small. If you change watering, light, and pot at the same time, the plant can only tell you that something is off; it cannot tell you which change helped. The watering-without-a-schedule post doubles as a useful reference for the wait-and-watch rhythm that follows any single change.
After any single change, give the plant a few weeks and watch for new green growth at the crown. A yellowed leaf usually does not turn green again, and that is normal. New growth is the recovery signal. If new growth comes in glossy and green, the change you made was probably the right one. If new growth is also yellowing, the next variable is still in play.
When to ask a local expert for help
Most peace lily yellowing is cultural and resolves with one or two steady adjustments. There are moments when a local set of eyes is worth more than another round of adjustment at home.
- Persistent yellowing after a month of observation and one or two calm changes
- Sudden collapse, soft stems, or a foul smell from the soil
- Yellowing that keeps spreading despite clean watering and a reasonable spot
- A pest that is hard to identify from a description alone
A local nursery, a master gardener hotline, or a county extension office can look at the actual plant, the actual room, and the actual water and give you a more grounded read than any article can.