Plant care
Do houseplants need drainage holes? A practical look at pot setup
· Updated
What drainage actually does inside a pot
Drainage is a way to control how long the root zone stays wet. Watering fills the air spaces in a potting mix, and roots need those air spaces for oxygen as much as they need the moisture itself. A drainage hole at the bottom of a pot gives excess water somewhere to go, which keeps the mix from staying saturated for days on end. A pot without a hole does not take away the plant’s water supply, but it does remove your easiest way to know when the mix has had enough.
For most indoor plants, the practical question is not whether the pot needs a hole, but how to keep the roots from sitting in water for too long. The three common setups indoor growers actually use answer that question in three different ways, with different levels of margin for error.
How standing water changes conditions at the roots
University of Missouri Extension notes that heavy or prolonged wet soil can suffocate roots and weaken plants. When a mix stays saturated, the air pockets in the soil collapse or fill with water, and the root zone shifts toward anaerobic conditions that most common indoor foliage plants are not equipped to handle. Roots that cannot respire eventually stop functioning, and the plant above begins to show it.
This is why drainage matters even for plants that prefer consistently moist soil. A mix that holds too much water for too long produces the same outcome as a drought, just through a different mechanism: the plant cannot use the water or the oxygen it needs.
Water is essential for plant function in the first place, including maintaining the turgor pressure that holds leaves upright, so both too much and too little water end up visible on the plant. That visibility is useful, because it gives the grower a way to check whether the setup is working without any special equipment.
The three setups most readers actually use
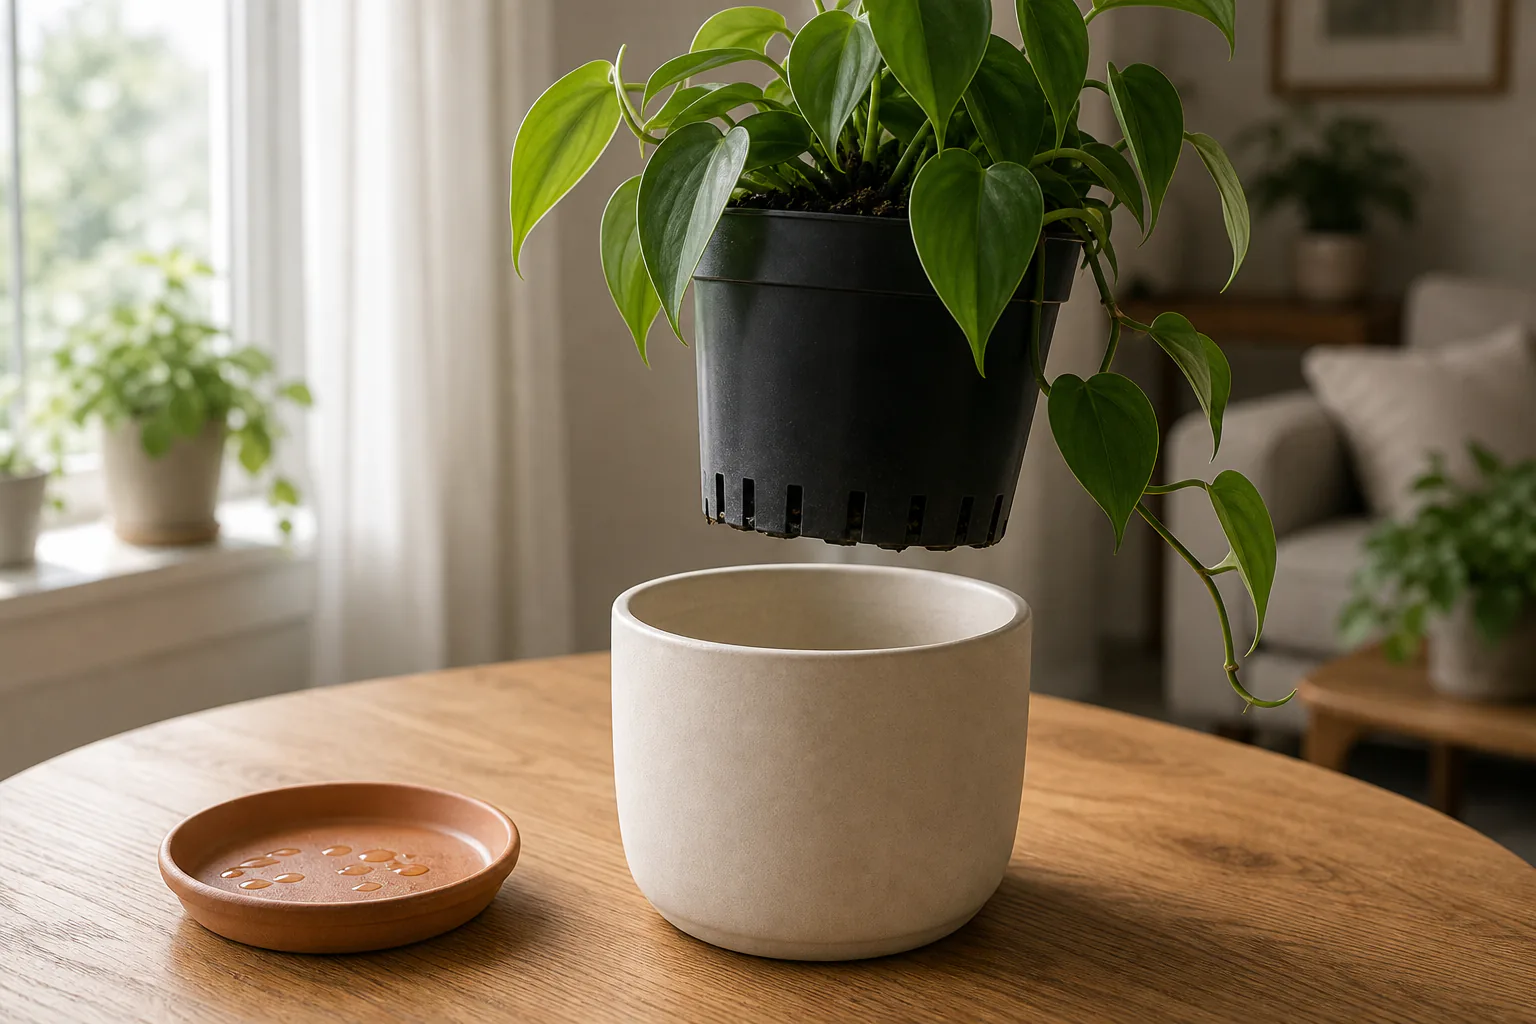
Nursery pot inside a decorative cachepot
A cachepot is a decorative outer container, usually without a drainage hole, used to hide a plastic nursery pot. The plant stays in its nursery pot, which has free drainage. You water the inner pot over a sink, let it drain, then slide it back into the cachepot. This setup works with most decorative pots, as long as the nursery pot fits inside with a little clearance around the sides, and it keeps the root environment controlled. It is the most forgiving of the three setups for a reader who is still learning their watering rhythm.
Plant directly in a pot with a drainage hole
A pot with a drainage hole, paired with a saucer underneath, is a straightforward setup. You water until a small amount runs out of the bottom, empty the saucer after a few minutes, and let the pot dry back according to the plant and the room. The hole gives the mix a clear endpoint, and the saucer catches what drains through.
Plant directly in a decorative pot with no drainage
A plant potted directly into a decorative pot without a hole can survive, but the margin for error is much smaller. You rely on a porous, well-draining mix, modest water volumes, and your own habit of checking the pot weight and the surface moisture before each drink. There is no overflow path if you misjudge. Many readers have plants thriving in this setup, especially with succulents, cacti, and other plants adapted to dry cycles. It just asks more from the grower on every watering day.
The cachepot method, step by step
If you choose the cachepot route, the sequence matters more than the pot you pick.
- Water the plant in its nursery pot over a sink, slowly, until water runs out of the drainage holes.
- Let the nursery pot sit for a minute or two so the mix releases the excess.
- Empty any water that has collected in the bottom of the cachepot. Standing water under the inner pot wicks back up into the mix and defeats the purpose of the drainage hole.
- Slide the drained nursery pot back into the cachepot.
- Check the cachepot again ten minutes later, especially for deeper decorative pots where water can pool below the level of the inner pot’s drainage holes.
The empty-the-cachepot step is the one readers most often skip. Standing water at the bottom of a decorative pot is the fastest way to turn a cachepot setup into something that behaves like a pot without drainage.
When a decorative pot without holes can work, and when it usually does not
A pot with no drainage can hold a healthy plant when the conditions line up. The mix should be loose and well-draining, sized so the plant is not buried in a much larger volume of soil than its roots can use. The room should be bright and warm enough that the mix does not stay cold and damp. The waterings should be modest, and the reader should be willing to lift the pot and check its weight before each drink. The plant also matters. Drought-adapted plants such as succulents, snake plants, and ZZ have a very different tolerance profile from moisture-loving plants like ferns and calatheas in the same pot.
The setup usually struggles when the mix is dense or peat-heavy, when the decorative pot is much larger than the root ball, when the room is dim or cool, and when waterings are heavy and frequent. A layer of rocks, broken pottery, or charcoal at the bottom of a pot is a common suggestion, but the available extension sources do not support it as a substitute for a drainage hole. Water still settles into the lowest part of the root zone, and the bottom layer can hold water against the roots rather than moving it away, which works against the goal of faster drying.
Reading the plant and the pot: signs water is staying too long
The plant and the pot themselves will tell you whether the setup is working. The signs below are worth checking on a regular schedule, especially in the first few weeks after a change.
- Pot weight. Lift the pot right after watering and again two days later. A pot that is still noticeably heavy, with a surface that feels cool and damp to the touch, is holding more water than the plant is using.
- Surface smell. After a few days of normal watering, sniff the top of the mix. A sour, stale, or swampy smell suggests anaerobic conditions in the root zone.
- Algae or white crust. Green algae on the surface or a white mineral ring at the rim tracks with consistent moisture. Neither is a crisis on its own, but both are signals that the pot stays wet for a long time.
- Fungus gnats. Small dark flies hovering around the soil usually mean the mix stays damp enough to support their larvae. Treat it as information about moisture, not just a pest problem.
- Lower leaves. Soft yellowing from the bottom up, with leaves that feel limp rather than dry and crispy, is more consistent with too much water than with too little. Crispy brown leaf edges and drooping are more often signs of underwatering or low humidity.
None of these is a diagnosis on its own. Taken together, they make a clearer picture than any one cue, and they are what experienced indoor growers use to adjust their watering rhythm. The indoor light in your room shapes that rhythm too, and our piece on reading the natural light in your room before you place a houseplant walks through how to gauge it.
Pot material and how it changes dry-down time
The wall of the pot is part of the watering system, not just decoration. The Missouri Botanical Garden’s container factsheet notes that containers come in ceramic, plastic, and other materials, sold both with and without drainage trays, and that material affects how the mix dries. Among the most common choices for indoor plants:
- Unglazed terracotta. The clay wall is porous, so water leaves through the sides as well as the surface. This is the fastest-drying of the three typical materials, which makes it a common choice for plants sensitive to wet roots.
- Glazed ceramic. The glaze seals the wall, which slows moisture loss through the sides. A glazed ceramic pot will hold moisture longer than the same size unglazed terracotta, especially in a dim or cool room.
- Plastic. A plastic nursery pot is essentially non-porous. Water can only leave through the surface and the drainage hole. Plastic pots dry the slowest of the three in a typical indoor environment.
The direction of the effect is consistent across sources. The exact difference in days depends on the size of the pot, the temperature, and the light, so there is no fixed number to hang on it. What is worth carrying forward is the order: terracotta dries fastest, glazed ceramic is intermediate, plastic dries slowest. The same logic is why a glazed ceramic cachepot in a north-facing room behaves very differently from the same cachepot in a south-facing window, which is one of the reasons the natural light guide is a useful companion read.
Quick reference: choosing a setup for the plant you have
These are starting points, not rules. Adjust from what you see on the plant.
- For a small plant in a plastic nursery pot with a decorative pot you love, keep the nursery pot and use the decorative pot as a cachepot. Water over a sink, drain, then return it.
- For a plant you want to repot directly into a long-term decorative pot, choose one with a drainage hole and pair it with a saucer. This is a straightforward setup that rewards simple habits.
- For a succulent, cactus, or other dry-cycle plant in a small decorative pot, a pot without drainage is workable if the mix is gritty, the room is bright, and the waterings are light and infrequent.
- For a moisture-loving plant such as a fern or calathea in a decorative pot with no hole, reconsider the setup. The margin is thin, and either a drainage hole or a true cachepot arrangement will be easier to manage.
- For any plant that is showing the signs above, switch to a setup with a drainage path before adjusting anything else about watering or feeding.
Sources
- University of Missouri Extension – Too much moisture can hinder root development
- Missouri Botanical Garden – Containers for Growing Plants
- West Virginia University Extension – How Plants Use Water