Plant care
Brown tips on houseplants: a calm diagnostic order that isn't just humidity
· Updated
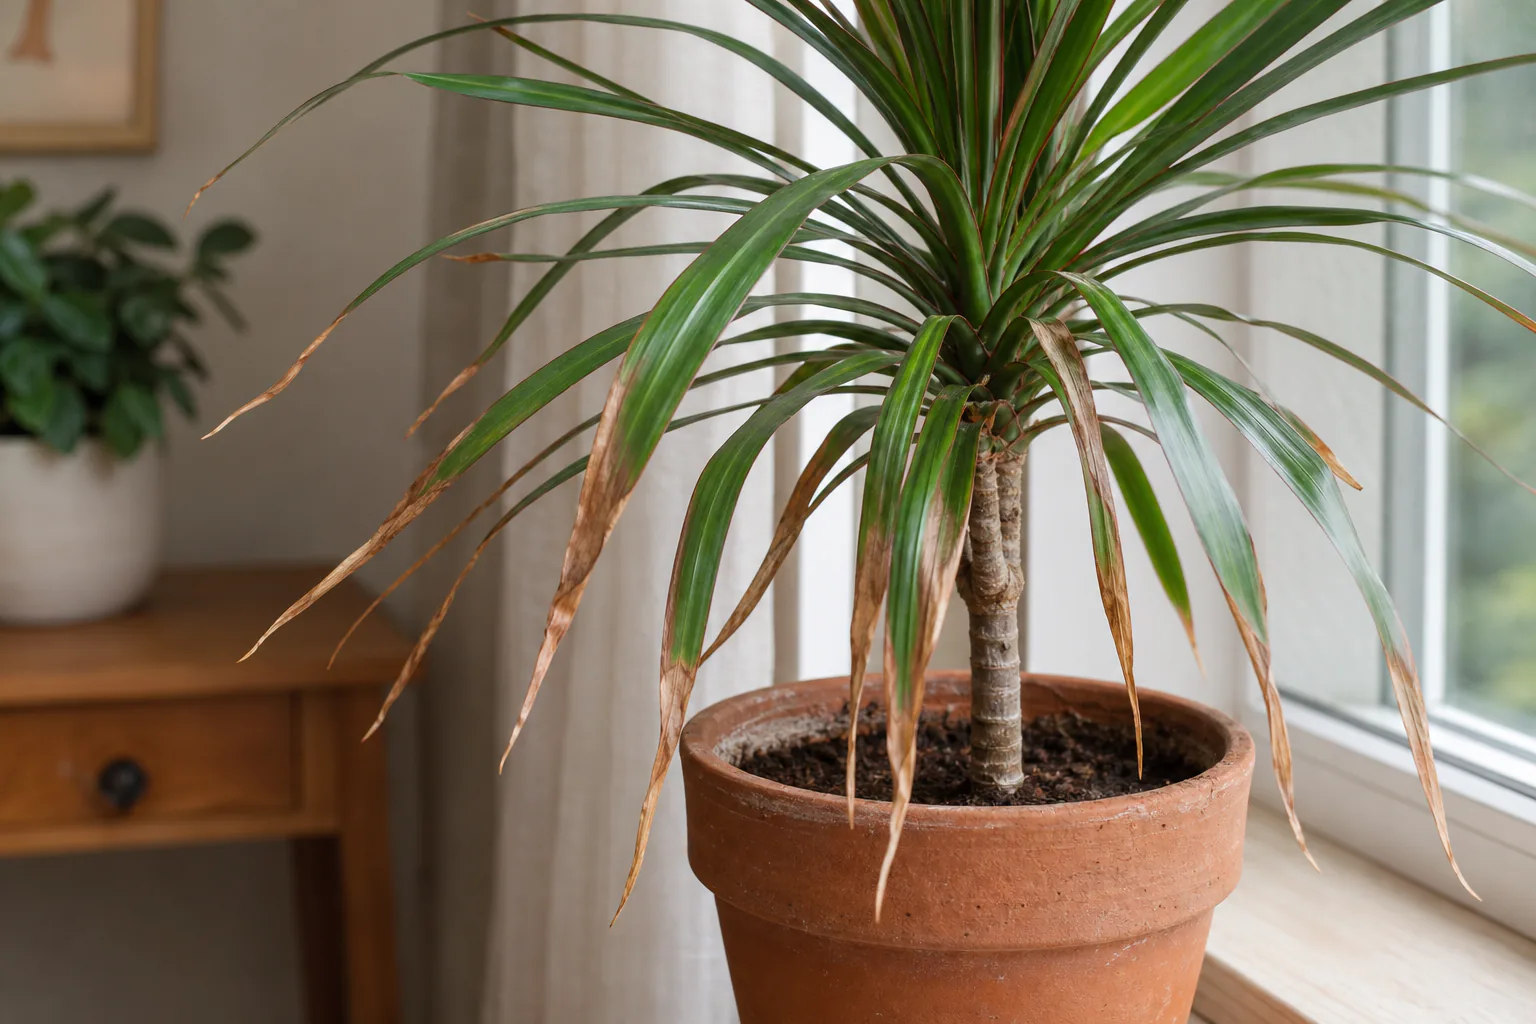
Brown, dry, or crispy leaf tips on an indoor houseplant are a symptom with several plausible contributors at once, not a single diagnosis. Humidity is one of them, but it is rarely the only one, and reaching for a humidifier before checking the basics is how readers end up with the same brown edges two months later.
One honest thing first: the brown tissue you can already see will not turn green again. Plants do not repair burned margins in place. Recovery shows up as new leaves coming out clean from the growing point, not as existing brown areas healing back. Knowing that up front keeps the rest of this article from sounding like a quick fix, because it isn’t one.
Here is the order that catches most of these problems without buying anything new.
What brown and crispy leaf tips actually look like
Before adjusting anything, get a clear look at the damage. The pattern of where the brown sits tells you which causes are more likely, even though no pattern is a guaranteed diagnosis.
- Tip only: the very point of the leaf dries and goes tan or brown, and the rest of the leaf looks fine. This is the classic signature of water stress, salt buildup, or fluoride sensitivity.
- Margin only: the leaf edge browns while the center stays green. This leans toward salt buildup, inconsistent watering, or low humidity, and the uppermost leaves in a dry room are usually the first to show it.
- Between the veins: brown patches in the middle of the leaf, away from the edge. This points away from the watering/salt family and toward light injury, leaf-surface contact, or fungal issues that are outside this article’s scope.
- Scattered spots on the upper surface: pale or bleached patches on the side of the leaf that faces the window. That is light scorch, not edge browning, and the fix is different.
It is worth noting that these patterns overlap. Extension services treat visual diagnosis as suggestive, not definitive. RHS specifically recommends checking the roots because leaf symptoms alone cannot reliably separate overwatering from underwatering.
Why humidity is only one possible explanation
Humidity is the first answer most online sources give, and it is genuinely one contributor. Indoor air in winter can sit below 30 percent relative humidity, especially near heating vents, and moisture-loving plants (calatheas, ferns, prayer plants) will show edge symptoms there. But the same browning pattern comes from watering rhythm swings, mineral accumulation in the pot, water source, light intensity, and root health. Treating humidity as the default explanation skips the contributors that are usually easier to fix.
A practical version of the rule: check the things you can observe and change cheaply before the things you can’t. Watering rhythm and water source are free. A humidifier is an investment in a contributor that may not be the main one. The closer you can read the plant’s actual conditions, the less guesswork there is. For realistic expectations on what humidity can and can’t do indoors, the Houseplant Supplies guide on humidity in real homes is a useful sanity check.
Step 1: Look at the watering rhythm, not the schedule
Brown leaf tips can come from a pot that swings from bone-dry to soaking wet, even if the average frequency looks reasonable. The plant doesn’t average water. Each dry-out event ends with the leaf tips losing more water than the roots can replace, and the damage shows up at the margin days later.
What to actually observe:
- How heavy does the pot feel when it is thoroughly wet? Lift it once after a deep watering and remember that weight. Lift again a day later, two days later. The dry-side weight is your baseline.
- How far down does the moisture go? A chopstick or wooden skewer pushed into the medium comes out cool and slightly damp when the lower root zone is still moist; dry and room-temperature when it isn’t. This catches the failure mode where the surface looks dry but the lower root ball stays wet, or vice versa.
- Are you watering shallowly? A small splash every few days wets the top inch and leaves the deeper roots dry, which produces exactly this symptom. Soak until water runs from the drainage holes, then let the medium dry to the appropriate level for the species.
If you want a more structured way to read when to water without leaning on a calendar, the Houseplant Supplies piece on watering rhythm and dry-down observation lays out the same observation chain with more detail.
Step 2: Look at the water itself — minerals, salts, and chlorine
Two things you put into the pot build up in it over time: fertilizer residue and dissolved minerals in the irrigation water. Both end up as soluble salts, which concentrate in the potting medium and at the leaf tips where transpiration is highest.
The visible proxy is a whitish or yellowish crust on the surface of the medium or along the inside rim of the pot. If you see that crust, salt accumulation is one of your contributors whether or not anything else is.
The standard corrective action recommended by extension services is to leach the medium: take the plant to a sink and run a generous volume of clear water through the pot, letting it drain freely, to flush the salts out through the drainage holes. UC ANR and the University of Georgia both describe this as the routine fix for soluble salt problems in container plants.
Water source matters too, but in a species-dependent way. Tap water is not universally bad. Extension sources flag fluoride and chloride sensitivity in a small list of genera:
- Dracaena
- Spider plant (Chlorophytum)
- Peace lily (Spathiphyllum)
- Tahitian Bridal Veil (Gibasis pellucida)
- Some Liliaceae family members
Missouri IPM and the Pacific Northwest Plant Disease Handbook both describe fluoride-related tip burn as appearing on properly watered plants, which is a useful clue: if a sensitive species keeps getting brown tips despite a good watering rhythm, the water source is a reasonable place to look. Other common houseplants are not documented as fluoride-sensitive in these sources, so switching to rainwater, distilled, or filtered water is not automatically worth the trouble.
Step 3: Look at the light reaching the leaf
Light-related injury is one of the easier patterns to read because the brown appears on the side of the leaf facing the window or the grow light, not at the margins. It tends to look bleached or pale at first, then turns papery brown. The fix is not humidity or water; it is moving the plant back from the window, diffusing the direct sun, or shortening the photoperiod on a strong grow light.
This step matters even when you suspect other causes. A plant getting more direct sun than it can use will show stress at the margins as well as on the surface, on top of whatever else is going on. It is rarely one thing at a time.
Step 4: Look at the pot, drainage, and the medium
Three quiet contributors often hide here:
- A pot without drainage holes keeps water around the lower roots, even with careful surface watering. Roots sitting in saturated medium start to suffocate, and the leaf symptom looks similar to underwatering, which is the dangerous part of this diagnosis.
- A pot that is too large for the root ball stays wet for a long time after each watering. The lower half never gets a chance to dry, and the plant produces the same kind of marginal symptoms as a chronically overwatered plant.
- A compacted, broken-down medium behaves similarly. After two or three years, peat-heavy mixes lose their airspace, hold water longer, and start smothering roots.
If the pot has been in the same container for a long time and the lower medium stays wet for more than a week between waterings, a repot into a smaller container with a fresh, well-aerated mix is a reasonable next step. Do it before chasing humidity.
Step 5: Check the roots gently before changing much else
Because overwatering and underwatering can produce nearly identical leaf symptoms, RHS recommends a root check as the disambiguator. Slide the plant out of its pot, shake off the loose medium, and look.
Healthy roots are firm, white, or tan, and they smell earthy. Roots in trouble are dark brown or black, soft to the touch, and may smell sour or rotted. If the lower roots are mushy, the watering rhythm has been too wet for too long, regardless of what the surface looked like. If the root ball is dense, dry, and the medium has pulled away from the sides of the pot, the plant has been drying out beyond recovery between waterings.
A root check is the one step in this list that requires unpotting. It is worth doing before changing watering rhythm, because applying the wrong correction makes the symptom worse.
Other contributors: drafts, leaf contact, and fertilizer residue
A few smaller contributors round out the list:
- Cold drafts from a window in winter or hot air from a heating vent can dry edges faster than the roots can keep up. This is a positioning question, not a humidity question.
- Leaves resting against a cold window or a warm radiator pick up direct contact damage that shows as a brown patch exactly at the contact point.
- Fertilizer residue increases the salt load in the pot. If you have been feeding regularly, especially with a synthetic liquid at full strength, cut back to half strength or feed less often while you work on the rest of the diagnosis.
None of these are the whole answer. They stack on top of the others.
The order matters: change one variable at a time
When several contributors are plausible, the instinct is to change everything at once. That instinct makes it impossible to know which change actually helped. The diagnostic value of any fix disappears if it happens at the same time as three other fixes.
A workable pace: pick the most likely contributor from the steps above, adjust it, wait a few weeks for new growth to evaluate, and only then move to the next variable. The new growth is your evidence; the existing brown margins are not.
What existing damage will not do, and what ‘getting better’ looks like instead
Brown leaf tissue does not regenerate. A trimmed tip will not heal into new green tissue. If the underlying cause is still active, the browning will simply continue from the new cut line, so trimming is cosmetic, not curative. Once the cause has been addressed, a clean cut can hold as a tidy edge, but it will not turn green again.
Recovery looks like this instead: new leaves emerge from the growing point with clean margins, the rate of new brown-tipped leaves slows over the next several weeks, and any new browning stays small and contained. If you see all three, the underlying cause has likely been addressed, even though the old damage is still there.
If new leaves are still browning heavily a few weeks after a single, deliberate change, that change probably wasn’t the cause. Roll back, restore previous conditions, and try the next candidate on the list.
When to pause and ask a local expert or nursery
A few situations are worth handing off to someone who can see the plant in person:
- New browning is rapid and spreading across many leaves at once.
- The stem or crown is soft, dark, or collapsing.
- There is visible fuzz, stippling, webbing, or insects that point away from abiotic causes and toward pests or disease.
- You have worked through the order above and new growth is still browning, which suggests an issue specific to the species or cultivar that benefits from local knowledge.
A local independent nursery, a botanical garden’s plant clinic, or a regional extension service can look at the actual plant, your local water report, and your specific room conditions. That is information no article can substitute for.
Sources
- Royal Horticultural Society — Leaf damage on houseplants: https://www.rhs.org.uk/prevention-protection/leaf-damage-on-houseplants
- University of Missouri IPM — Leaf Tipburn on Houseplants: https://ipm.missouri.edu/meg/index.cfm?ID=599
- Pacific Northwest Plant Disease Management Handbook — Dracaena tip burn: https://pnwhandbooks.org/node/2659/print
- UC ANR — Leach Your Houseplants to Avoid Salt Problems: https://ucanr.edu/blog/stanislaus-sprout/article/leach-your-houseplants-avoid-salt-problems
- University of Georgia CAES — Growing Indoor Plants with Success: https://fieldreport.caes.uga.edu/publications/B1318/growing-indoor-plants-with-success/