Plant care
How to identify spider mites on a houseplant (and what to do before treating)
· Updated
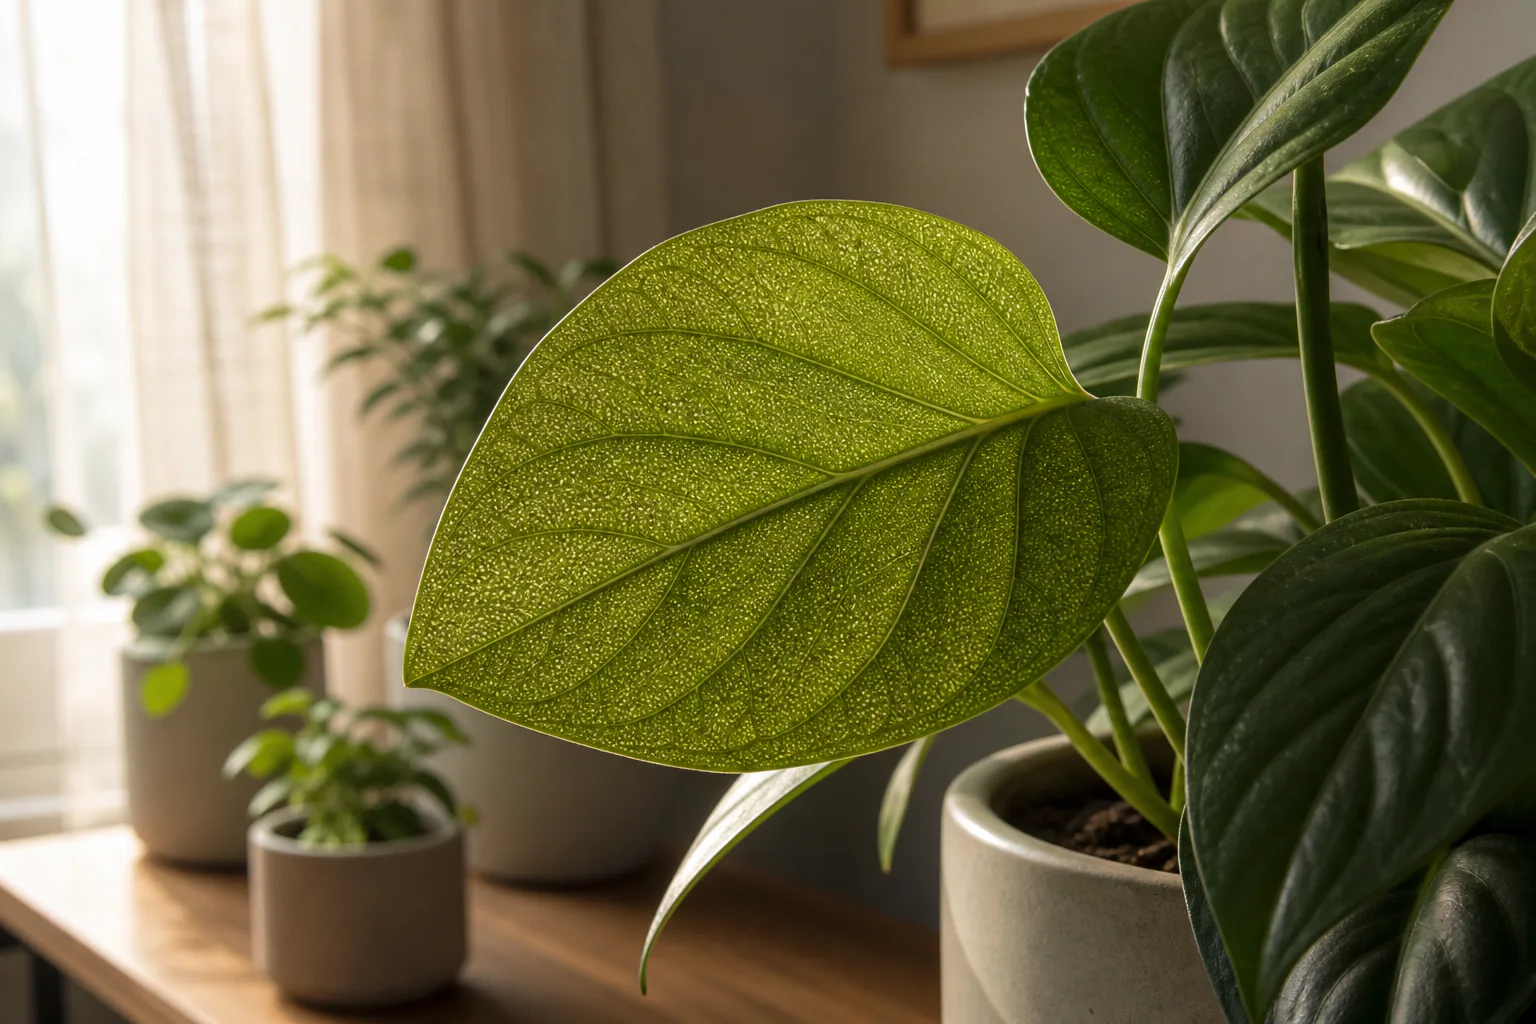
Spider mites are a common indoor plant problem, but they leave a recognizable pattern rather than any single clue. Look for fine pale stippling on the upper surface of leaves, a gritty or dusty feel when you run a finger across a leaf, fine silk webbing at leaf joints and growing tips, and tiny moving specks on the underside of leaves that show up when you tap a leaf over a sheet of white paper. Before reaching for any product, confirm the pattern on your own plant, separate the affected plant from its neighbors, and inspect any plants that were sitting nearby.
What follows is an ordered approach: how to tell whether what you are seeing is actually spider mites, what to do in the first 24 hours after you confirm it, and how to think about any product if mechanical steps alone do not resolve the problem. The goal is to help you make a confident decision based on what your plant and your room are telling you.
What spider mites actually are on a houseplant
Spider mites are tiny arachnids, related to spiders and ticks, that feed by piercing plant cells and removing the contents. A species commonly encountered indoors is the two-spotted spider mite (Tetranychus urticae), though several other species show up on houseplants in practice.
Adults are less than about one-twentieth of an inch long, which is why they look like tiny moving dots to the naked eye rather than insects you can identify at a glance. A magnifier or the zoom on a phone camera helps confirm body shape, but for a working indoor identification you usually do not need to pin down the species. What matters is recognizing the pattern they leave on the plant.
Spider mites have a short life cycle, often around a week in warm indoor conditions and somewhat longer in cooler rooms, and a single female can lay dozens of eggs. That combination is why populations rebound quickly if you stop paying attention after a single treatment.
The pattern to look for: stippling, webbing, gritty leaves
The signs spider mites leave fall into four overlapping signals. None of them is a perfect test on its own, but together they make a strong case.
Stippling is the most reliable early signal. Spider mites pierce individual cells on the upper leaf surface and remove the green contents, leaving behind a pattern of fine pale dots, almost as if the leaf had been gently sanded. Hold a suspect leaf up to a light and tilt it; the dots show up most clearly when light passes through the leaf.
A gritty or dusty feel is the tactile version of stippling. Run a clean finger lightly across an unaffected leaf and then across the suspect one. A sandpapery or rough texture, paired with pale dots, is a common cue.
Webbing shows up later and is not always present in early infestations. When it does appear, it is a fine silk layer that drapes across leaf joints, the underside of leaves, and growing tips, rather than the structural web a passing house spider would build between objects.
Tiny moving specks on the underside of leaves are the most direct sign. Spider mites cluster on the underside of leaves and along midribs, where they are easier to see than from above.
If two or more of those signals show up on the same plant, you can be reasonably confident you are looking at spider mites rather than dust, hard-water spots, or low-humidity browning.
Where on the plant to inspect first
Start on the underside of leaves, especially older and mid-canopy leaves, and along the midrib and leaf joints. Mites cluster where the leaf surface is most sheltered and where local humidity is slightly higher than the room air.
Work outward from there. New growth and growing tips are usually where the infestation spreads next, so once you have confirmed the underside pattern, check the tender tips for stippling, webbing, and a slightly distorted look.
If only one or two leaves are showing signs, mark them mentally and use them as your reference. You will want to look back at the same leaves over the next two to four weeks to see whether the pattern is improving, holding steady, or getting worse.
A simple confirmation test you can do in a few minutes
The tap test is the standard at-home way to confirm a suspicion. You need a clean sheet of white paper, a flat surface, and a few minutes of patience.
Hold the paper under a suspect leaf with one hand. With the other hand, tap the leaf or stem firmly a few times. Wait five or ten seconds and look at the paper.
Dust falls and stays put. Spider mites fall and then move slowly across the paper, and movement is what distinguishes them from inert debris. A magnifier or a phone camera held close to the paper makes the mites much easier to see; you are looking for tiny dots, often with a darker spot on each side of the body, that crawl in a slow, deliberate way.
If the test is positive on one leaf, run the test on two or three more leaves from different parts of the plant. If multiple leaves produce moving specks, you have a working confirmation.
What spider mite damage is not (and what to rule out)
Several common indoor conditions produce leaf changes that get mistaken for spider mite damage, and treating the wrong cause is one of the more common mistakes.
Low humidity browning tends to concentrate at leaf tips and edges rather than producing an even pattern across the upper surface, and it does not produce webbing or moving specks on a tap test.
Hard-water spots appear where water has splashed and dried, are flat rather than stippled, and do not produce webbing.
Dust on leaves wipes away cleanly with a damp cloth, while stippling does not.
Natural leaf fuzz (trichomes) on plants like African violets or some begonias looks web-like but is part of the leaf itself, does not move, and produces nothing on the tap test.
A passing spider’s web usually connects two structural points, like the rim of a pot to a shelf or two leaves across open air, and is anchored at the ends rather than draping across a leaf surface.
If the tap test is negative on leaves that show other suspicious signs, it is worth pausing before you treat, because the most likely cause is not spider mites.
Conditions that let spider mites take hold indoors
Spider mites do best in conditions that are hot, dry, and dusty, and on plants that are under drought or water stress. Iowa State Extension has noted that spider mite populations can rise sharply when temperatures climb above roughly 85°F (29°C) and humidity stays low, though that threshold is drawn from field crop data and is not a hard rule for indoor rooms.
Translated to a typical room, the common setups look like a plant sitting in a sunny window above a heat vent in winter, a plant allowed to dry out completely between waterings, or a collection of plants crowded together where air movement is poor and dust settles on the leaves.
If you are seeing spider mites on more than one plant in the same room, the room itself is part of the problem, and addressing the room-side conditions is part of the response. Our guide on how to read the natural light in your room before you place a houseplant goes into the light and airflow side of that picture in more detail.
First 24 hours after confirmation: isolate and inspect neighbors
Once the pattern is confirmed, the first action is to move the affected plant away from its neighbors. University extension guidance is consistent on this point: when a pest problem is detected on an established houseplant, isolate the plant immediately to prevent spread. A separate room is ideal; a separate shelf well away from other plants is a workable compromise.
Then walk the room and inspect the plants that were sitting closest to the affected one, even if they look clean. Spider mites spread through contact, through shared tools, and on air currents, so an asymptomatic plant a few feet away can already be carrying a low population. Use the tap test on a leaf or two of each neighbor.
After handling the suspect plant, wash your hands and any tools before moving on to healthy plants.
Mechanical and cultural steps that are reasonable to try first
A few mechanical and cultural steps are reasonable first moves before any product is considered.
Rinsing the plant with a forceful stream of lukewarm water aimed at the underside of leaves can physically dislodge a large share of the mite population. Let the plant dry out of direct sun to avoid leaf scorch.
Pruning heavily affected leaves and sealing them in a bag before removing them from the home reduces the reservoir of mites on the plant. For a plant with most of its leaves affected, this is not a workable approach, and rinsing becomes the main mechanical option.
Correcting drought stress by checking watering rhythm and the moisture level deeper in the pot removes one of the conditions that allowed the outbreak.
Cleaning dusty leaves with a damp cloth removes the dust layer that mites use as shelter.
Raising humidity modestly around the plant, by grouping it with other plants, setting it on a pebble tray with water below the pot’s drainage level, or running a small humidifier nearby, makes the local environment less favorable for mites. None of these by itself is a complete answer; together they shift the conditions away from the hot, dry, dusty setup that mites prefer.
When a product is on the table, and how to read the label
If mechanical and cultural steps do not bring the population under control over a couple of weeks, a product may be the next step. Two product classes come up most often in extension guidance: insecticidal soaps and horticultural oils. Miticides labeled for indoor houseplant use exist as well, but the choices and label conditions are specific enough that you should treat the label as the source of truth rather than any general article.
Before applying anything, read the manufacturer label in full. Confirm that the product is labeled for indoor houseplant use, for the specific plant you intend to treat, and for spider mites. Most labels call for a test patch on a leaf or two, a waiting period to check for damage, and then a careful full application. Labels also specify re-application intervals, which exist because eggs are typically not killed by these products and a follow-up application is part of the standard approach.
Pet and child safety is a label question. The label specifies any restrictions on treated areas, ventilation, and re-entry, and that language governs what you should do. If you share your home with pets or small children and you are unsure how to apply the label conditions in your space, your veterinarian or local poison control center is the right resource for safety questions.
Homemade spray recipes, including essential-oil blends and dish-soap mixes, come up frequently online. Extension services do not endorse these recipes, and commonly cited concerns include leaf damage (phytotoxicity) and exposure to pets and children in enclosed rooms. They are not the right first move.
A two- to four-week monitoring rhythm
Because spider mite eggs are not affected by most rinses, soaps, or oils, repeat inspection is part of the standard response rather than an optional extra. The most commonly cited interval in extension guidance is on the order of five to seven days, tied to the egg-to-adult cycle, though exact timing varies with temperature and species.
A practical rhythm is to inspect the affected plant and its neighbors once a week for two to four weeks after the last time you saw signs of active mites. Use the tap test on the same reference leaves you flagged at the start. If those leaves stay clean over several cycles, the population is likely under control; if the pattern reappears, you have an early signal to act again before the population rebuilds.
When to ask a local nursery or extension office for help
If the pattern is confirmed and mechanical steps do not bring it under control, or if the affected plant is one you particularly value and you are not sure whether a product is appropriate, a local independent nursery or your regional extension office is the right next call. They can look at the actual plant, recommend a treatment that fits your specific species and conditions, and flag any plant- or region-specific concerns that a general article cannot.
Sources
- UC IPM Home and Landscape — Spider Mites: https://ipm.ucanr.edu/home-and-landscape/spider-mites/
- Clemson HGIC — Integrated Pest Management (IPM) for Spider Mites: https://hgic.clemson.edu/factsheet/integrated-pest-management-i-p-m-for-spider-mites/
- Colorado State Extension — Spider Mites: https://extension.colostate.edu/resource/spider-mites/
- Iowa State Extension — Drought Stress Promotes Spider Mite Injury: https://crops.extension.iastate.edu/cropnews/2017/07/drought-stress-promotes-spider-mite-injury
- National Pesticide Information Center — Spider Mites: https://npic.orst.edu/pest/spidermite.html