Plant care
Monstera leaves turning yellow: a pattern-first guide
· Updated
Start with the leaf, not the diagnosis
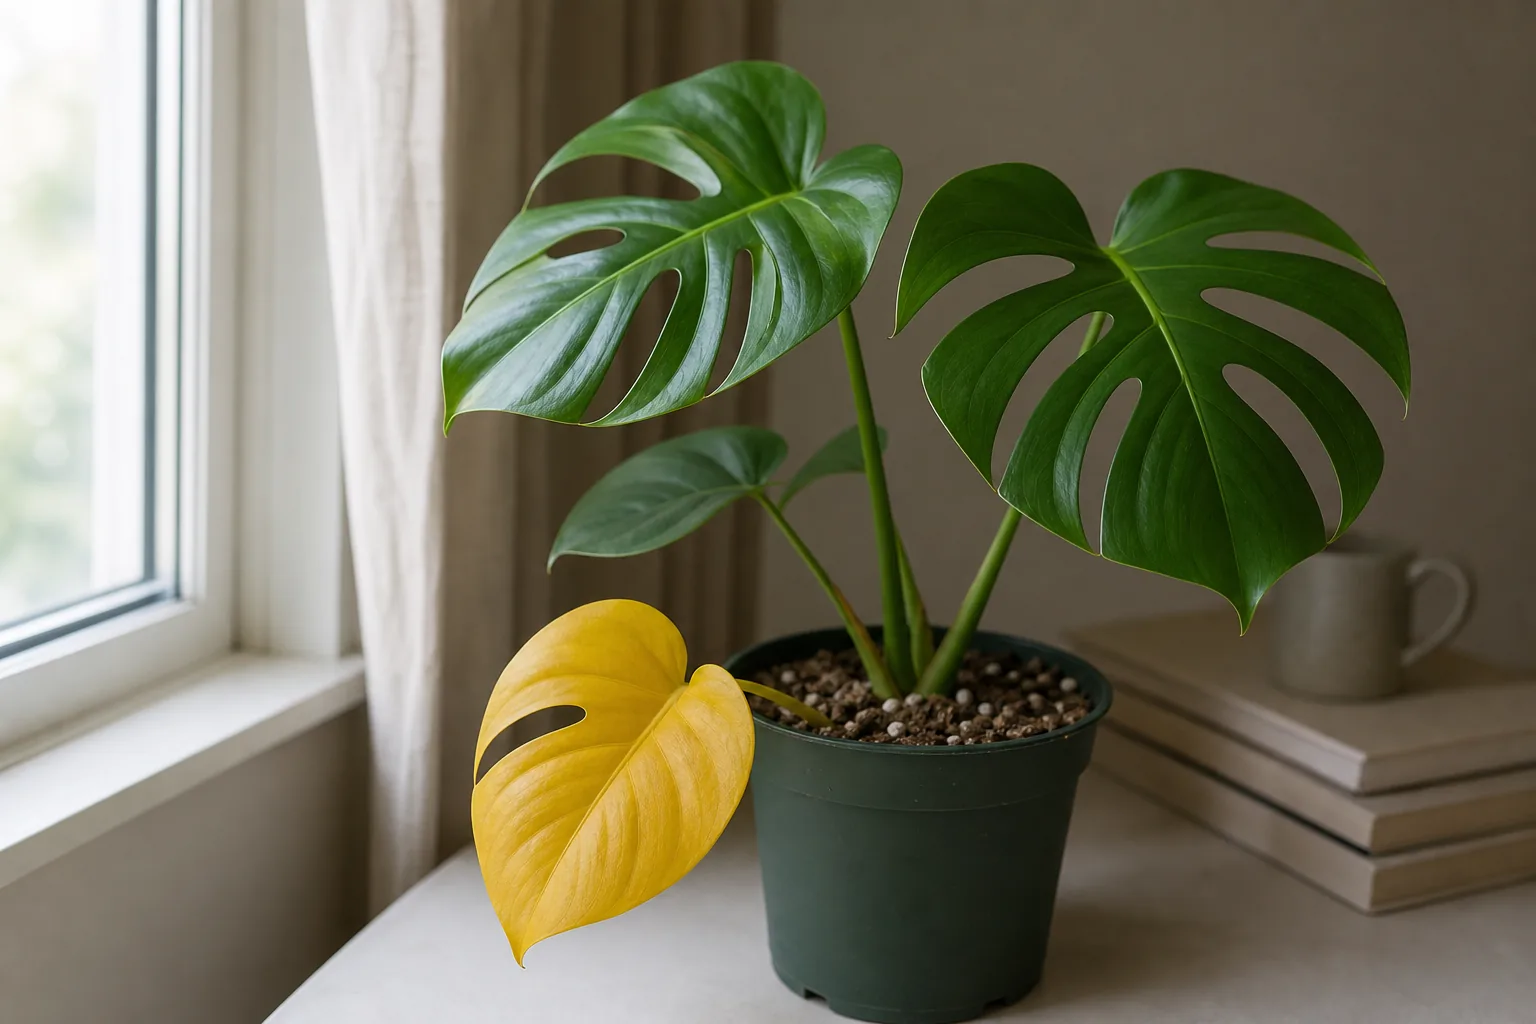
A yellow leaf on a Monstera is a signal, not a verdict. In most cases it points to one of three things: a watering rhythm that is not quite matching the pot, a light change the plant is still adjusting to, or the natural retirement of the oldest leaf at the bottom of the vine. One yellow leaf on an otherwise healthy Monstera that is still pushing new growth is usually not a crisis, and the leaf will not turn green again once it has yellowed. The job is to read the pattern and protect the next leaf.
For the broader, species-agnostic framework, see the general troubleshooting order for yellowing leaves. This page narrows that framework to Monstera specifically, where the chunky aroid mix, the aerial roots, and the vining growth habit change what “too wet” and “not enough light” actually look like on the plant.
Which leaves are yellowing, and how fast
The position and speed of yellowing are the most useful pieces of information you have. Three patterns cover most cases:
- A single oldest leaf at the bottom of the vine turning yellow slowly and evenly, with the rest of the plant still green and pushing new growth, is usually normal senescence. Monsteras regularly retire their lowest leaf as they grow upward, and a small juvenile leaf that has not yet developed fenestrations may also be a candidate. If a new leaf is unfurling cleanly, the plant is reabsorbing what it can from the old leaf and moving on.
- A new or partly unfurled leaf yellowing before it has hardened off points to a water, light, or recent-change issue. New leaves are the most sensitive part of the plant and tend to show stress first.
- Multiple leaves yellowing at once, or yellowing that is moving quickly up the vine, is more often a watering rhythm or root issue, especially if stems or the base start to feel soft.
A separate pattern to watch for is yellowing with soft dark spots, a yellow halo around a brown patch, or yellowing combined with mushy stems. That kind of pattern falls outside the home-adjustment range and is covered at the end of this page.
Check the soil and the pot before changing anything
The single most common indoor cause of yellowing on a Monstera is a watering rhythm that keeps the mix too wet for too long. The mix matters more than the calendar. A chunky aroid mix of orchid bark, perlite, and coco coir or chips drains and airs out faster than a dense peat-based mix, and the same weekly cadence can overwater one and underwater the other.
Two checks are more reliable than a schedule. First, lift the nursery pot right after a thorough watering and notice the wet weight. Check the weight again a few days later. If it still feels heavy, the lower portion of the pot has not dried enough to water again. Second, push a finger one to two inches into the mix. In a chunky aroid mix the top can feel dry while the lower portion is still damp, which is why pot weight matters as much as the finger test. The ordered guide to telling overwatered from underwatered walks through the same inspection in more detail, and learning to water by feel and pot weight, not a schedule keeps the rhythm matched to the actual pot.
Pot setup is part of the same story. A pot without drainage holes, or a nursery pot sitting in a cachepot that holds standing water, will keep the root zone wet far longer than you expect, and the practical look at pot setup and drainage explains how that holding time can sneak up on a reader. Aerial roots sticking out of the soil are not, on their own, a sign of distress. They are normal anatomy for a vining aroid, and they help the plant climb and take up humidity from the air.
Underwatering is also possible, especially in a chunky mix that dries fast, in a small pot, or in a warm, dry room. Underwatering on a Monstera often shows as a fully yellow leaf that can also look limp or curled, with soil that may have pulled away from the sides of the pot.
Re-read the light your Monstera is actually getting
Light is the second thing to check, and the on-plant pattern is different depending on the cause.
Chronic low light tends to yellow the older, lower leaves first, over weeks, as the plant sheds foliage it cannot support. Growth also slows, and new leaves may come in smaller or with fewer fenestrations. The correction is to move the plant closer to a bright, indirectly lit window, not to fertilize it. For a method to read the actual light your room is delivering, see how to read the light your Monstera is actually receiving.
A recent light increase is the opposite pattern. A Monstera moved closer to a bright window in spring or summer, or set in a sunbeam for part of the day, can bleach and yellow within days. The new growth may come in pale or papery. The correction here is to back the plant away from the direct beam and let it adjust to bright, indirect light over a week or two. For what a healthy Monstera looks like over a season, the Monstera care guide is a useful companion.
Notice any recent change, even a small one
Yellowing that begins within two to four weeks of a change is most often an adjustment response rather than a new problem. Worth asking about: a repot, a new pot or cachepot, a move to a different room or window, a new watering can or a change in water source, a new grow light, a vent that was turned on for the season, a draft from a newly opened window, or a move outside and back in for the summer.
If you can place the yellowing inside that window, the right move is usually to hold conditions steady for a few weeks rather than to add another change on top. Yellowing shortly after bringing a Monstera home is common, and the first one to three weeks of acclimation usually settle as greenhouse conditions give way to home light and humidity. For yellowing that begins within a few weeks of a repot, the post-repotting expectations page sets a realistic timeline, and for a move or seasonal shift, leaf drop and yellowing after a move or environmental change is a related read.
The slower, less common possibilities
A few causes are worth knowing about, but they are not the first place to look for an indoor Monstera in a typical home.
Compacted or old mix. Over a year or two, even a chunky aroid mix breaks down, holds more water, and drains more slowly. If your Monstera has been in the same pot for a long time and yellowing has slowly crept in alongside slower growth, the mix may be part of the story.
Fertilizer over-application. This tends to show first as leaf-tip and margin burn that progresses inward, rather than as a clean, whole-leaf yellow. If you have been feeding on a schedule and the yellowing is paired with brown, crispy edges, the most useful move is to flush the pot with plain water and pause feeding. Indoor Monsteras in most homes do best with light, infrequent feeding, and the conservative fertilizer expectations for an indoor plant are a better starting point than a corrective one.
Pests. Common indoor pests such as spider mites and mealybugs are a less common but possible cause of yellowing on an otherwise healthy indoor Monstera. Yellowing from pest pressure usually comes with other visible signs: stippling, sticky residue, small dots, webbing at the nodes, or visible insects on the undersides of leaves. If you see those, treat the pest rather than the yellowing.
Tap water. The evidence that chlorine, fluoride, or water hardness is a primary cause of yellowing on indoor Monsteras is mixed. If you have already checked the watering rhythm, the light, and recent changes, and the plant is still struggling, a switch to filtered or rainwater is a low-risk experiment, but it is one of the last moves to try rather than the first.
Nutrient deficiency. The popular “yellow leaf equals magnesium, iron, or nitrogen deficiency” story is over-applied online. University extension and botanical garden sources frame yellowing on indoor Monsteras as a cultural pattern, not a deficiency diagnosis, and there is no strong source backing for treating deficiency as the default explanation. Adding fertilizer to a plant that is already overwatered, underlit, or adjusting to a move usually makes things worse, not better.
What to do this week, in order
- Do not repot, fertilize, or move the plant again. Adding a change on top of a change is the most common way a yellowing Monstera gets worse.
- Check pot weight and the finger test, and confirm the pot is draining. If the pot sits in a cachepot, lift it out and look underneath.
- Re-read the light over a full day, including morning and afternoon. Bright, indirect light is the target; direct sun for part of the day is not.
- Mark the affected leaves and check back in a week. New growth coming in clean and green is the signal that the conditions are right.
- If the yellowing is on a single oldest leaf and the rest of the plant looks healthy, wait until the leaf is fully yellow or pulls away cleanly before removing it. The plant is still reabsorbing mobile nutrients from the leaf during the yellowing process. A short weekly check-in routine can keep the watching consistent without becoming a chore.
When it is time to ask a local expert
A few signs are past the home-adjustment stage. If the stem or the base of the petiole feels soft, dark, or mushy, if the soil smells sour or rotten, if yellowing is spreading across the plant within days rather than weeks, or if the plant has suddenly collapsed, the right next step is to stop adjusting at home and to contact a local nursery, a master gardener through your state extension service, or another qualified local resource. Those signs can point to a root or stem issue that benefits from hands-on inspection rather than more changes at home.
Sources
- What’s wrong with my Monstera? — Brooklyn Botanic Garden
- Monstera deliciosa factsheet — UConn Home & Garden
- Monstera deliciosa turning yellow with brown spots — Ask Extension (Cooperative Extension network)
- This is how much light a Monstera really needs — The Spruce
- Why do Monstera plants have holes? Understanding their unique leaves — Treleaf