Plant care
Aloe vera as an indoor houseplant: what it actually needs
· Updated
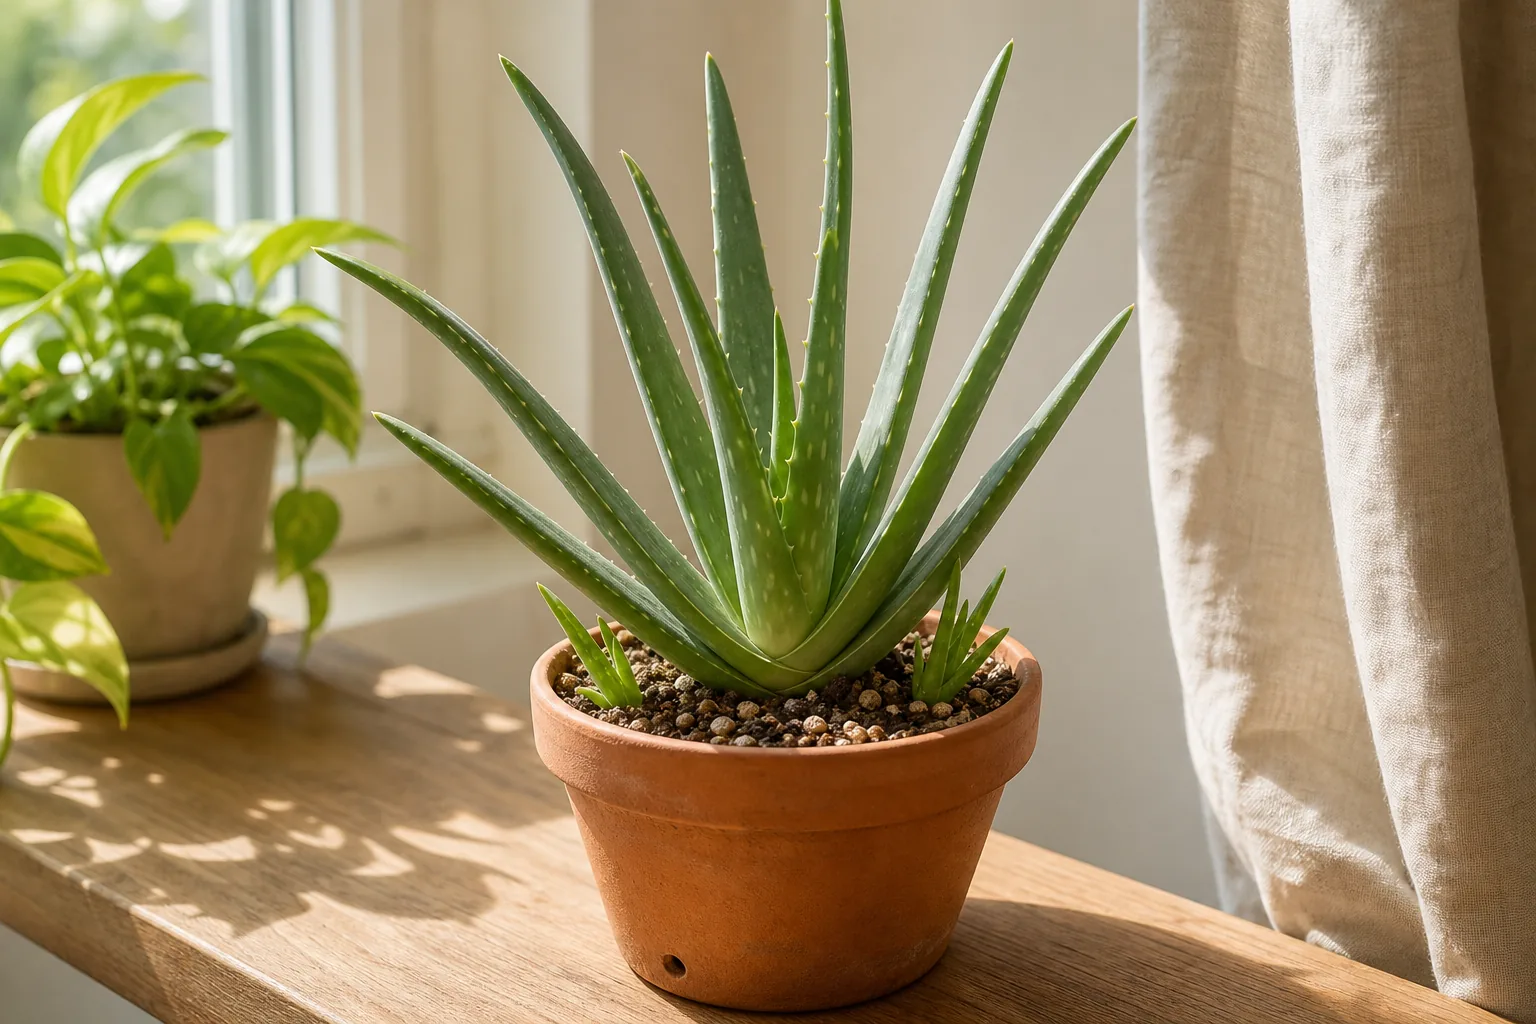
Aloe vera looks like a small green sculpture on a shelf, which is why so many people treat it like a decoration that waters itself. It does not. Aloe is a sun-loving succulent with specific indoor needs, and the gap between how it actually behaves and the generic succulent advice online is the reason so many kitchen-window aloes turn mushy or stretch.
The short version: an indoor aloe vera wants the brightest window the room can offer, watered by a deep soak followed by a full dry-down, in a small unglazed terracotta pot with drainage holes, in a coarse mix that dries out fast. It is not a low-light plant, it is not a “water once a month” plant, and it will eventually produce pups that crowd the pot and need a decision.
What an indoor aloe vera is actually doing
Aloe vera (Aloe barbadensis Mill.) is a rosette-forming succulent from warmer, drier regions than most apartments. Indoors, it grows slowly to moderately, holds water in its fleshy leaves, and spreads by sending up offsets at its base. A mature plant can reach two to three feet tall once it has the light and a long enough run of time to do so (NC State University Plant Toolbox).
That base is the part to watch. New leaves grow from the center, pups appear at the soil line, and the oldest outer leaves will slowly lean outward and may eventually dry and pull away. None of that is a problem on its own. The problem shows up when the plant is asked to live in a dim corner, watered on a calendar, in a pretty glazed pot with no drainage. The broader principles for keeping indoor succulents in a sunny window apply here as well, with a few aloe-specific differences worth knowing.
Light: aloe is one of the hungriest succulents on a windowsill
Aloe needs more light than most other indoor succulents. The New York Botanical Garden’s houseplant guide gives a floor of about six hours of sunlight per day, and other extension sources place aloe firmly in the “bright light to direct sun” category. The brightest window in the room is the right starting point, whether that is south-, west-, or unobstructed east-facing in your hemisphere.
If the room does not have a window that delivers that much light, the plant will tell you. Leaves grow farther apart on the stem, the rosette leans toward the glass, the color fades from blue-green to a paler yellow-green, and the plant loses its compact upright form. That stretching is called etiolation, and the fix is more direct light, introduced gradually. Moving an aloe from a dim corner into a full-sun window in one step can scorch the leaves.
For rooms that genuinely cannot offer six hours, a white fluorescent or LED grow light placed six to twelve inches above the plant is a workable supplement. The goal is light on the leaves, not just light in the room. Reading the actual natural light in your room before deciding on a windowsill is worth the few minutes it takes.
Watering: a real soak-and-dry rhythm, not ‘a splash now and then’
The watering rule is simple and unforgiving: soak the entire root ball, then let it dry completely before watering again. SDSU Extension describes aloe as wanting regular, thorough watering with a full dry-down between drinks, with the interval getting noticeably longer in winter.
In practice, the interval is set by the room, the pot, and the mix, not by the calendar. A small terracotta pot in a bright window in summer might dry out in a week. The same plant in a glazed pot in a north-facing room in January might go a month or more. The way to read it is by weight and feel: lift the pot right after a thorough watering, then again a few days later, and notice how much lighter it feels when it is dry. The difference is hard to mistake once you have done it a few times. This is the same observation-first approach to watering that works for most indoor plants.
A common indoor mistake is watering too often rather than too rarely. Small sips keep the upper soil damp and the lower root zone dry, which is the opposite of what an aloe wants, and the soil never quite dries out between visits. Soak it, leave it alone, soak it again when the pot is light.
Pot choice: small, heavy, and breathable beats decorative
The pot is the single biggest lever for keeping an indoor aloe alive, and most of the failures trace back to it.
- Material: unglazed terracotta is the default recommendation (NC State University Plant Toolbox). Clay breathes, water evaporates through the sides, and the mix dries faster, which is exactly what aloe wants.
- Drainage: a drainage hole is not optional. A pot without one will hold water around the roots long enough to rot them. Getting the drainage and cachepot setup right is worth doing before any other decision.
- Size: aloe prefers to be slightly under-potted rather than over-potted (UF/IFAS Gardening Solutions). A larger pot holds more moisture than the plant can use, and the root zone stays wet. When the plant has clearly outgrown the pot, move up only by an inch or two at a time.
A decorative outer pot without a hole (a cachepot) is fine if the inner pot has drainage and you remove it to water. Standing water at the bottom of a cachepot is the same as no drainage at all.
Potting mix: coarse, fast-draining, and willing to dry fast
Aloe grows naturally in nutrient-poor, sandy soil, which is the opposite of what most bagged houseplant mixes offer (SDSU Extension). A standard cactus-and-succulent mix is a workable starting point, but many bagged mixes are fine-textured and peat-heavy enough that they stay wet longer than an indoor aloe can comfortably handle.
The fix is to make the mix coarser. Common amendments include perlite, pumice, coarse sand, horticultural grit, or small bark pieces. A working ratio skewed toward more drainage material than organic matter is a reasonable starting point. What you are aiming for is a mix that feels gritty in the hand, drains quickly when you water, and dries out within a sensible interval in the conditions of your room. If water sits on top for more than a few seconds, the mix is too fine. The same label-reading framework for choosing a potting mix that applies to other houseplants works here too.
Reading the plant: thin leaves, curled leaves, mushy base, and stretched growth
Most indoor aloe problems show up in the leaves before they show up anywhere else, and reading them takes the place of any fixed schedule.
- Thin, curled, or upward-pointing leaves usually mean the plant is too dry or under-lit, or both. Check the soil weight and the window.
- Yellowing, soft, mushy, or translucent leaves, especially starting at the base, almost always mean too much water. Stop watering, lift the plant to check the roots, and expect to repot into a dry, coarse mix if the base is collapsing. The same pattern shows up across many indoor plants, and the overwatered-versus-underwatered checklist is a useful side-by-side when the signal is not obvious.
- Stretched, pale, leaning growth means not enough light. Move the plant closer to the window and acclimate it gradually.
- Brown or crispy leaf tips can mean sunburn from a sudden move into direct sun, or simply older outer leaves drying at the edges.
When the soil is still wet and the plant is wilting anyway, the root system is usually the issue rather than thirst. A plant wilting in wet soil is a strong signal of root rot and is worth acting on quickly.
Pups and offsets: what they are and when to separate them
Aloe spreads by sending up pups at its base, and producing them is a sign of a mature plant getting enough light and the right watering rhythm. A healthy aloe in a bright window will eventually fill the pot with the parent rosette surrounded by smaller ones.
Crowding itself is not an emergency. It becomes one when the pot starts to tip, the pups compete for the same limited root space, or the parent rosette loses its shape. The lowest-risk separation is when a pup is at least a few inches tall and has its own small root system (NC State University Plant Toolbox).
A simple sequence:
- Unpot the cluster on a dry day and brush off the soil so you can see the roots.
- Separate the pup with a clean cut, keeping as much of its own root as possible.
- Let the cut end callus in open air for a day or two.
- Pot it into a small terracotta pot with the same coarse mix, and withhold water for about a week before starting the soak-and-dry rhythm again.
Unrooted pups can also be propagated, but the callusing period matters and the failure rate is higher.
Temperature, seasons, and a short note on moving aloe outside for summer
Indoor aloe is comfortable across roughly 55 to 85°F (13 to 27°C), a range most homes hit without trying (SDSU Extension). The placement check that often gets missed is the windowsill itself: a south- or west-facing window in summer can heat the pot and cook the roots through the glass, while the same window in winter can drop below 55°F against the glass at night. The placement risks from drafts, vents, and sun-heated glass are worth checking at any windowsill, in any season.
If you want to move an indoor aloe outside for the summer, the transition needs to be gradual. A few hours of morning sun for the first week, increasing over a second week, gets the leaves used to direct sun without burning them. Bring it back inside well before nights drop to about 60°F (16°C) — the rough threshold where aloe starts to feel cold.
Pets, gel, and what this article is not trying to answer
Two related questions are out of scope here. The first is whether the gel inside the leaves is useful on skin, for burns, or for digestion. This article covers the plant, not the gel, and any such use is a separate question for a medical professional.
The second is pet safety. Aloe vera is listed as toxic to cats and dogs by the ASPCA Animal Poison Control Center, with saponins and anthraquinones named as the toxic principles. The right next step for a household with pets is to verify the listing with a veterinarian rather than rely on a one-line warning, and the pet-aware plant choices article walks through that verification.
A short checklist for the first month with a new aloe
- Place the plant in the brightest window available and acclimate it to direct sun if it has been in lower light.
- Repot into a small unglazed terracotta pot with a drainage hole if it came in a nursery pot that does not suit the room.
- Use a coarse, fast-draining mix amended with perlite or pumice rather than a fine, peat-heavy houseplant mix.
- Water by soaking the root ball, then let it dry completely before watering again. Lift the pot to feel the difference.
- Reduce watering in winter, when growth slows and the mix dries more slowly.
- Watch the leaves for thin or curled (too dry or too dim), mushy (too wet), or stretched and pale (not enough light), and change one thing at a time.
- Treat pups as a sign of maturity, not a problem. Separate only when the pot starts to crowd or tip.
- Keep the plant away from cold glass in winter and from sun-heated glass in summer.
- Place it out of reach of pets and verify the toxicity listing with a veterinarian.
Sources
- New York Botanical Garden — Aloe houseplants guide: https://libguides.nybg.org/aloe
- SDSU Extension — Aloe vera: houseplant how-to: https://extension.sdstate.edu/aloe-vera-houseplant-how
- NC State University Plant Toolbox — Aloe vera: https://plants.ces.ncsu.edu/plants/aloe-vera/
- UF/IFAS Gardening Solutions — Aloe vera: https://gardeningsolutions.ifas.ufl.edu/plants/ornamentals/aloe-vera/
- ASPCA Animal Poison Control — Aloe vera: https://www.aspca.org/pet-care/animal-poison-control/toxic-and-non-toxic-plants/aloe