Plant care
Bottom watering houseplants: when it helps and when it doesn't
· Updated
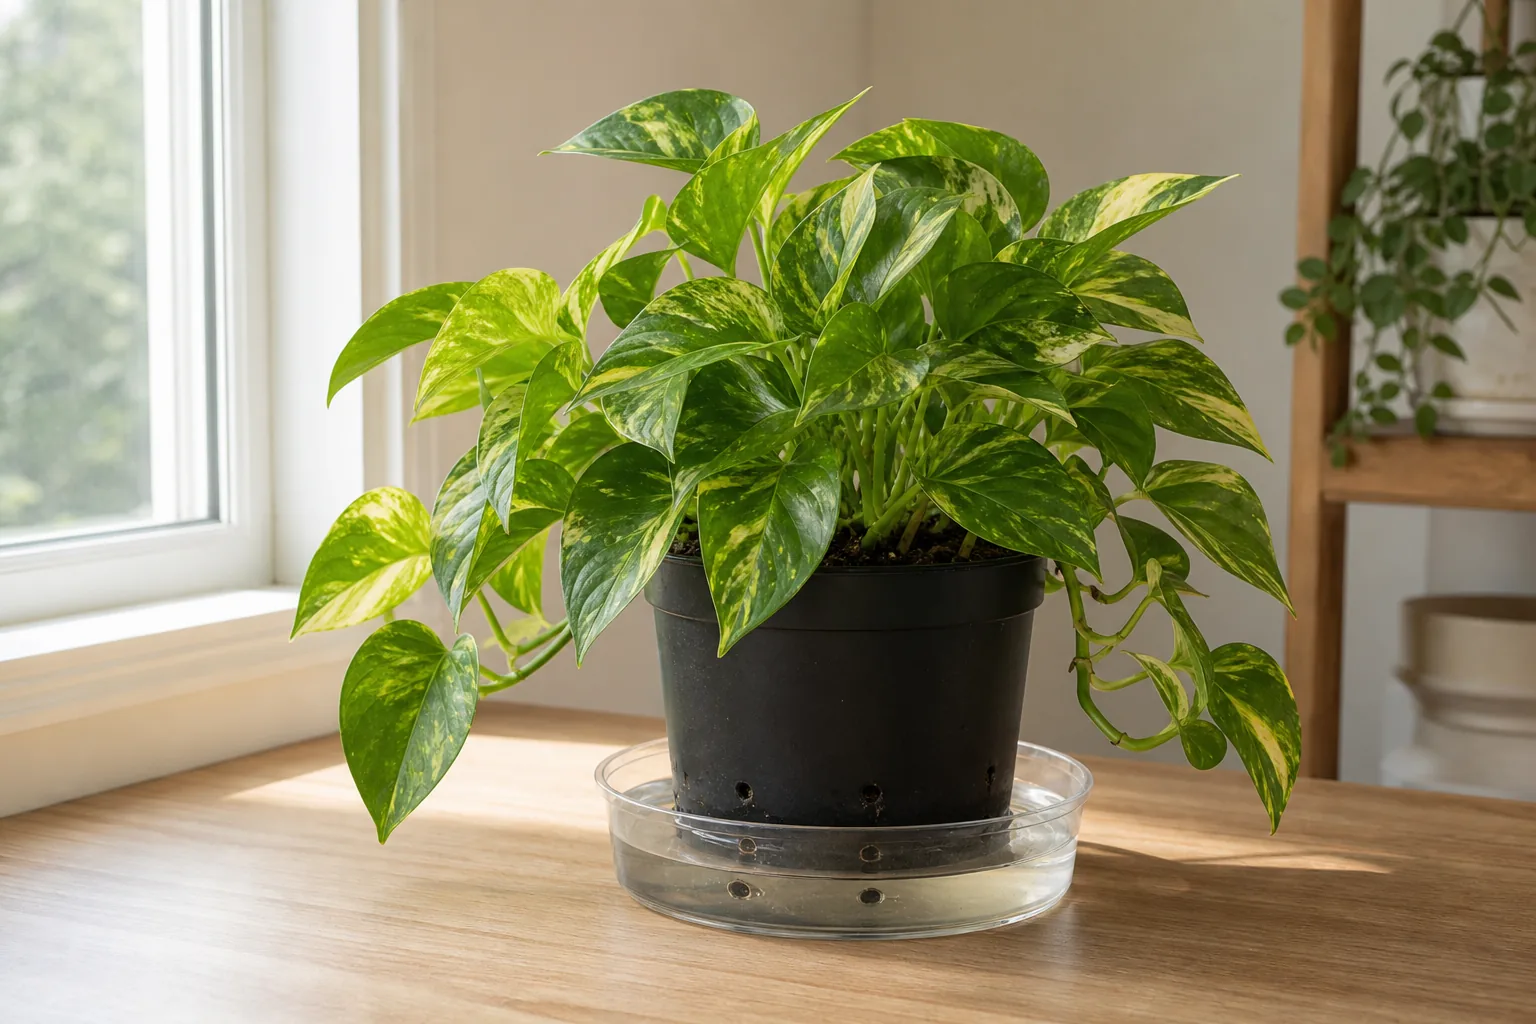
Bottom watering is a tool, not a default habit. It means setting a pot with drainage holes into a shallow container of water and letting the potting mix wick moisture up through the holes by capillary action. It helps in three specific situations: when a mix has pulled away from the pot wall and is hard to rewet from above, when the plant has a rosette form where water should not sit on the crown, and when you want to keep the top layer of soil drier to discourage fungus gnats from laying eggs there. It is the wrong choice for plants that need the mix to dry deeply between waterings, for any pot without drainage holes, and as a permanent substitute for the occasional deep top-watering that flushes soluble salts from the mix.
That is the short version. The longer version is about preconditions, plant form, and how to know whether the method actually worked.
What bottom watering actually is, and what it isn’t
Bottom watering is not a modern upgrade or a “correct” method. It is one of two standard watering approaches covered in University of Maryland Extension guidance on watering indoor plants: set the pot in a shallow reservoir of water and let the potting mix absorb moisture from below through the drainage holes.
What it is not:
- A way to water a pot that has no drainage holes. Water cannot leave the pot, and the mix stays saturated indefinitely.
- A way to water a plant inside a sealed cachepot that is holding standing water. That is a soaking setup, and it can lead to root rot.
- A permanent swap for top watering. Top watering until water runs out of the drainage holes is the standard way to flush soluble salts from the root zone, and skipping that step leads to mineral buildup over months.
The mechanism is simple physics. Water molecules cling to each other (cohesion) and to the surfaces of potting mix particles (adhesion). Together those forces let water climb upward through narrow spaces in the mix, which the USGS describes as capillary action. In soil-science terms, smaller pores pull water higher but more slowly, while larger pores move water faster but to a lesser height. Soilless houseplant mixes are dominated by larger pores, which is why capillary rise from below works but is uneven, especially in chunky, bark-based mixes.
When bottom watering genuinely helps
A mix that has pulled away from the pot wall. When a peat-based mix dries out completely, it shrinks and water poured on top runs down the gap between mix and pot without being absorbed. Bottom watering often rehydrates a hydrophobic root ball faster than repeated top watering in this state.
Plants with a rosette form where water should not sit on the crown. Many popular flowering houseplants hold their leaves in a tight rosette, and water that collects in the crown can cause rot or leaf spotting. Bottom watering delivers moisture without wetting the foliage.
A drier soil surface. Fungus gnat adults prefer to lay eggs in moist mix near the surface. Extension publications consistently identify larvae as living in the top half-inch to inch of mix, and the most reliable cultural control is letting that layer dry between waterings. Bottom watering keeps the surface drier than top watering does, which makes the pot a less attractive place for egg-laying.
When bottom watering is the wrong choice
Semi-succulent and dry-adapted forms that need the mix to dry deeply. Plants that store water in thick leaves or rhizomes, or that come from dry habitats, generally tolerate long dry periods between waterings — snake plants, hoyas, and cacti fit this pattern. Bottom watering extends the wet period in the lower mix and works against that pattern, so it is usually a poor match for these forms.
A chronically waterlogged root ball. If a plant is already sitting in wet mix and wilting, the answer is to let it dry and recover, not to add more water from below. Wilting in wet soil is usually a drainage or root-rot problem, and more water makes it worse. Our piece on wilting in wet soil walks through the diagnosis.
Any pot without drainage holes. A sealed inner pot, a glazed cachepot without feet, or a decorative container holding standing water will keep the mix saturated. Drainage holes are not optional. Our overview of pot setup and drainage holes covers the reasoning in more depth.
What you need before you try it
Three things.
A pot with drainage holes. The water has to enter through the bottom and air has to be able to follow it back in once the pot is lifted out.
A separate water container. A plastic tub, a baking dish, a sink with the drain closed — anything that holds an inch or two of water and lets the pot sit in it briefly. The pot is not supposed to sit in water long-term. That is a self-watering pot design, not a bottom-watering event, and the two have different rules.
A mix that actually wicks. Peat-based mixes and most soilless houseplant mixes wick reasonably well. Very chunky, bark-heavy mixes (orchid mixes, some aroid mixes) wick slowly and unevenly, and the upper third of the root ball can stay dry even after a long soak. Our potting mix guide walks through how to read the texture of a mix in your hand before committing to a watering method.
How to bottom water without overdoing it
A calm step-by-step.
Fill the reservoir with room-temperature water to about a third of the pot’s height. More than that and the pot may float or tip; less and the top of the root ball may not get wet.
Set the pot into the water and let it sit. Watch for the surface of the mix to darken and become slightly damp to the touch. Most 4 to 6 inch pots with a moderately dry mix reach that point somewhere between 10 and 30 minutes. Very dry or compacted root balls take longer, and chunky mixes may never fully wet the upper third. The clock is a starting point, not a finish line — judge by pot weight and surface dampness.
Lift the pot and feel the weight. The pot should feel noticeably heavier than it did dry. This weight is the reference point for future waterings.
Let it drain. Set the pot on a saucer or rack where air can reach the drainage holes. Do not return it to a sealed cachepot that holds standing water at the bottom.
Top water periodically. Every few waterings, or whenever a white crust starts to form on the surface, water from above until water runs out of the drainage holes. This is the flushing step, and it is what bottom watering alone does not do.
How to know it actually worked
Three observable signs.
The surface of the mix is uniformly darker and slightly damp, not just a ring around the edge.
The pot weighs noticeably more than it did before.
If you gently tilt the pot, the root ball is moist all the way through, not powder-dry in the upper third.
If the surface stayed dry, or only the outer edge darkened, the most common cause is a hydrophobic root ball with a channel between mix and pot wall. The recovery move is to submerge the entire root ball in a sink of water for about 30 minutes, then return to a normal top-watering routine.
Bottom watering and fungus gnats: the part the videos skip
The claim that bottom watering eliminates fungus gnats is the most repeated, and the least accurate.
NC State Extension and Oregon State University Extension both emphasize that larvae live in the top half-inch to inch of mix. The adults lay eggs there because it is moist and warm. Bottom watering does keep the top layer drier, which makes the pot less attractive for egg-laying. That is a real benefit.
It is not a cure. Larvae already in the mix are not flushed out by capillary rise from below; they survive in pockets of moisture throughout the top inch. Our fungus gnat prevention guide covers the broader plan: letting the surface dry, removing organic debris from the pot top, sticky traps for adults, and biological controls where appropriate. Bottom watering is one tool in that plan, not the plan itself.
Bottom watering and mineral buildup: why it is not a substitute for flushing
Tap water and mineral-rich well water leave calcium and other salts behind as water evaporates. Over months, those salts concentrate where evaporation pulls them — along the rim, on the surface, and inside the walls of a terracotta pot.
Top watering until water runs out of the drainage holes carries those salts out with the drainage water. Bottom watering moves water up by capillary action and does not carry salts out of the mix; if anything, evaporation at the surface pulls salts toward the top layer. The practical answer is to alternate: bottom water most of the time if it suits the plant, and top water thoroughly every few waterings so drainage carries salts away.
If you already see a white crust on the soil surface, that is the visible evidence of the same accumulation. Our piece on white crust on houseplant soil covers what the crust actually is, and what works to remove and slow it. Periodic top watering until you see drainage helps prevent it, and switching water source can slow it down.
A short decision checklist for your specific plant
Before you change your routine, run through these.
- Does the pot have drainage holes? If no, do not bottom water.
- Is the mix peat-based or otherwise fine enough to wick? Chunky bark mixes will frustrate you.
- Does the plant form benefit? Rosette-form plants and plants that hate wet foliage are good fits. Semi-succulents and dry-adapted forms are poor fits.
- Are you willing to top water occasionally to flush salts? If you would rather not, bottom watering alone will cause buildup over months.
- Will you judge the cycle by pot weight, not a clock? The duration that works depends on the pot and the mix.
If all five are yes, bottom watering is a sensible option. If any are no, top watering from above is the safer default.
A note on when not to change anything
A plant that is currently healthy with a working top-watering routine does not need a new method. Switching is worth considering only when you have a specific reason: a hydrophobic root ball that resists top watering, a rosette plant that keeps getting water in its crown, or a fungus gnat problem that responds to a drier surface. If the plant just arrived in your home, hold off on changing watering methods until after the first two weeks of acclimation — that period is stressful enough on its own. And remember that the timing framework for when to actually water matters more than which direction the water enters the pot.