Plant care
Sphagnum moss propagation for houseplant cuttings: a practical guide
· Updated
Long-fiber sphagnum moss can root a houseplant cutting when the moss is damp like a wrung-out sponge, the node touches the moss rather than being buried, and air can still move around the stem. Treat moisture and airflow as the two skills that decide whether the cutting roots or rots, and plan to move the cutting into a well-drained potting mix once roots are a few centimeters long.
What sphagnum moss actually is (and what it is not)
The bag you want is labeled “long-fiber sphagnum moss” or simply “sphagnum moss.” It is the loose, strand-form material sold for orchid mounting and propagation. Each strand is the dried moss plant itself, hollow and springy, with open air pockets between the fibers.
Sphagnum peat moss is a different product. It is decomposed, fine, and dense, and it is mostly used as a base ingredient in potting mixes rather than as a standalone rooting medium. University extension materials list the two as separate items, and treating them as interchangeable leads to denser, less airy conditions around the stem than long-fiber sphagnum provides. Milled peat is finer still and behaves the same way for propagation purposes: denser, less airy, and prone to staying soggy.
If your goal is what this article describes, look for long-fiber sphagnum on the label. Coco coir is a third option that gets mentioned in the same conversations but is, again, a separate product with a different feel and behavior.
Why people use sphagnum for cuttings, and what it really does
Sphagnum holds water in its hollow strands while still leaving air between them, so a stem sitting on damp moss has access to both moisture and oxygen. That combination is closer to the humid, airy conditions a cutting is hoping to find than a glass of water or a dry pot of soil.
What sphagnum does not do is also worth naming. It is not known to contain rooting hormones, and the idea that it has natural antifungal or antibacterial properties does not appear in the university extension literature. Over a few weeks, an over-wet, sealed mass of sphagnum can absolutely grow mold or rot the base of a stem, the same failure mode that affects water propagation. Treat sphagnum as one of several rooting media rather than a guaranteed upgrade. Water and perlite propagation are both valid alternatives.
What you need: long-fiber sphagnum, a container, and a node
Sphagnum propagation only works if the cutting has a node. A node is the small bump on a stem where leaves, aerial roots, or growth points emerge. If the concept of identifying a node is new, the cut just below a node primer covers how to find it on common houseplants.
For the container, a clear cup, small jar, or shallow tray works well. The point is to be able to see moisture on the inside walls and, eventually, roots at the node. If you use a closed lid or a propagation box, leave it vented; air still needs to move. A propagation box or clear container set up with airflow in mind is one of the cleanest ways to keep sphagnum from staying waterlogged.
Have clean water, scissors or a clean blade, and a few minutes of setup time ready before you cut anything from the parent plant.
Preparing the moss: rewetting, draining, and fluffing
Bagged long-fiber sphagnum arrives dry and dusty. USDA plant-materials handling notes describe sphagnum as highly sensitive to desiccation, which is part of why a sealed bag feels more like a block of compressed fibers than loose strands.
Put the amount you plan to use into a bowl, add clean water, and let it soak until fully rehydrated. Lift it out, let excess water drain, and squeeze gently. The target feel is damp like a wrung-out sponge: wet enough to hold together loosely, not so wet that water drips from your hand. Fluff the strands apart with your fingers before placing them in the container. Packing them densely leaves less room for air, and air is one of the things you are storing alongside moisture.
Setting up a cutting in sphagnum without burying the node
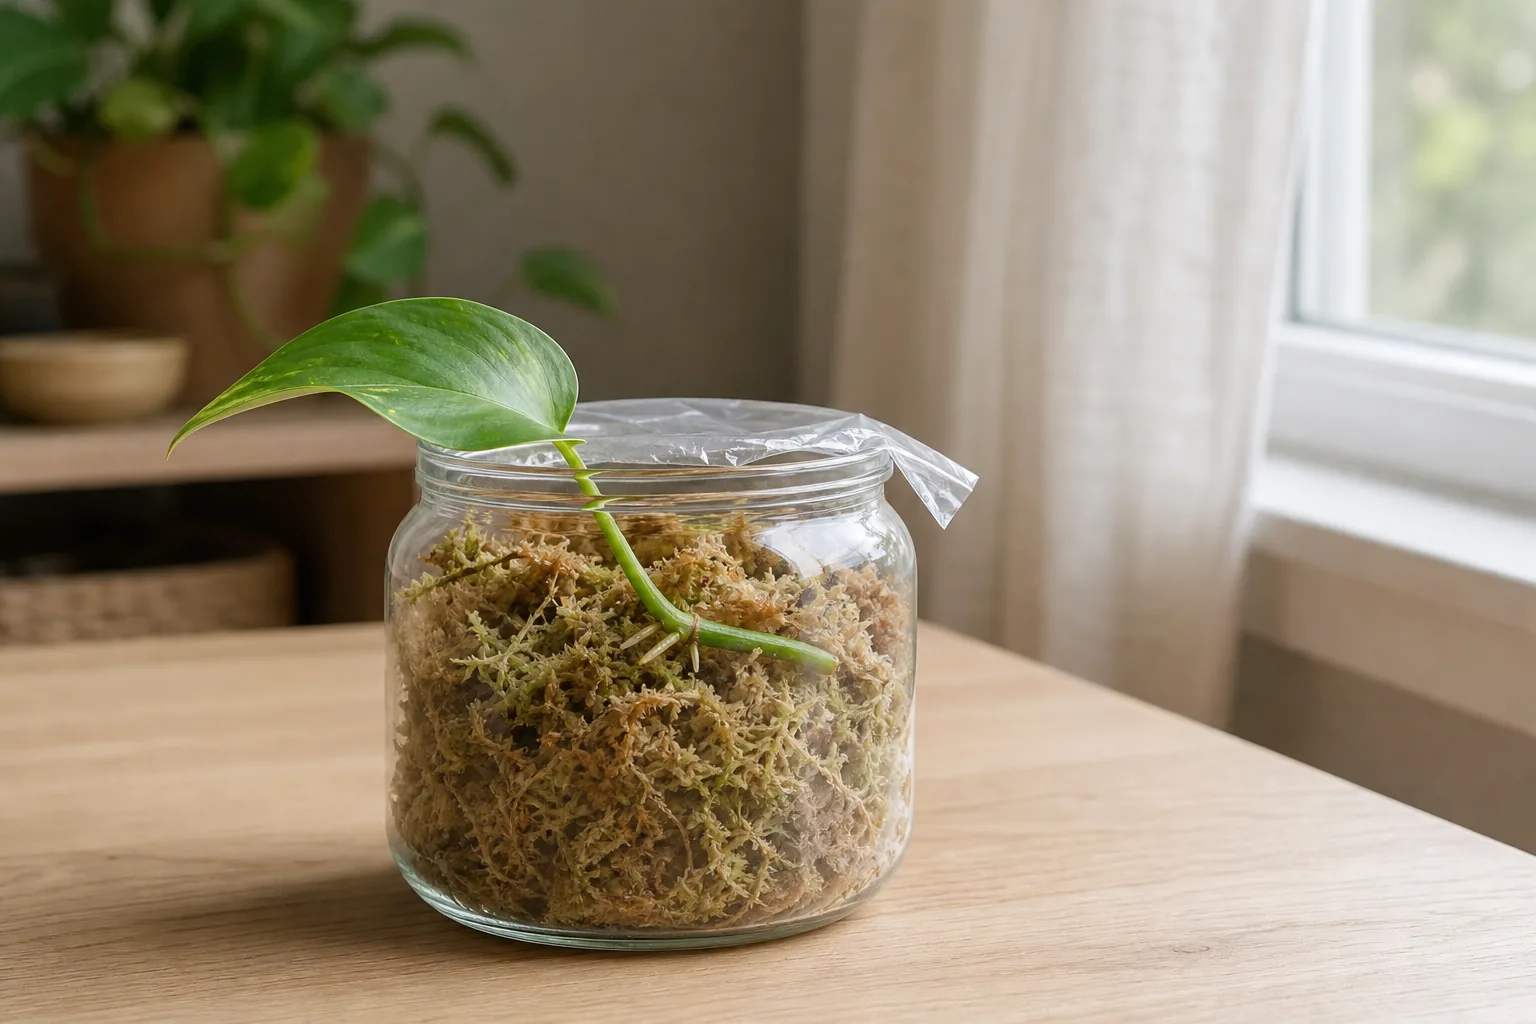
Take a healthy cutting that includes at least one node and one or two leaves, trimming the lower leaf so the node is exposed. Place a loose layer of damp moss in the container, set the cutting on top so the node rests against or just into the moss, and leave the upper stem and leaves in open air.
The instinct to bury the stem is the most common mistake. A buried node without airflow traps moisture against the cut end and is where most sphagnum-related rot begins. Contact, not burial, is the goal.
If you are also weighing water propagation for the same cutting, the practical difference is that sphagnum roots in a damp medium while water roots in a liquid. Both can work. Visibility of roots is easier in water, and so is the early detection of rot at the base of the stem.
Moisture target: damp like a wrung-out sponge, not dripping
University extension guidance on vegetative cutting propagation consistently flags over-watering as a more common cause of failure than under-watering. The same principle applies to sphagnum: the moss should stay damp, not wet.
A simple check is to lift a small pinch of moss. It should feel cool and slightly heavy. If water runs out when you squeeze it, the moss is too wet, so pull some out and let the rest drain. If the moss is starting to feel dry and the container walls have no condensation at all, mist it lightly with clean water.
In a vented setup inside a typical home, the moss usually holds its moisture for several days between checks.
Airflow: leaving room around the stem and the container
A propagation setup that stays closed all the time is the configuration most likely to grow mold. Leave the lid cracked, prop a corner open, or choose a container without a lid so air can move around the stem and across the moss. A little condensation on the inside of the container is healthy. Dripping, fogged walls, or pooling water at the bottom is a sign to vent or replace the moss.
A useful comparison: perlite propagation keeps the base of the stem in a damp but very airy medium and is essentially dust-free to handle. Sphagnum holds more moisture and produces more dust when dry. Both are airflow-first media, and either can rot a stem if left standing in water.
Reading the moss and the stem: healthy cues vs early rot
Healthy sphagnum looks pale, springy, and slightly green or tan. A faint earthy smell is normal. The first signs that something has shifted are usually visual: white fuzzy growth on the moss, dark patches, or a sour smell. At the same time, check the stem where it meets the moss. Soft, dark, or slimy tissue at the base of the stem is the same rot-at-the-base failure that water propagation produces.
If you see early signs of trouble, the response is to replace the moss and improve airflow rather than to add more water. Fresh, damp, airy moss around a still-firm stem has a good chance of recovering. A mushy, dark, or hollowed-out stem usually does not, and the cutting is best discarded before it spreads the problem to its container.
How long rooting usually takes, and what slows it down
A reasonable expectation is weeks, not days, and the exact window depends on the species, the warmth of the room, and the light the cutting is sitting in. A cutting in a warm, bright room with damp moss may show first roots within a few weeks. A slower or woodier cutting can take several weeks longer, and a cutting placed in a cooler, dim corner can stall indefinitely.
What slows rooting most often is temperature below the comfortable indoor range, very low indirect light, moss that dries out completely between checks, or moss that stays soggy enough to rot the stem. If the moss is damp, the airflow is reasonable, and the cutting looks firm, the most useful thing to do is wait.
When to pot up a sphagnum-rooted cutting into potting mix
A widely used rule of thumb for sphagnum-rooted cuttings is to pot up when the primary roots are a few centimeters long and you can see secondary roots starting to branch off them. At that point the cutting has enough root surface to take up water and anchor in a new medium. The same cue works for water-propagated roots ready for potting mix, so a sphagnum cutting and a water cutting at the same stage are both ready to move.
Prepare a small pot with a well-drained potting mix, moisten the mix evenly, and gently lift the cutting from the moss with the new roots attached. A little moss clinging to the roots is fine; do not strip it off aggressively. Settle the roots into the mix at roughly the same depth they were sitting at in the moss, water once, and keep the plant in bright, indirect light while it adjusts.
Safe handling: dust, gloves, ventilation, and rewetting dry moss
Bagged long-fiber sphagnum is dusty. Iowa State Extension recommends wearing gloves and long sleeves when handling dried moss to limit skin contact with dust, and rewetting dry moss before working with it. A simple additional habit is to avoid breathing dust directly when you first open the bag or break apart a dry block; rewetting first keeps most of the dust from becoming airborne in the first place.
A practical routine: work over a tray rather than the floor, rewet the moss in a bowl, and put on gloves if your skin reacts to dry plant fibers. If you have a window or fan nearby, airflow during handling keeps dust from settling on nearby surfaces. None of this is alarming; sphagnum is a routine horticultural material, but the small habits above keep it comfortable to use in a small apartment.
When sphagnum is not the best choice, and what to try instead
Sphagnum is one rooting medium, not the only rooting medium. If your cuttings are thin-stemmed and prone to rot, water propagation with frequent water changes lets you see the stem base every day and react quickly. If you want a low-dust setup, perlite propagation is essentially dust-free and stays very airy around the stem. If your cutting is large-wooded and dislikes constant moisture at the cut end, sticking the base in soil under a humidity cover may suit it better.
Treat the choice of medium as a small experiment that you can switch on later cuttings. Plants respond to the full setup (moss plus container plus room conditions) rather than to the label on the bag.
Sources
- Iowa State University Extension and Outreach – Is There A Problem With Sphagnum Peat Moss?
- Michigan State University Extension – Moisture management during vegetative cutting propagation
- University of Wisconsin 4-H – Propagating and Growing Indoor Plants (PDF)
- Virginia Cooperative Extension – Propagation by Cuttings, Layering and Division (PDF)
- USDA NRCS Plant Materials Center – Protocol Information for Sphagnum (PDF)