Plant care
How to propagate a pothos cutting in water
· Updated
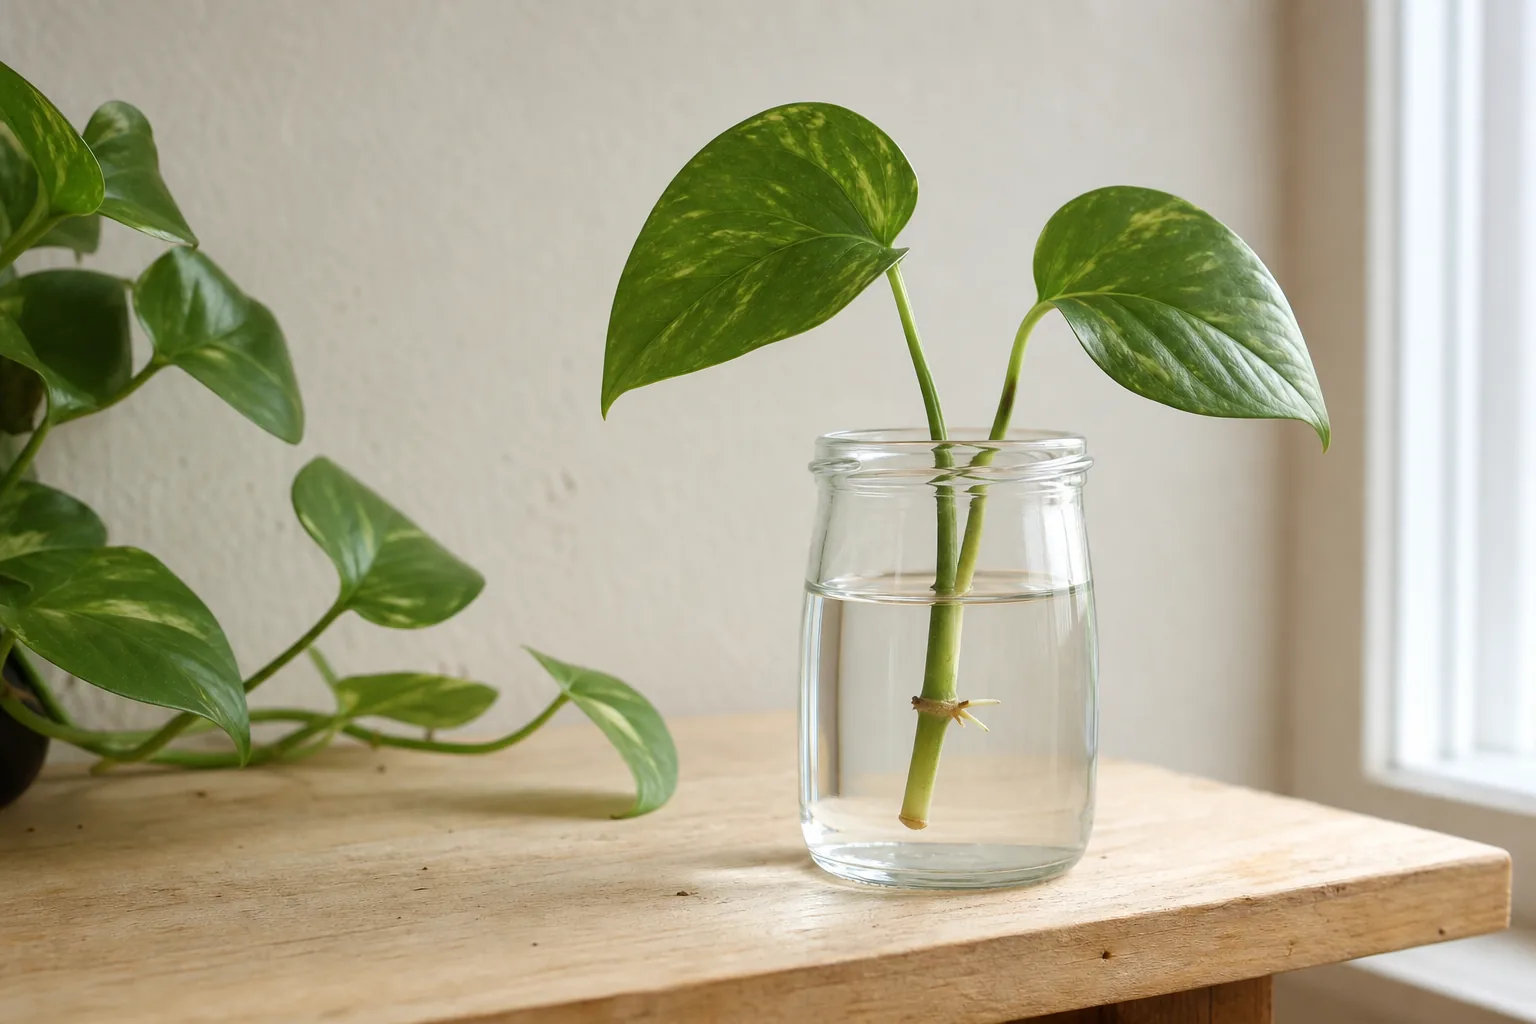
You can root a pothos cutting in a jar of plain water by cutting just below a node, removing any leaf that would sit under the waterline, placing the cut end in room-temperature water in bright indirect light, and changing the water when it looks cloudy or smells off. The first small root nubs usually appear within one to two weeks, with longer, branching roots in three to four weeks. No rooting hormone is required.
That is the short version. Everything below explains how to recognize the right spot on the vine, what “going well” looks like at each stage, and what to watch for when something is clearly going wrong. Plant behavior varies with light, temperature, the health of the parent plant, and the home, so the goal here is to give you a checklist of what to observe rather than a single fixed procedure.
Why pothos is a forgiving first plant to propagate in water
Pothos (Epipremnum aureum) is one of the most commonly recommended plants for first-time propagators because its nodes carry active root-producing tissue that responds readily to plain water. A cutting is not a fragile surgical sample; it is a segment of vine with built-in meristematic cells ready to grow when conditions are reasonable.
That said, “forgiving” does not mean “foolproof.” The two most common failures are leaves sitting in the water, which rot quickly, and water going stagnant, which feeds the wrong microbes. Both are easy to avoid once you know what to watch for. If your parent plant is healthy and you can identify a node on the vine, the cutting will most likely take hold.
Before you start, confirm the parent vine is worth cutting from. The existing pothos care guide covers what a thriving pothos looks like and how to keep it that way.
Read the vine first: node, internode, aerial root, and petiole
Before you cut anything, look at the vine and learn to name four parts. On a pothos vine, a node is the slightly raised ring or bump where a leaf meets the stem. An internode is the smoother section of stem between two nodes. The petiole is the small stalk that connects each leaf to the node. And on most mature vines you will also see aerial roots: brown or pale-green nub-like protrusions, sometimes longer and wiry, emerging from the same point as the petiole.
You want to cut just below a node, never in the middle of an internode. The node is where new roots form; the internode has very little root-producing tissue. On a mature pothos vine, nodes are typically spaced a few inches apart, varying a little with cultivar and growing conditions, so they are easy to find once you start looking along the vine.
A node with a visible aerial-root nub is a strong choice because the root-producing cells at that point are already active. Nodes without an obvious aerial root can still root, often just a touch slower. If you have a choice, prefer the node that already shows a small brown or green nub.
Take the cutting: tools, where to cut, and how many leaves to keep
A clean, sharp pair of scissors or pruning snips is enough. Wipe the blades with rubbing alcohol or hot soapy water and let them dry. There is no need for a special horticultural knife for a soft pothos vine.
Pick a section of vine that has at least one healthy leaf and one clearly visible node. Cut just below the node so the cut is easy to spot later. Trim the cutting to a workable length: a single-node, single-leaf cutting is the smallest unit and works fine, while a longer piece with two or three nodes gives the cutting more leaf area to photosynthesize while it has no roots.
A practical balance for beginners is one node at the waterline and one or two leaves above it. More leaves mean more water loss through transpiration while the cutting has no roots to absorb replacement water. Fewer leaves mean less energy for the cutting to stay alive until roots form. Avoid the temptation to leave a long vine dangling in the jar; long cuttings are harder to keep stable, and the submerged stem sections between nodes will not produce roots.
If a node has an aerial root that has already grown long and woody, you can shorten it to about half an inch. Fresh, short nubs are more efficient at transitioning into water roots than hardened, wiry aerial roots.
Set up the jar: container, water level, and which leaves stay dry
Any small glass jar or vessel works. A clear container is genuinely useful at this stage because you can watch roots form and notice when the water clouds up. An opaque container hides the cutting but reduces green algae growth in the water. If you go opaque, you cannot watch the roots, so you will need to gently tip the jar to check water clarity.
Fill the jar with room-temperature water. Submerge the node, and only the node. If the petiole or any part of a leaf sits below the waterline, remove that leaf at the petiole base before setting the cutting in. Submerged leaf tissue rots quickly and turns the water cloudy, and that single rule prevents most beginner failures.
The water depth should cover the node by about an inch or so, deep enough that the node stays wet as the level drops through evaporation, but not so deep that the stem is submerged far above the node.
There is no consensus in the sources we reviewed on whether tap, filtered, distilled, or rainwater is “best” for pothos cuttings, and controlled comparisons were not documented. Tap water works in most homes. If your tap water is very hard or heavily chlorinated and your cutting persistently yellows or the water clouds quickly, switching to filtered or rainwater is a reasonable experiment. Otherwise, use what is convenient and observe the cutting.
Pick a spot for the jar: bright indirect light and stable temperature
A pothos cutting wants the same conditions the parent plant likes: bright, indirect light. A spot a few feet back from a sunny window, or near a window that receives gentle morning light, is typical. A clear jar in direct sun acts as a small greenhouse: the water heats up quickly, dissolved oxygen drops, and the cutting can cook.
Stable room temperature helps too. A typical indoor range suits pothos cuttings well; cold windowsills in winter or hot, sunny spots can slow rooting noticeably. A spot on a shelf in a regularly used room is usually better than a chilly windowsill. For more on judging whether a chosen spot actually qualifies as bright indirect light, see our guide on how to read the natural light in your room.
Maintain the cutting: changing water and what to watch each week
Water changes should respond to what you see, not to a calendar. If the water is clear and odor-free, leave it alone. If it clouds, develops a faint film, develops green algae on the glass, or smells sour or swampy, replace it. Pour out the old water, rinse the jar, and refill with fresh room-temperature water. A quick rinse of the cutting under clean water is fine if you see slime on the stem. The same observation-first reasoning that guides how to tell when a houseplant actually needs water applies to a jar of cuttings: respond to what you see.
Once a week is a useful rhythm to look at the cutting with fresh eyes. Check the cut end of the stem: it should stay firm, and the color should stay pale tan or whitish rather than dark brown or black. Check the leaves above the water: a small amount of yellowing on the oldest leaf is normal as the cutting redirects resources, but widespread yellowing or wilting is not.
If leaves wilt and do not perk up after a water change and a day, the cutting may be losing more water through its leaves than it can sustain until roots form. Trimming the cutting back to fewer leaves is a reasonable response.
Read root development: from nubs to branched roots and when it is ready
Week one is usually quiet. Some cuttings show no visible change at the node; others develop a slight swelling or a tiny white or cream-colored nub where the aerial root was. Both outcomes are consistent with a healthy cutting.
Weeks two to four typically bring the first real roots: thin white strands roughly half an inch to a couple of inches long emerging from the node. A single node often produces a small fan of several roots rather than a single root, and seeing multiple roots at once is a good sign, not a problem.
By weeks three to six, the longer roots begin to branch, sending out thinner side roots. This is the point at which the cutting has a real root system rather than a stub. The cutting is ready to move into potting mix once the roots are roughly 3 to 5 cm (one to two inches) long and have visible secondary branching. Preparing the new home ahead of time makes the move easier; our guide on how to choose a potting mix walks through what to put in the pot.
Longer is not necessarily better. Very long water roots can be fragile and adapt poorly when moved to soil; a moderate, branched root system transitions more reliably than a long, sparsely branched one. The exact number of days depends on light, temperature, and the vigor of the parent plant, so any single-number timing claim is misleading.
Common problems and what they usually mean
A yellowing leaf on the cutting often signals one of three things: the lowest leaf is touching the water and needs to come off, the cutting is losing more water through its leaves than it can spare and needs fewer leaves, or the water has been sitting too long and needs a refresh.
A mushy, brown or black stem spreading up from the cut end is rot rather than normal callus formation. Cut above the soft tissue into healthy green stem, refresh the water, and restart the cut. Rot usually traces back to a submerged leaf, stagnant water, or a cutting that was already stressed before you took it.
Cloudy or smelly water is a microbial signal that oxygen is dropping and rot organisms are gaining ground. Replace the water, and consider whether the cutting is sitting in light that is too dim or in a jar that is too deep for that volume of water.
Slow rooting, meaning no visible change after three to four weeks, most often comes from a missed node, a cutting in too-cold conditions, or insufficient light. Recut if you suspect the node was missed, and move the jar to a warmer, brighter spot. Patience helps too; some cuttings simply take longer than others, especially outside the active growing season.
What this guide does not cover
This article stays in the jar on purpose. Soil propagation, propagation in sphagnum, and long-term pothos-in-water setups are different tasks with their own trade-offs, and they belong in separate guides. The heartleaf philodendron is a closely related aroid with very similar cutting anatomy; if you want to compare species once you are comfortable with pothos, the heartleaf philodendron care guide is a useful companion read. After potting, treat the rooted cutting like any new arrival and give it a calm settling period; the same logic in our guide on acclimating a new houseplant applies.
One brief note before you propagate in a home with pets: pothos is widely reported as toxic to cats and dogs because its leaves and stems contain calcium oxalate crystals. For severity, symptoms, and how to verify that information against current veterinary toxicology sources, see our guide to pet-aware houseplant choices. Place cuttings and the parent plant where curious pets cannot reach them.
Sources
- Grow Tropicals — How do I propagate a Pothos in water?
- Grow Tropicals — What Is a Node and Why Does It Matter for Propagation?
- Soltech — How to Propagate Pothos in Water
- Foliage Factory — Water Propagation: Cuttings, Roots & Transfer
- Botanic Gardens — Three Basic Principles of Propagating with Cuttings