Plant care
How to propagate a Monstera deliciosa cutting in water or potting mix
· Updated
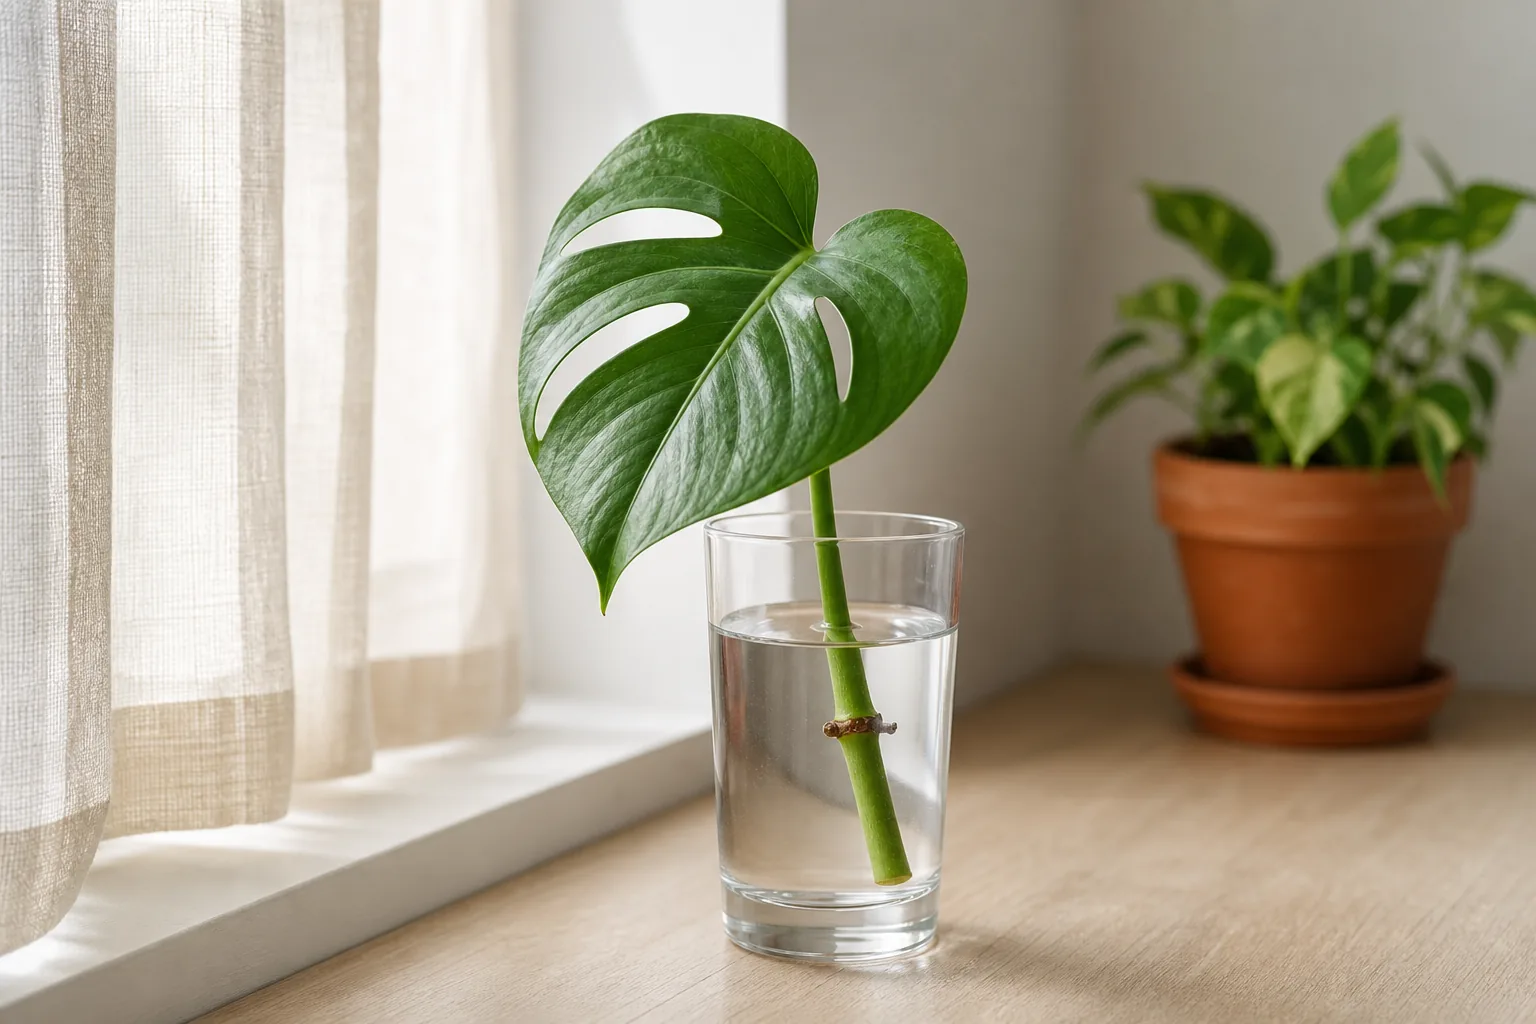
A Monstera cutting is a section of stem that includes at least one node — the slightly thicker ring where a leaf petiole attaches and where new roots form. Without a node, no section will root, no matter how healthy the leaf looks.
If you keep two habits, the rest of propagation is patience: clean tools and containers, and bright indirect light in a warm room. Then it is mostly a matter of reading what the cutting shows you. White root nubs and firm growth are progress; a mushy stem and sour smell are not.
This guide covers how to choose a section, take a clean cut, decide between water and a moist potting mix, watch the cutting as it grows, and move a rooted cutting into a real pot without losing it. For a fuller picture of long-term light, water, and support needs once the cutting is established, the general Monstera care guide is a useful companion.
What a Monstera cutting actually is: nodes, internodes, and aerial roots
The stem of a Monstera is built from segments. The node is the slightly thicker point where a leaf petiole meets the stem and where an aerial root originates. The internode is the smooth stretch of stem between nodes. University of Minnesota Extension notes that each cutting must include a node with an axillary bud, the small growing point tucked at the node, for roots to form.
Aerial roots are normal. On a young plant they may show as small brown nubs; on a mature plant they can be long, cord-like, and adventurous. The aerial root and the leaf petiole are simply two things emerging from the same node. When you choose a cutting, you are looking for that node, ideally with a visible aerial root nub or an already-emerged aerial root, because it confirms the section is viable. The guide to supporting a climbing houseplant explains how aerial roots behave on a mature plant, which can help when you are scanning a stem for a useful node.
Before you cut: checking the parent plant, the season, and the room
Take the cutting from a healthy, actively growing section of the parent plant, not a struggling or yellowing stem. Leave at least two or three leaves on the mother plant after the cut so it can continue photosynthesizing.
UMN Extension notes that cuttings may be taken at any time of year. Indoor warmth, bright days, and active growth in spring and summer usually make rooting faster; cuttings in low-light winter months root more slowly. That is a pace difference, not a failure. Set the cutting up in a spot with bright indirect light and stable, normal room temperature. Direct sun tends to stress cuttings that have no roots yet to replace lost moisture, which is why consumer guides on tropical cuttings generally recommend keeping them out of strong direct sunlight.
Tools and sanitation: what to use and why clean tools matter
You only need a few clean supplies: a sharp knife, pruning shears, or clean scissors; a clean glass or small container for water, or a small nursery pot with drainage for mix; and a way to disinfect the blade.
University of Illinois Extension emphasizes that when propagating, always use sterilized tools and containers. A 10 percent bleach solution or isopropyl alcohol wiped along the blade are simple routine options that home propagators use, not guaranteed pathogen control. Prepare the vessel or pot and the pre-moistened mix before you cut so the cutting goes straight in.
Taking the cutting: where to cut, how much stem, and how many leaves
Trace a stem down from the tip until you find a node: the joint where a leaf attaches, often with a brown nub or a longer aerial root emerging. Plan to cut about an inch below that node, through the internode. A single clean stroke is better than sawing, so the cut surface stays smooth.
A cutting with a node plus one or two healthy leaves has more stored energy than a leafless node section. The trade-off is that leaves lose moisture through their pores and benefit from humidity. A single-node, single-leaf cutting is a common compromise that works well for a first attempt.
If the cutting has a long aerial root, leave it attached. Aerial roots often convert into functional roots once the cutting is in water or mix, and removing them simply reduces the cutting’s resources.
Water propagation: container, water level, light, and water changes
A clean glass is the simplest vessel because you can see the node and any emerging roots. Opaque containers hide the cutting but reduce algae growth; transparency is the main advantage of water propagation, so glass is the usual choice.
Fill the vessel with room-temperature water so the node is submerged and the leaf or petiole stays above the waterline. Leaves sitting in water tend to rot. Place the vessel in bright indirect light and refresh the water roughly every week, or sooner if it turns cloudy or smells sour. The change keeps oxygen levels up and discourages bacterial growth; it is not, on its own, a growth trigger.
Potting mix propagation: medium, depth, humidity, and how to water
A moist, airy, soilless mix is the standard option. A peat- or coco-coir-based houseplant mix with perlite or bark for drainage works well; a mix formulated for cacti and succulents tends to dry out faster than most Monstera cuttings can drink from. The pot should be small, roughly the size of a single yogurt cup, and have drainage holes. For a closer look at how to assemble an airy mix, the potting mix selection framework covers the variables in more detail.
Pre-moisten the mix so it is evenly damp but not dripping. Insert the cutting so the node sits just below the surface and the leaf or petiole stays above. Press the mix gently around the stem so the cutting stands on its own.
A clear cover — a plastic dome, a cut-off bottle, or a clear bag with a few air holes — holds humidity around the leaf while the cutting has no roots to replace lost moisture. Open the cover briefly every couple of days to refresh the air. Water only when the top of the mix starts to feel dry; aim for evenly moist, never soggy.
Reading the cutting week by week: healthy progress versus warning signs
Healthy progress usually looks like this. A pale callus may form on the cut end within a few weeks, then white or pale root nubs appear at the node or along the submerged stem. Those nubs lengthen into branching white roots. The first new leaf, smaller than the parent leaves and often without fenestrations at first, is the long-awaited sign that the cutting has established. UMN Extension notes that a propagated node can take two to three months to form a new leaf, so patience matters more than calendar-checking.
Warning signs are different. A mushy, brown, or foul-smelling cut end or stem is rot, not dryness. Cloudy or smelly water in a propagation vessel is a hygiene signal, not a quirk of the cutting. A cutting whose leaf yellows and drops off cleanly sometimes still roots from the node; a cutting whose stem turns soft from the node down is usually done. Some leaf yellowing is normal — the cutting may simply be reabsorbing nutrients from the leaf while it builds roots.
When a water-rooted cutting is ready for soil
Wait until the water roots are several inches long and beginning to branch, which signals enough root surface to take up water from mix. That is a common observation rather than a fixed threshold, so use it alongside the cutting’s other cues. University of Illinois Extension observes that water-rooted houseplant cuttings tend to produce roots that often do poorly when transplanted into soil. That is a tendency rather than a rule, and it is the practical reason this transition deserves care.
When the roots look ready, move the cutting into a small pot of pre-moistened, airy mix at the same depth it sat in water. Keep the mix evenly moist for the first two weeks so the water-adapted roots do not dry out before new mix-adapted roots form. Hold off on fertilizer until you see active new growth. Readers who want to compare how a similar vining aroid handles the same transition can take a look at the heartleaf philodendron care guide as a sibling reference.
Potting up a rooted cutting: pot size, mix, and the first two weeks
Choose a pot only an inch or two larger in diameter than the current root mass. A pot that is too large holds excess moisture and stresses fresh roots. Use the same airy mix you would use for an established Monstera and water it in so the mix settles around the roots.
For the first two weeks, treat the potted cutting the way you treated the propagation vessel: bright indirect light, evenly moist mix, no fertilizer yet. Once you see a new leaf pushing out, switch to the normal watering rhythm described in the watering by observation guide and consider light feeding only if the parent plant would normally be in active growth at that time of year.
Common problems: rot, mushy stems, stalled roots, and yellowing leaves
If the cut end turns soft and brown, trim above the rot with a disinfected blade and return the cutting to fresh water or mix. Removing a partially rotted or heavily damaged leaf can help, but trimming healthy leaves off a struggling cutting is not generally recommended. If the node itself has gone soft and dark, the cutting is usually lost; clean the vessel and start again with a fresh section from the parent plant.
If roots have not appeared after several weeks, the most common causes are a missing node, cool room temperature, or too little light. Check the cutting against a node again, move it to a brighter warm spot, and give it more time. Cuttings in low-light months genuinely root more slowly.
A leaf that yellows and drops on a cutting that still has firm white roots is usually the plant reallocating resources and is not, by itself, a failure.
Variegated and unusual forms: what may change and what stays the same
Variegated Monstera cultivars, forms with white, cream, or yellow sectors, propagate by the same node-based method. The difference is that white sectors carry little chlorophyll, so a cutting with mostly white growth has less energy to root and is generally less forgiving. The basic procedure is the same; the margin for error is smaller. This article does not cover sourcing, pricing, or trade specifics for named cultivars.
When to ask a local expert or accept the loss of a cutting
Not every cutting will root, and a lost cutting usually says more about the cutting’s starting condition than about the reader’s skill. If several cuttings in a row fail in the same conditions, a local independent nursery or a county extension office can look at the parent plant and the home setup in person.
For households with curious pets, Monstera tissue contains calcium oxalate crystals, which is why reputable toxic-plant databases list it among plants toxic to cats and dogs. The Houseplant Supplies pet-aware guide walks through how that classification is verified; if a pet has chewed on a Monstera, contact your veterinarian or an animal poison control resource directly rather than waiting for general guidance.
Sources
- University of Minnesota Extension. Propagating Monstera deliciosa. https://extension.umn.edu/houseplants/propagating-monstera-deliciosa
- University of Illinois Extension. Learn to Propagate Your Plants. https://extension.illinois.edu/blogs/know-how-know-more/2019-02-22-learn-propagate-your-plants-ground-march-9
- University of Illinois Extension. One to Many: A Beginner’s Guide to Plant Propagation. https://extension.illinois.edu/news-releases/one-many-beginners-guide-plant-propagation
- Missouri Botanical Garden. Propagating Plants by Cuttings. https://www.missouribotanicalgarden.org/gardens-gardening/your-garden/help-for-the-home-gardener/advice-tips-resources/visual-guides/propagating-plants-by-cuttings
- Northern Gardener / Minnesota Master Gardeners. Your Plant Propagation Toolkit. https://northerngardener.org/your-plant-propagation-toolkit/