Plant care
How to repot a houseplant
· Updated
Repotting a houseplant is mostly a sequence of small, reversible choices rather than one big event. Water the plant the day before so the root ball slides cleanly, choose a next-size pot that is only modestly larger than the current one, prepare a mix suited to the plant and the pot, remove the plant gently, read the roots before doing anything to them, settle it at the same depth it was growing at before, water in (with explicit exceptions for succulents, cacti, and plants with damaged roots), and return it to its usual spot. Most repotting stress comes from doing several large things at once.
If you are not sure the plant actually needs a new pot, when to repot a houseplant and when to leave it alone is a quick gut-check before you begin. If the only real problem is a mix that has gone flat, refreshing only the mix without changing the pot is a lighter-stress alternative that may be all the plant needs.
Why repotting is actually several different jobs
When people say repot, they often mean any of three different operations: stepping the plant up into a larger pot, refreshing the mix in the same pot, or dividing the plant into more than one pot. The procedure below covers the first one, which is the most common case and the most stressful. A simple mix refresh in the same pot is a lighter intervention that does most of the same things without disturbing roots, and it is the right move if the plant’s roots still have room.
If you are looking at a plant that is clearly declining rather than simply outgrowing its pot, pause and read whether repotting is the right move for a stressed plant before you start. Yellowing leaves, wilting, or pest pressure are not automatically fixed by a new pot, and repotting a failing plant can add to its stress.
Before you start: a short pre-check
Two small decisions shape everything that follows.
The first is timing. Spring is the default window because most plants are entering active growth, but it is not the only window. Indoor conditions, hemisphere, and the species all change this. Some arid-region plants rest in summer and grow in cooler months, which complicates the standard advice. The actual best time to repot is whenever the plant shows observable cues that it needs more space and is not currently in distress. A failing plant in midwinter is usually better left alone until it stabilizes than rushed into a new pot.
The second is hydration. Water the plant in its original container the day before, or at least several hours ahead. A moist root ball slides out more cleanly and holds together better than a dry one, which means fewer torn fine roots during the removal step.
Pick the right next-size pot for this plant
Most general tropical foliage plants do well stepping up by about one to two inches in diameter. The reason this is a default rather than a rule is that an oversized pot holds excess moisture around the roots, slows establishment of new roots into the fresh mix, and raises the risk of rot. Bigger is not better here.
A few groups want a different increment. Phalaenopsis orchids, for example, typically step up by only about an inch and prefer being slightly under-potted. Some very vigorous growers are occasionally moved up by slightly more than the default, but the principle is the same in every case: match the pot to the root ball rather than to the foliage, and resist the temptation to give the plant room to grow into. Roots will fill a smaller pot much more reliably than a larger one. If you are unsure whether the plant is actually pot-bound, confirming the plant is actually root bound is worth doing before you size up.
The new pot should have a drainage hole. A decorative cover pot without drainage can be used as a removable cachepot that holds the drained nursery pot, but it should not be the only container the roots sit in. The fuller look at pot setup, including drainage holes and cachepots, is in how the new pot should drain.
Choose a mix that matches the plant and the pot
Different plants have different mix needs. Tropical foliage plants generally want a peat- or coco-based mix with perlite or bark for air. Succulents and cacti want a fast-draining mineral mix with little organic matter. Phalaenopsis orchids want a bark-based medium, not a peat-based one. A single bag is rarely the right answer for every plant on a windowsill. The guide to choosing a potting mix for houseplants walks through the matching principles.
The same principle applies to the pot itself. A porous unglazed terracotta dries faster than a glazed ceramic. A self-watering container changes the watering decision substantially and falls outside the basic procedure. In every case, pick the mix for the plant first and let the pot’s material be a secondary consideration.
Prepare the workspace and the new pot
Before the plant comes out, everything should be at hand. Lay out a tray or old newspaper, since the surface will get wet. Have the new pot ready, washed if reused. Have the mix open and a watering can within reach. If the plant will need root work, disinfect scissors or pruners with rubbing alcohol first. A blunt knife reserved for the task is useful if a root ball is stuck in its old pot.
A note on the bottom of the pot: do not add a layer of gravel, broken pot shards, or packing peanuts as a drainage layer. Current extension guidance generally argues against this practice. A drainage hole plus an appropriate mix does the work a gravel layer was once thought to do, and the gravel layer actually raises the saturated zone inside the pot.
Remove the plant from its old pot without tearing roots
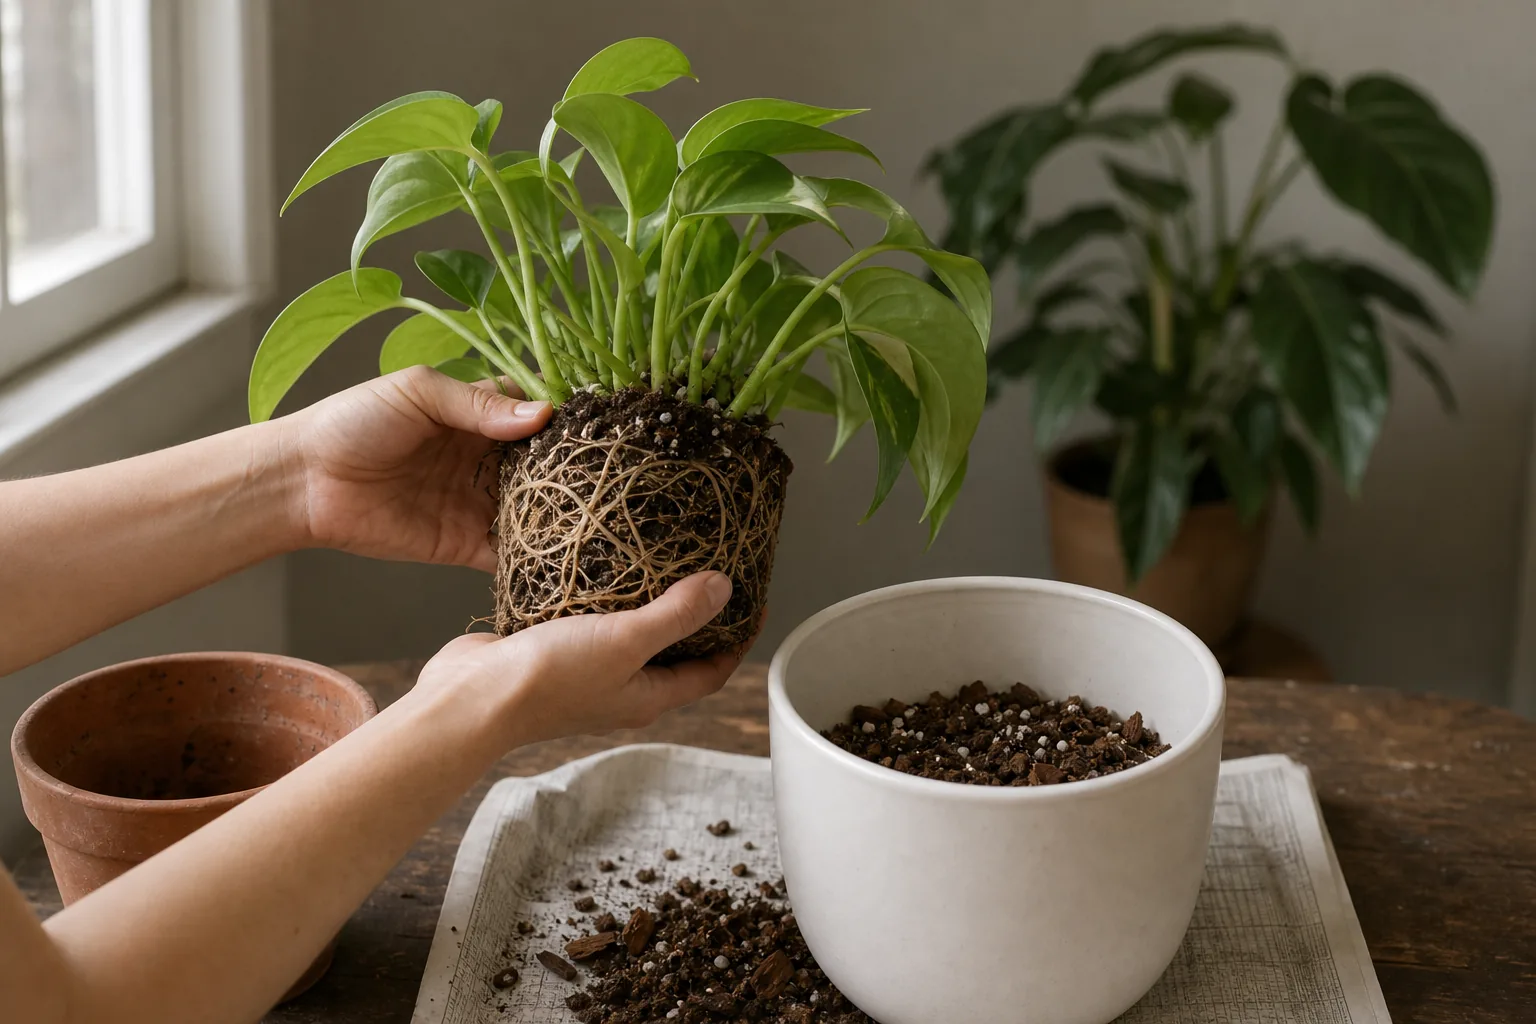
Turn the pot on its side, support the base of the plant with one hand, and tap or squeeze the pot to loosen the root ball. If the plant resists, run a blunt knife around the inside edge of the pot to release it. The goal is for the root ball to come out in one piece rather than as a shower of loose mix and snapped roots.
If the root ball slides out dry and crumbly, the plant was too dry before the repot. Note that for next time, water more thoroughly the day before.
Read the root ball before you do anything to it
Pause here. The condition of the root ball determines the rest of the procedure.
Firm, pale roots, even tightly tangled ones, are healthy. They will tolerate light handling and need nothing done to them beyond loosening the outer surface slightly so new mix can work in. Dark, mushy, sour-smelling roots are a sign of rot and should be gently removed with clean scissors down to firm tissue. Tightly circling roots that hold the shape of the pot can be loosened with your fingers, scored with shallow vertical cuts on the outside, or left alone. The choice depends on how severe the circling is and what the plant can tolerate.
Root work is a judgment call, not an automatic step. Tease or score only what looks truly circling or compacted, and leave a healthy root ball mostly undisturbed.
Settle the plant in at the same depth it was before
Add a small amount of mix to the bottom of the new pot. Hold the plant in place at the height that puts its old soil line, visible as a faint mark on the stem, exactly at the new soil line. Fill in around the root ball with fresh mix, tapping the pot gently to settle the mix without compacting it. Leave roughly one to two centimeters (about half an inch to an inch) of space between the mix surface and the rim so water has somewhere to go during watering.
The depth check matters more than people expect. Buried stem tissue is a leading cause of rot in plants that expect their stem or rhizome to sit at the surface. For rhizomatous plants like ZZ or Sansevieria, the rhizome should sit at or just below the soil line, not buried under an inch of mix. For most tropical foliage, the old soil line on the stem is the reference.
Water in and place it back where it was
Most tropical foliage houseplants benefit from a moderate watering immediately after repotting to settle the new mix around the roots. The root ball is already moist, so this is not a full drench but a settling-in drink.
Succulents, cacti, and any plant that has had damaged or cut roots should not be watered right away. Wait several days to about two weeks so any cut surfaces can callous over before they sit in moisture. Phalaenopsis orchids that have had root work fall in the same group. Skipping the water for these plants is a small thing that prevents a common failure mode.
Once watered, or not, as the case may be, return the plant to its usual spot. Repotting does not need a recovery location with different light or humidity. Moving the plant to a new environment at the same time it is handling root disturbance stacks two stresses on top of each other.
What to observe in the next one to three weeks
A little droop, slower growth, or a leaf or two yellowing in the first one to three weeks is common and usually not a problem. The plant is redirecting energy to its roots.
Persistent limpness beyond that, blackened or mushy tissue at the soil line, a sour or swampy smell from the mix, and continued or accelerated leaf drop are not normal. They usually point to overwatering, a buried stem, or root damage. The fuller observation guide for the weeks after repotting, including when to resume fertilizing, is in the post-repotting care article.
Hold off on fertilizer for the first few weeks regardless. Fresh mix contains enough fertility to support the plant during re-establishment, and added salts during this window can burn the recovering roots.
Common mistakes that cause the most stress
A few patterns account for most repotting problems:
- Repotting a plant that did not need it, on a calendar schedule rather than in response to observed cues.
- Stepping up into a pot that is much larger than the current one, holding excess moisture.
- Burying the stem or rhizome deeper than it was sitting before.
- Watering succulents, cacti, or plants with damaged roots immediately after repotting.
- Doing several big things at once: new pot, new spot, new fertilizer schedule, which compounds stress.
- Mistaking tired foliage for a plant that needs a bigger pot, when the cause is often watering, light, or pests rather than pot size. When a plant is clearly declining, whether repotting is the right move for a stressed plant is worth thinking through before you start.
When to stop and ask a local nursery or extension service
Repotting is one response to a plant that needs it, not a universal fix. If the plant is declining and the cause is unclear, including yellowing leaves, ongoing wilting, pest pressure, or suspected disease, a local nursery, master gardener program, or cooperative extension service can look at the actual plant and give a more specific answer than any single article can. For people or pets in the household, follow product labels and contact a qualified medical or veterinary resource if exposure is suspected.
Sources
- Repotting Houseplants — Penn State Extension
- When, why, and how to repot your houseplants — Brooklyn Botanic Garden
- Indoor plants: Transplanting and repotting — Clemson HGIC
- Girdling roots — University of Maryland Extension
- Spring into houseplant care — University of Minnesota Extension
- Indoor plant selection and care — University of Arizona Cooperative Extension
- Succulents 101 — West Virginia University Extension
- Repotting Houseplants — University of Arkansas Cooperative Extension
- Untangling the issue of circling roots — Harvard Arnold Arboretum
- Repotting questions for Phalaenopsis orchids — Just Add Ice Orchids