Plant care
Grow lights for houseplants: a calm, room-first beginner setup
· Updated
Most readers reach for a grow light before they have read their room. The setup that actually works starts with observation: which plants are leaning, which stay dull, which window gives what, and whether the simpler fix is a different plant, a different spot, or a quick rotation. A grow light is a tool to fill a gap you have already identified, not a substitute for light your plant cannot physically use.
That sounds modest, and it is meant to be. University extension services and botanical gardens consistently describe supplemental electric light as one tool among several, not as a default fix for an unhappy plant. If you begin by reading the natural light in your room, ruling out the cheaper non-light fixes, and confirming a real light gap, the rest of the decision gets much calmer.
Start with the room, not the light
Before you decide what to buy, spend a week watching where light actually lands in your space. The shadow test is the simplest version: hold your hand a foot above a sheet of paper at midday. A sharp, well-defined shadow means bright direct light. A soft shadow with visible edges means bright indirect. A faint shadow with no clear edges means medium. No readable shadow at all means low.
Window direction sets the baseline. In northern-hemisphere homes, south-facing windows generally give the most light, east and west are next, and north-facing windows are usually the dimmest. Light intensity also drops noticeably in winter, which is why this is the season most readers first consider a grow light at all.
If you want a fuller way to read your room, the Houseplant Supplies guide to reading natural light walks through the same observation in more detail. The point here is order: read the room before you reach for the equipment.
Three non-light fixes worth ruling out first
Once you have a rough map of your light, look at what is actually in the dim spot. Several low-cost changes often resolve the problem before a grow light enters the picture.
- Match the plant to the room. A pothos in a north-facing hallway is asking for slow growth. A ZZ plant or a snake plant in the same spot is asking for nothing in particular. Choosing a plant that fits the room you actually have is the cheaper, lower-risk fix when the gap is small.
- Move the existing plant a few feet closer to or further from the window. A single step can move a plant across the boundary between low and medium light, or between medium and bright indirect.
- Rotate the pot and clean the leaves. A plant that leans hard toward one side is reaching. A regular rotation evens out the growth, and a dusty leaf blocks a noticeable share of incoming light.
If your plant is showing stretched-out stems with long spaces between leaves, that pattern is worth reading as a specific signal. The Houseplant Supplies post on leggy growth walks through what that symptom usually means and what to rule out before assuming it is a light problem. Slow growth and dull color can also be watering, root, temperature, or pest issues, and a grow light will not fix any of those.
What a grow light is actually doing in a home
Once you have ruled out the cheaper fixes and the plant still looks starved, supplemental light is worth considering. In plain terms, a grow light raises the total amount of usable light the plant receives over the course of a day. Extension publications describe this using three factors: intensity, or how strong the light is at the leaf; duration, or how long the light is on; and quality, or which wavelengths the bulb emits. Those three factors together are what a home grower is actually adjusting, whether or not they know the technical term.
For foliage houseplants, the practical implication is that supplemental light extends a dim spot rather than replacing a window. A plant that gets two hours of soft morning sun and a stretch of electric light at the right intensity is in a very different situation from a plant that gets only electric light. Most home extension sources are clear that sunlight through a window is generally the best single source of light for a foliage plant, and the grow light is the assistant, not the replacement.
It is also worth noting where most of this guidance comes from. A lot of horticultural lighting research sits in greenhouse and controlled-environment-agriculture contexts, where light is managed as a production input. The home windowsill is a different setting, and numbers or recommendations borrowed from greenhouse guides should be treated as background rather than direct instruction. University extension publications on greenhouse and controlled-environment lighting are useful as boundary markers for what carries over from a production setting and what does not.
A beginner’s overview of grow light types
You will run into three broad categories as a beginner.
Full-spectrum white LED panels are small, flat fixtures designed to sit above a group of plants. They run cool, use little electricity, and emit a balanced mix of wavelengths that extension sources generally describe as appropriate for foliage. The phrase “full spectrum” is a marketing term with no single agreed definition, and two fixtures labeled full spectrum can have noticeably different outputs.
LED bulbs that screw into a regular lamp or clamp fixture are a low-commitment way to try supplemental light in a fixture you already own. They are useful when you have one or two plants and do not want a separate panel.
Fluorescent tubes, including the standard cool-white and daylight household tubes, are the older option. Extension sources, including the University of Nebraska–Lincoln, note that many foliage plants grow acceptably under ordinary household fluorescent tubes, and a special horticultural bulb is not always required. The trade-off is size, weight, and slightly more heat than a comparable LED.
The cluster’s deeper page on bulb-versus-fixture comparisons will go into the trade-offs in more detail. For the hub, the useful comparison is intent and room, not brand.
Four decisions before you buy
The purchase is easier to make once the room is read and the non-light fixes are ruled out. Four practical questions frame the choice.
- How much foliage do you actually need to cover? A single small plant on a side table wants a different fixture than a row of plants on a shelf.
- How bright does the spot need to be? This is a question about the plant’s natural-light tolerance, not a number on the box. A low-light-tolerant plant in a medium corner wants less added intensity than a foliage plant being kept on the dim edge of its range.
- What spectrum is appropriate? For foliage, extension sources converge on the idea that blue-weighted, balanced light supports leafy growth, while red and infrared matter more for flowering and fruiting. A white LED that looks neutral to your eye is generally a reasonable starting point.
- How will you mount and power it safely? A clamp, a small stand, or a hook above the plant are all workable. The fixture should clear the foliage, the cord should not cross a walking path, and you should be able to reach an outlet without stretching across furniture.
Each of those four questions is a hand-off to a deeper page in the cluster: distance from the foliage, daily on-duration, bulb-versus-fixture, and the planned signs that a plant is getting too much light.
The simplest beginner setup
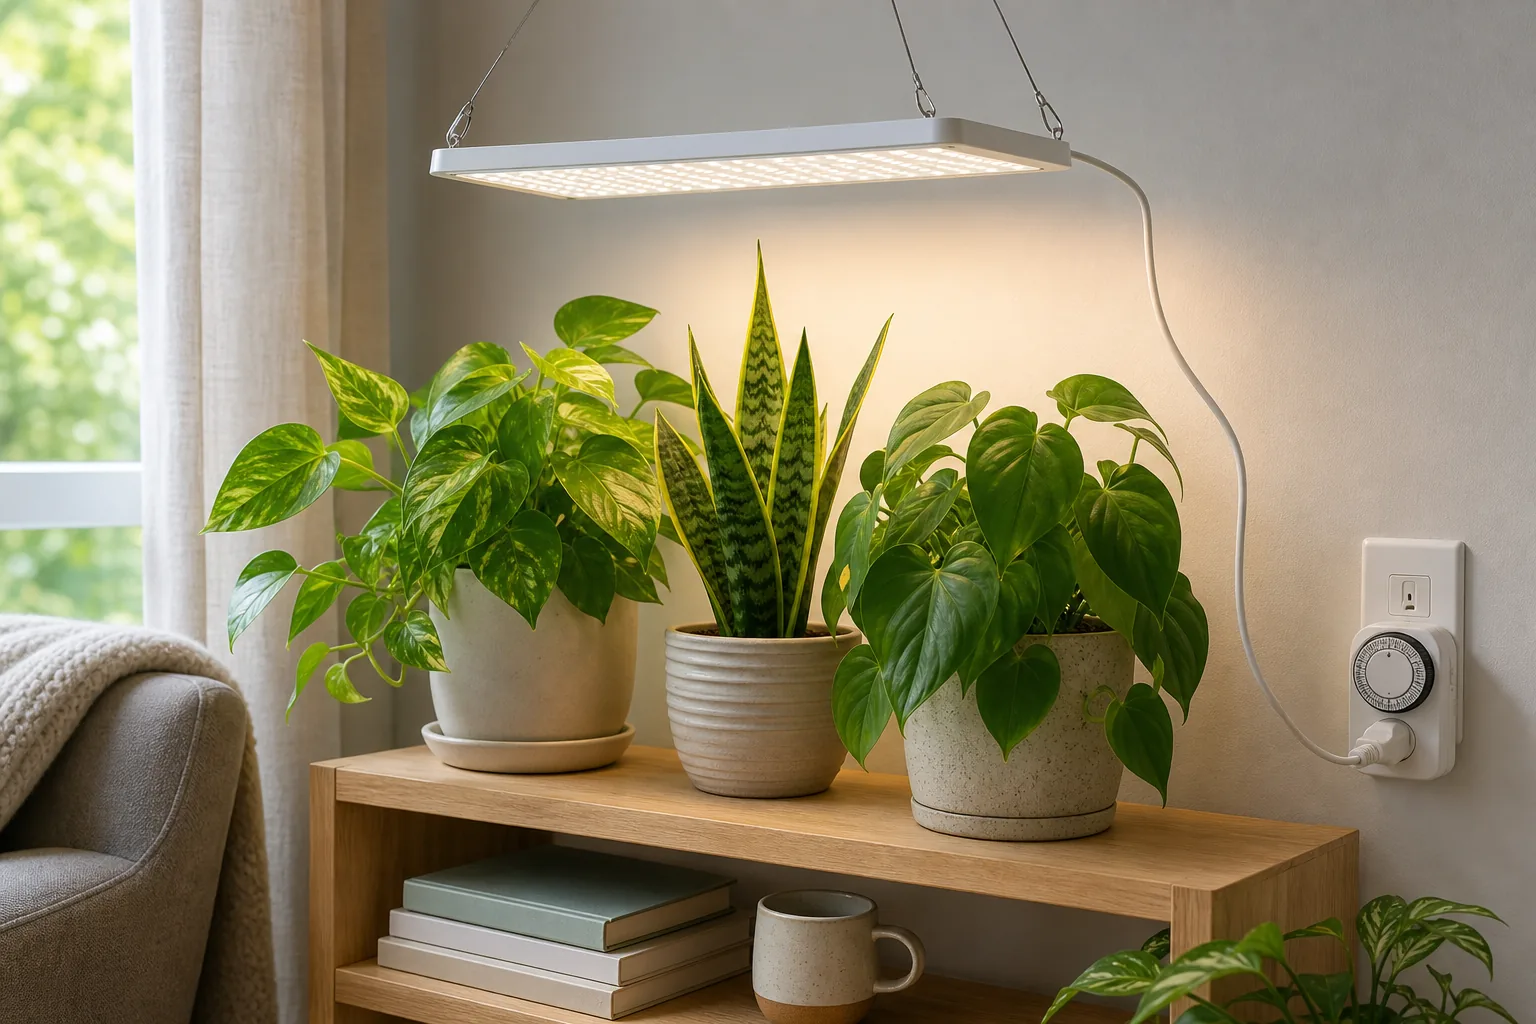
If you have confirmed a real light gap and you want the calmest possible first setup, the conceptual picture is this. One full-spectrum white LED panel, sized to roughly cover the foliage footprint of the plants you are lighting, positioned above them with clearance so no leaf touches the panel. The fixture plugs into an inexpensive outlet timer so the on and off hours are consistent, the way sunrise and sunset are consistent.
That is the whole setup. No special wiring, no daily switching, no controller. The timer turns the panel on for a defined stretch during the day and turns it off at night, which is closer to how plants actually use light than a light you remember to flip.
Exact distance and exact daily hours are ranges, not single numbers, and they belong on the linked cluster pages. The cluster’s distance guide will walk through how to think about clearance by fixture type, and the hours guide will walk through how to think about seasonal duration. As a rough starting point, a hand’s breadth above the tallest leaf and a block of time during the brightest part of your day is a reasonable default for many foliage plants; the cluster pages refine that for your specific fixture and species.
Where to put the light in an ordinary room
A few placement details are worth thinking through before you commit a fixture to a corner.
Keep the fixture clear of curtains, shelves, and anything flammable. LED panels run cooler than older options, but they are still electrical devices that should not be buried under fabric or pressed against wood. Leave airflow around the panel so heat does not build up against a wall or a window frame.
Route the cord so it does not cross a walking path or sit under a rug. Standard home-electrical caution applies: do not overload the outlet, do not daisy-chain extension cords, and keep the cord where you can see it. A timer is best plugged into a wall outlet rather than a power strip that is already carrying other things.
Watch the plant after the first week. Signs of too much light are usually visible before they are severe: a washed-out or pale patch on the top leaves, brown or crispy edges, or a faint bleach look on the most exposed foliage. If any of those appear, pull the fixture a few inches higher, shorten the duration on the timer, or both. The cluster’s planned signs of too-much-light page walks through the specific symptoms in more detail.
If the light is going near a window, remember that a window changes the microclimate around the plant, especially in winter and summer. A grow light adds its own small heat signature on top of that, which is worth keeping in mind when the plant is sitting next to cold glass in January or sun-heated glass in July. The Houseplant Supplies guide to drafts, vents, and hot glass covers placement near windows in more detail.
A simple daily routine with a grow light
A timer-driven light is meant to behave more like sunlight than like a chore. Once it is on a timer, you should not need to think about it daily. The plant still needs attention, but the light does not.
Most foliage houseplants in average home light do not need supplemental lighting year-round. Winter is the most common season when a timer-driven light earns its place, and spring and summer often let you turn it off entirely. Adjusting care when winter light drops is the broader context for why the timer is often a seasonal tool rather than a year-round one. The timer is a natural on-and-off boundary, which means you can run the light through the darker months of the year and switch it off for the rest of the year without much thought.
For weekly care, the light plugs into a routine you already check, instead of becoming a separate task. The Houseplant Supplies simple weekly care routine is a useful reference for fitting a timer-driven light into ordinary watering and inspection without adding new chores. The result is that the grow light is doing its job quietly while you water, rotate, and inspect the plant as you already do.
When the light is not the answer
A grow light is one tool, and it has limits. It will not rescue a plant that is chronically overwatered, root-bound in a pot that has not been refreshed in years, sitting in a cold draft, or kept in a room that is much too dry. It will not turn a sun-loving plant into a foliage plant. And it will not substitute for matching the plant to the room in the first place. The calmer path is often choosing a more tolerant plant for the dim spot rather than adding equipment to fight the room.
If a plant is still struggling after you have read the room, ruled out watering and root issues, and given a simple supplemental setup a few weeks to show results, that is the right moment to ask someone who can see the plant. A local nursery, a county extension office, or a botanical garden education program can look at the actual leaves and potting mix and tell you more in a few minutes than any general guide can.
Sources
- University of Maryland Extension, Lighting for indoor plants
- Iowa State University Extension, How to set up supplemental lights for indoor plants
- University of Illinois Extension, Houseplants and indoor lighting
- University of Nebraska–Lincoln Extension, Let there be light… for your houseplants
- New York Botanical Garden, Artificial light for houseplants FAQ