Plant care
Separating Pilea pups: how to read, cut, and pot up a Chinese money plant baby
· Updated
Pilea peperomioides, often called the Chinese money plant, makes pups that most growers can separate and pot up with a clean tool, a small pot with drainage, and a light, well-drained mix. Wait until the pup has its own short stem, a few leaves, and ideally some visible roots before cutting. Pot it small, water it lightly, and place it in bright, indirect light. Then the work shifts to watching: expect some droop, skip the fertilizer for now, and only water when the top inch of mix actually feels dry.
That is the short version. The longer version is about reading what the plant is showing you, because a Pilea pup is not a finished plant. It is a small start that needs to settle in, and almost everything that goes wrong with a separated pup comes from one of three things: too little root at separation, a pot that is too big, or water that arrives on a schedule instead of when the mix actually needs it.
How Pilea pups form, and why the plant makes them
Pilea peperomioides sends up offsets from its base and root system. These little plantlets, often called pups, are connected to the mother by a short rhizome or stem just below or at the soil surface. The mother plant pushes energy into these pups as a kind of insurance: if the main stem is damaged, a pup can take over, and in the wild the colony spreads by sending up more and more of them.
Indoors, this is useful because each pup is a clone of the mother. Many Pilea owners end up with more plants than they started with, simply because a happy Pilea tends to keep making them. Some readers will see one pup a year, others will see a small ring of pups around the mother after a season of bright light and once the mother is reasonably established.
What a ready pup looks like above and below the soil
The cues for readiness are visual, not calendar-driven. A pup is usually considered ready to separate when:
- It has its own short stem above the soil line, not just a leaf or two sitting flush with the soil.
- It has roughly three to four leaves, and it stands on its own rather than leaning on the mother.
- When you gently brush back the top of the soil, you can see at least a few fine roots near the base.
Heights of two to three inches are commonly cited as a workable reference, but the strongest signal is roots. A pup with visible roots has a meaningful head start. A pup with no visible roots is still separable; it will just establish more slowly and will be more sensitive to overwatering in the first couple of weeks.
It is worth pausing if a pup is very small, with only one or two leaves and no stem of its own. Tiny pups are easy to damage at separation and slower to bounce back. Leaving them attached to the mother while they harden off is reasonable and avoids the most common beginner mistake: separating too early.
Tools, containers, and mix: keep the setup small and well-drained
You do not need much. A clean, sharp knife or a pair of small pruners is enough. A teaspoon or a chopstick is helpful for moving soil aside to see what you are doing. A small pot with a drainage hole is the right container. For the mix, anything that drains freely and does not stay soggy will work.
Pot size matters more than pot material. A small pot, only an inch or so wider than the root mass, lets the mix dry out at a pace that a small root system can keep up with. A bigger pot holds more moisture than a freshly separated pup can use, and that extra moisture is the most common reason a young pup declines rather than establishes. Our guide to do houseplants need drainage holes and how pot setup works walks through what good drainage actually requires indoors, which is the same idea that applies at this smaller scale.
Terracotta dries faster than plastic, which can be helpful if you tend to water generously. Plastic holds moisture longer, which can be helpful in dry rooms but increases the overwatering risk if you are not adjusting. The decisive factor is pot size plus a drainage hole.
For the mix, a peat- or coco-coir-based potting blend amended with perlite or pumice is a common starting point. The point is drainage, not a specific brand. Our post on how to read a potting mix label and choose a houseplant mix covers what to look for in plain language.
Separating the pup: a slow, observation-led method
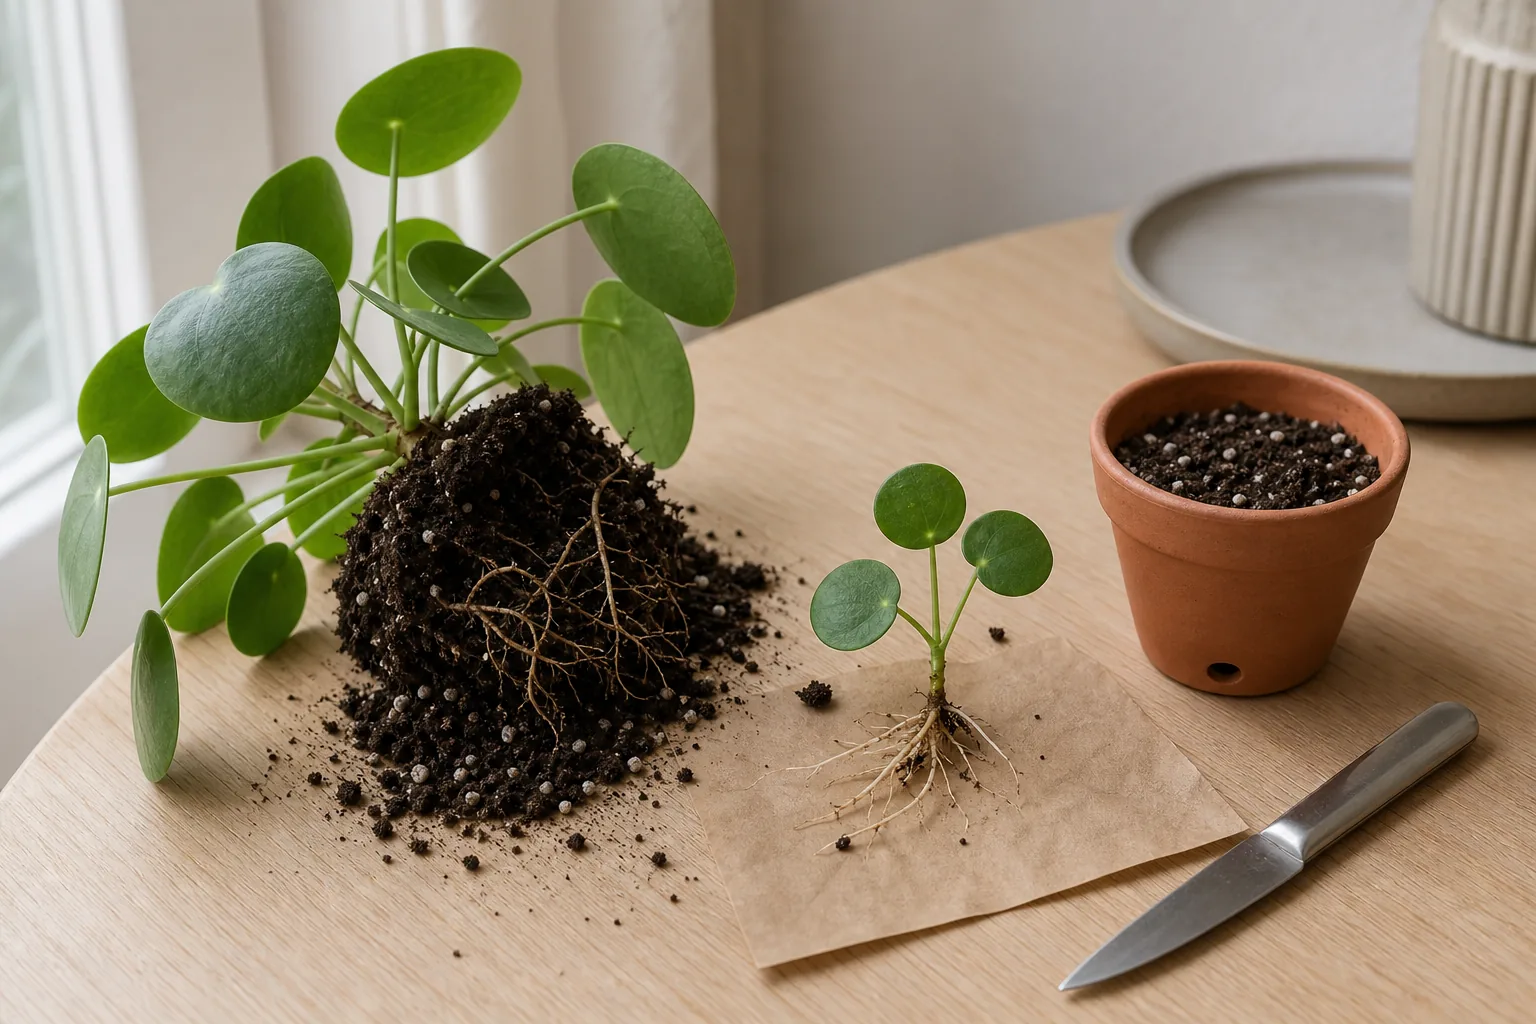
Take the mother plant out of its pot if you can. Lay it on its side and gently work the root ball loose. Brush away the top layer of soil until you can see where the pup connects to the mother. The connection is usually a short rhizome, sometimes with a visible joint where it joins the main stem or root.
Slice cleanly through that connection with a sanitized blade, as close to the mother as you can without damaging either plant. A single, decisive cut is gentler than sawing. Pulling the pup off by hand tends to tear small roots and can leave a ragged wound on the mother that takes longer to heal.
If the pup comes away with a small wad of fine roots attached, that is a good sign. If it comes away with almost nothing, set it aside and decide whether to pot it directly anyway or to root it in water for a few weeks first. Both approaches are used; both can work; outcomes depend on how dry or humid your home is, and how carefully you watch the moisture.
Before you pot anything up, take a moment to inspect the pup and the mother. Pilea stems and petioles are a common hiding spot for mealybugs, and a quick look while the plant is in your hands is the easiest moment to catch something before it spreads to the rest of your collection. Our guide to identifying mealybugs on houseplants walks through what to look for and what to do about it.
Potting up: depth, first watering, and avoiding a too-wet start
Hold the pup at the same depth it was growing at on the mother. Pilea stems do not like to be buried; a buried stem is a stem that can rot. Set it in the pot so the lowest leaves sit just above the soil line, then backfill with mix and tap the pot on the table to settle.
Water lightly. The goal is to settle the mix around the roots and remove air pockets, not to soak the plant. The mix should be evenly moist, never saturated. Let the excess drain freely from the hole. After ten or fifteen minutes, dump any water that collected in the saucer.
If the cut site looks fresh and the mix was already a little damp, some growers skip the immediate drink and let the pup rest for a day before watering. This is not a hard rule; either path works. The signal that the first watering was about right is that the mix feels like a wrung-out sponge the next day, not heavy and not bone-dry.
Skip the fertilizer. Newly potted houseplants, including separated pups, are not in a state where added nutrients help. Most extension guidance treats the first weeks after repotting as a recovery period, and our post on what to do in the weeks after repotting a houseplant goes into the same idea in more detail.
The first two to four weeks: light, water, and what ‘normal’ looks like
Place the new pot in bright, indirect light. Direct sun through a south- or west-facing window can be harsh on a freshly separated pup with a small root system, because the leaves are asking for water that the roots cannot yet supply. A spot a few feet back from a bright window, or near an east-facing window with gentler morning light, is a reasonable starting point.
Watering during this window is the part most readers get wrong. There is no fixed schedule that fits a Pilea pup, because pot size, plant size, mix, light, temperature, and humidity all change how fast the mix dries. The practical rule from extension guidance is consistent: check the top inch of mix with a finger, and water when it feels dry. Our guide on watering houseplants by feel rather than by calendar walks through that tactile check in more depth.
Expect some leaf droop in the first days. A pup that looked perky when you cut it can look soft and tired a day later, because the small root mass is suddenly supporting the leaves on its own. Within limits, this is normal. New growth, when it comes, tends to appear from the center of the plant, and the timing is variable. Some pups push a new leaf in a few weeks, others sit quietly for a month or more, depending on light and temperature.
Do not be alarmed if a lower leaf yellows and drops. A single older leaf is the pup’s way of redirecting energy to the new roots. Multiple yellowing leaves, especially with a soft stem, is a different signal and is usually about moisture.
When a separated pup struggles: droop, yellowing, and slow roots
The three most common post-separation problems are all easy to misread.
Persistent droop after the first week. A little softness right after potting is normal. Droop that does not improve, or that gets worse, is often a moisture problem at the root. Check the mix with a finger. If it is still wet below the surface, the pup is sitting in too much moisture and the pot may be too big. If it is bone-dry an inch down, the pup may need water and a slightly more sheltered spot.
Yellowing lower leaves with a firm stem. Usually one older leaf, and usually fine. The plant is shedding something it cannot afford to support while it grows new roots.
Yellowing leaves with a soft or mushy stem at the soil line. This is a moisture and pot-size problem, and the corrective action is environmental, not chemical. Move the pup to a smaller pot with a faster-draining mix if possible, stop watering until the top inch is genuinely dry, and give it more light without putting it in direct sun.
Slow or no new growth after a month. Often this is a light or temperature issue rather than a method failure. A Pilea pup in a dim corner grows slowly even with good roots. A pup in a warm, bright window with a small pot and a light mix grows faster, all else equal.
In all of these cases, the answer is to adjust the environment, not to add fertilizer, rooting hormone, or any other input.
Honest expectations and when to ask a local source
Some pups arrive at separation with very limited roots. Even with a careful cut, a small pot, and a light mix, those pups establish slowly and a fraction of them do not make it. That is not a method failure so much as a starting-condition problem.
If you have a local independent nursery, a master gardener program, or a houseplant-focused community group, those are reasonable places to bring a struggling plant for a closer look. Pictures and descriptions are not a substitute for someone seeing the actual plant and the actual conditions in your home.
One more note on pets. Pilea peperomioides is sometimes listed as non-toxic to cats and dogs, but pet-toxicology questions are best directed to the ASPCA or your veterinarian rather than assumed from a blog post. Keep the pup away from curious pets while it is small and at soil level, the way you would any new houseplant.
Separating a Pilea pup is a small, slow, satisfying project. The plant does most of the work. The reader’s job is to give it a clean cut, a small home, and a steady, observant few weeks afterward.
Sources
- Iowa State University Extension: How to propagate houseplants by division and offsets
- Brooklyn Botanic Garden: How to propagate houseplants
- University of Missouri Extension: Caring for houseplants (G6510)
- Houseplant Journal: Pilea peperomioides — separating pups
- Delineate Your Dwelling: How to propagate Pilea