Plant care
Rooting houseplant cuttings in perlite
· Updated
Rooting houseplant cuttings in perlite: a calm, observation-first guide
Perlite works as a propagation medium because it holds moisture around the stem while leaving a high proportion of air-filled pore space around the forming root. Success depends less on perlite itself and more on a healthy node, steady indirect light, a consistent shallow water level at the bottom of a clear container, and reading the cutting week by week rather than watering it on a schedule. Most failures are not caused by perlite at all; they are caused by a weak node, a node sitting in standing water, or a container that ended up in the wrong light.
What perlite actually does as a rooting medium
Perlite is expanded volcanic glass, and what matters about it for propagation is purely physical. Each white particle is full of tiny pores, so a container of perlite holds some moisture against the stem while leaving a high share of air-filled space around the forming roots. That balance is the whole reason it works.
University extension publications describe this in terms of air-filled porosity, the share of the medium that drains free of water and refills with air. Purdue Extension puts a working target at roughly 20–25% air space for proper root growth in soilless substrates, and Nebraska Extension names perlite specifically as a propagation material because it provides good flow of oxygen to the root system.
When a node sits in damp perlite, three things happen at once. The stem stays hydrated through contact with the damp particles, the new roots have oxygen around them as they form, and there is no nutrient chemistry complicating the picture. Perlite does not feed the cutting. It just keeps the air and water balance in a range that roots can work with.
What perlite is good at, and what it is not
Perlite is good at giving a cutting oxygen while still feeling moist. It is not good at holding a cutting upright on its own, at supplying any nutrition, or at replacing a real potting mix for the long term.
A few specifics worth keeping in mind:
- Perlite is inert. It does not feed the cutting. Anything the cutting needs to grow new tissue comes from stored energy in the stem and from light.
- Perlite is not “sterile” in the household sense once it has been opened, handled, or reused. Bag-fresh perlite is essentially free of organic matter, but it is not a clinical clean surface.
- Perlite lowers rot risk compared with a saturated medium, but it does not eliminate rot. A node submerged in standing water inside a perlite container will still rot.
- Perlite is a short-term rooting environment. Its job ends when the cutting has roots.
A quick honest comparison: perlite vs water vs sphagnum moss
These three media can all root a healthy node cutting. The differences are mostly about visibility, how much oxygen sits at the root zone, and how easy the transition into potting mix tends to be.
Water propagation is the most beginner-friendly for visibility, because roots form right against the glass. The trade-off is oxygen: water carries far less dissolved oxygen than air, and slower-rooting cuttings sometimes rot at the node before they root. Water-grown roots are also commonly reported to be less prepared for soil and to go through a longer adjustment period once potted.
Sphagnum moss holds more water than perlite and can be wrapped around a single small node without a heavy container. It is useful when a cutting is tiny or when you want to control moisture tightly. The trade-off is that sphagnum rewets less predictably for beginners, and what you see when something is going wrong is less obvious than in a clear perlite vessel.
Perlite sits between the two. Roots form in air rather than in liquid, so oxygen is plentiful. Visibility is reduced because roots grow into the white particles, which is why a clear vessel matters. In common observation, the roots that come out of perlite tend to be more robust and easier to transition into potting mix, but they are also more fragile at the moment of removal because perlite clings to the fine root hairs.
If you are rooting a cutting from a pothos or a heartleaf philodendron, perlite is a sensible default. Both species are forgiving, and both respond well to the air-and-moisture balance perlite offers.
What you need to set up a simple perlite propagation container
The setup does not need to be complicated. Most readers already have what they need at home.
- A clear vessel. A glass jar, a small plastic food container with a clear side, or a propagation vase. Clear glass lets you watch the water level and the lower part of the stem without disturbing anything.
- Plain horticultural perlite. Not the heavily amended kind with fertilizer already mixed in.
- Clean snips or scissors. Wiped down before use, especially if they have been used on other plants.
- A source of stable, bright indirect light. A spot near a window but out of direct sun is the usual recommendation, since a closed container in hot direct sun can stress a cutting.
That is the whole list. No rooting hormone is required, no special container, no misting system. If you want to use a rooting hormone, treat it as an optional aid rather than a required step.
Handling note: perlite dust and wet-down before use
Perlite dust is a recognized respiratory irritant. The standard handling step in horticulture is to dampen the perlite before pouring or scooping it, which keeps the fine particles from becoming airborne. Working over a sink or a tray, with a little water mixed in, is usually enough.
This is a one-time step at setup. Once the perlite is wet, dust is not really a concern during the rooting weeks.
Prepping the cutting
A short note on the cutting itself, because even perfect perlite cannot rescue a node that is not there.
For most common houseplants, you want a cutting that includes at least one node, the slightly thickened bump on the stem where leaves and aerial roots emerge. Cuttings root from the node, not from the internode. A segment of stem with no node will stay green for a while and then quietly fail.
The cut should be clean. Nebraska Extension recommends making the cut cleanly at an angle just below a node. Any leaves on the lower part of the cutting can be removed so they do not sit below the perlite surface, where they tend to rot.
If you are taking the cutting from a plant you have just brought home, it is worth checking it over for pests first. A quick inspection before you start cutting can save the propagation container from becoming a pest nursery. The same goes for the snips themselves; wiping them down with isopropyl alcohol between plants is a small habit that prevents a lot of cross-contamination. For a short routine on keeping snips and containers clean between cuttings, see our inspection and isolation guide.
Setting up the container: perlite depth, water level, and light
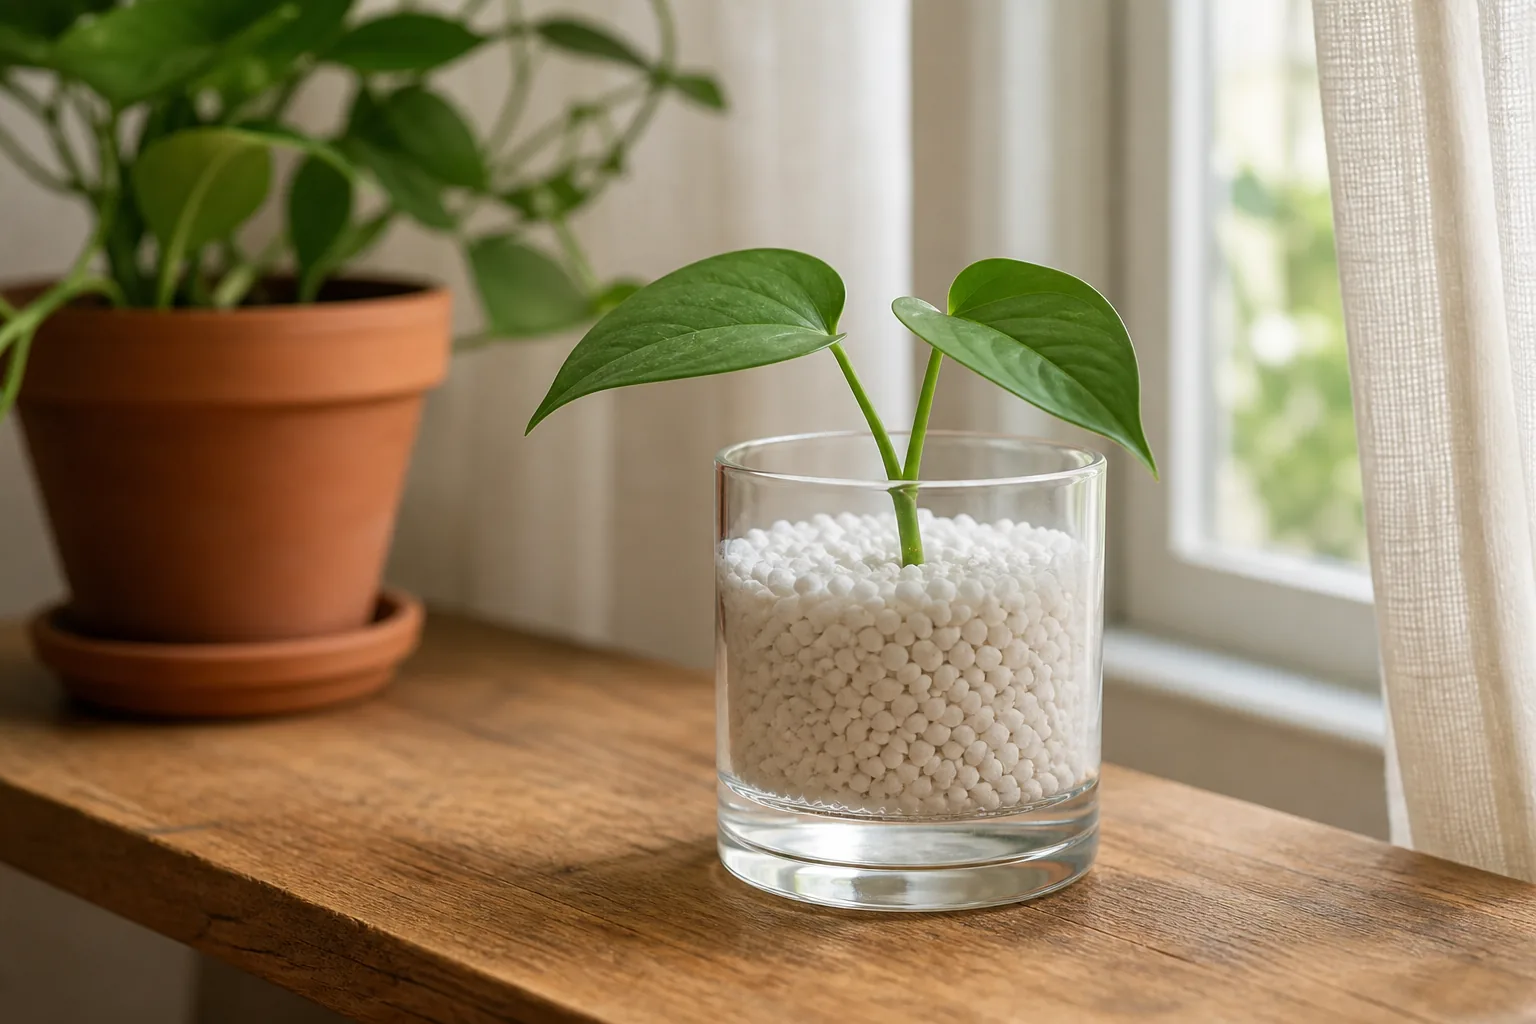
Fill the clear vessel with dampened perlite to a depth of roughly three to four inches for a standard cutting, enough that the node can sit below the surface without the leaves touching the perlite. Pour in a small amount of clean water so that a shallow layer, typically about half an inch, sits at the bottom of the container. The perlite will wick that water upward on its own. You are not trying to submerge the node; you are trying to keep the medium consistently damp.
Place the cutting so the node is in contact with the perlite and the leaves are above it. If the perlite wants to float the cutting up, a small stick or a clean pebble laid across the stem can hold it in place without crushing it.
Set the container somewhere with stable, bright indirect light. Mississippi State University Extension names light as the single most important environmental factor for indoor plant success, and that includes propagation. A warm room is helpful, but a hot, sunny windowsill can stress a cutting through a clear vessel, so err on the side of gentle light.
Refill the shallow standing water as it wicks away. The perlite color shifts from bright white when dry to slightly translucent when wet, which is a useful visual cue: if the upper perlite looks chalky, the medium is drying out and the water level probably needs topping up.
The first one to three weeks: how to read what is happening
Perlite propagation is a reading exercise more than a watering schedule. Here is what to look for over the first few weeks.
In the first week, the main thing to confirm is that nothing has gone wrong. The stem should still be firm, the cut end should not be turning black or soft, and the perlite should still be damp. No roots is normal at this stage.
In weeks two and three, look for small white or pale cream nubs emerging from the node. These are root primordia, and they are the first real signal that the cutting is investing in new growth. They can take longer to appear in perlite than in water, because the oxygen-rich environment is commonly observed to favor slower, sturdier root formation rather than fast, watery roots.
Throughout this period, the question is not “have I watered enough.” The question is “what does the cutting look like today.” Most perlite failures are not caused by perlite itself; they are caused by a cutting that was weak to start with, a node that got submerged, or a container that sat in direct sun and cooked.
Healthy new roots versus rot: what each looks like in perlite
Healthy new roots in perlite are white to pale cream, firm, and often visibly branching. They may take longer than water roots to lengthen, but they tend to be thicker and more soil-ready.
Rot looks different. The stem at or below the node turns brown or black, feels soft or mushy instead of firm, and may develop a sour smell. New roots that have gone bad turn brown and translucent, then collapse.
A few practical distinctions:
- A slight tan tinge on the oldest part of a root is not the same as rot. Roots do darken slightly with age.
- A perlite particle clinging to a new root is normal. Gently rinsing the root under clean water before potting is fine, but new roots tear easily, so do not pull perlite off by force.
- A leaf going yellow on a cutting is not automatically a sign that rooting has failed. The cutting often sheds one or two leaves as it redirects energy into roots.
If the stem is firm and the perlite is damp and there is no sour smell, the cutting is most likely still working, even if nothing visible has happened yet.
When the cutting is ready to move into potting mix
A perlite-rooted cutting is ready for potting mix when it has a small, branched root system with roots that are firm and white rather than brown or mushy. There is no single number that fits every species. A pothos cutting might be ready with a few roots an inch or two long, while a slower-rooting species may take longer to develop the same density.
The move itself matters. Perlite roots are used to high air porosity and no nutrition, so the first potting mix should be one that holds moisture without staying soggy. A standard indoor aroid mix, with perlite as one of the components, is a reasonable match for what the roots have just been growing in. For a deeper look at how perlite functions in a finished mix, see our guide on choosing a houseplant potting mix.
After potting, keep the new plant in stable, bright indirect light and water it slightly more often than you would a fully established plant for the first week or two. The roots are adjusting to a denser medium, and a consistent moisture level reduces transplant stress.
Common pitfalls and the smallest adjustments that fix them
- The node is sitting in standing water. Pour out the water so only the bottom of the perlite is wet, then top up with less next time.
- The perlite is drying out at the top. Add a little more water at the bottom and move the container a touch farther from direct sun or any heat source.
- The cutting has been sitting for weeks with no visible roots. Check the node is actually under the perlite, confirm the light is bright and indirect, and give it more time. Many common houseplants simply take longer in perlite than in water.
- The stem is going soft or dark at the node. That is rot. Lift the cutting out, cut back to healthy firm tissue above the rot, let the new cut dry briefly, and start again in fresh dampened perlite with less standing water.
- New roots are tearing when you try to remove perlite. Soak the root mass briefly in clean water so the perlite loosens, and let the roots release it rather than pulling.
Perlite propagation rewards a calm, observational approach. Set the container up once, keep the water level shallow and consistent, put it in good indirect light, and let the cutting tell you what is happening over the next few weeks.