Plant care
Spots on houseplant leaves: how to triage before you treat
· Updated
When you spot something on a houseplant leaf, the urge to do something right away is strong. The safer first move is to slow down. Spots on houseplant leaves have many possible causes, and the same look can come from very different origins, so observation almost always beats treatment in the first day or two.
University extension publications, including UC IPM and Iowa State Extension, treat indoor plant problems as a care-and-environment question first, not a disease question. A short set of four checks — how fast the spotting is spreading, what changed recently, whether the leaf surface stays wet, and whether any pest signs are visible — usually points to one of three next steps: keep watching, separate the plant from the rest of your collection, or take clear photos and notes to a local nursery or extension service. This guide walks through those checks, the three branches, and what the article deliberately will not do.
Why leaf spots send so many readers into a panic (and why that is worth resisting)
A new spot looks like a sentence about your plant’s future. It rarely is. Extension services consistently frame indoor plant symptoms as a care-fit question first, with abiotic stresses — low humidity, over- or under-watering, fertilizer imbalance, light stress, and temperature extremes — often matching what is actually showing up on the leaf. Reaching for a spray before checking the environment is the kind of action that adds stress without solving anything.
There is also a contagion reflex: one spot, and the plant goes to the far windowsill alone. Isolation has its own costs, because moving a plant abruptly changes its light and humidity, which can produce more stress and more spots. UC IPM’s IPM logic is built around observing and assessing risk before responding, not isolating on instinct.
What we mean by a leaf spot in this guide (and what we don’t)
In this article, a leaf spot is a discrete mark on the flat surface of the leaf — the blade. Brown or crispy leaf tips, yellowing that starts at the edge, or whole-leaf color change are different symptom categories and usually have different common causes. If your plant’s symptom is at the tip or margin rather than a discrete spot on the blade, this triage flow may not be the right one for you.
A spot can be brown, black, yellow, tan, or reddish. It can be tiny or as wide as a fingernail. It can be flat, sunken, or slightly raised. The shape is one clue; the context — what changed recently, whether it is spreading, what the underside looks like — usually matters more.
Check 1: How many leaves, and how fast — the spread question
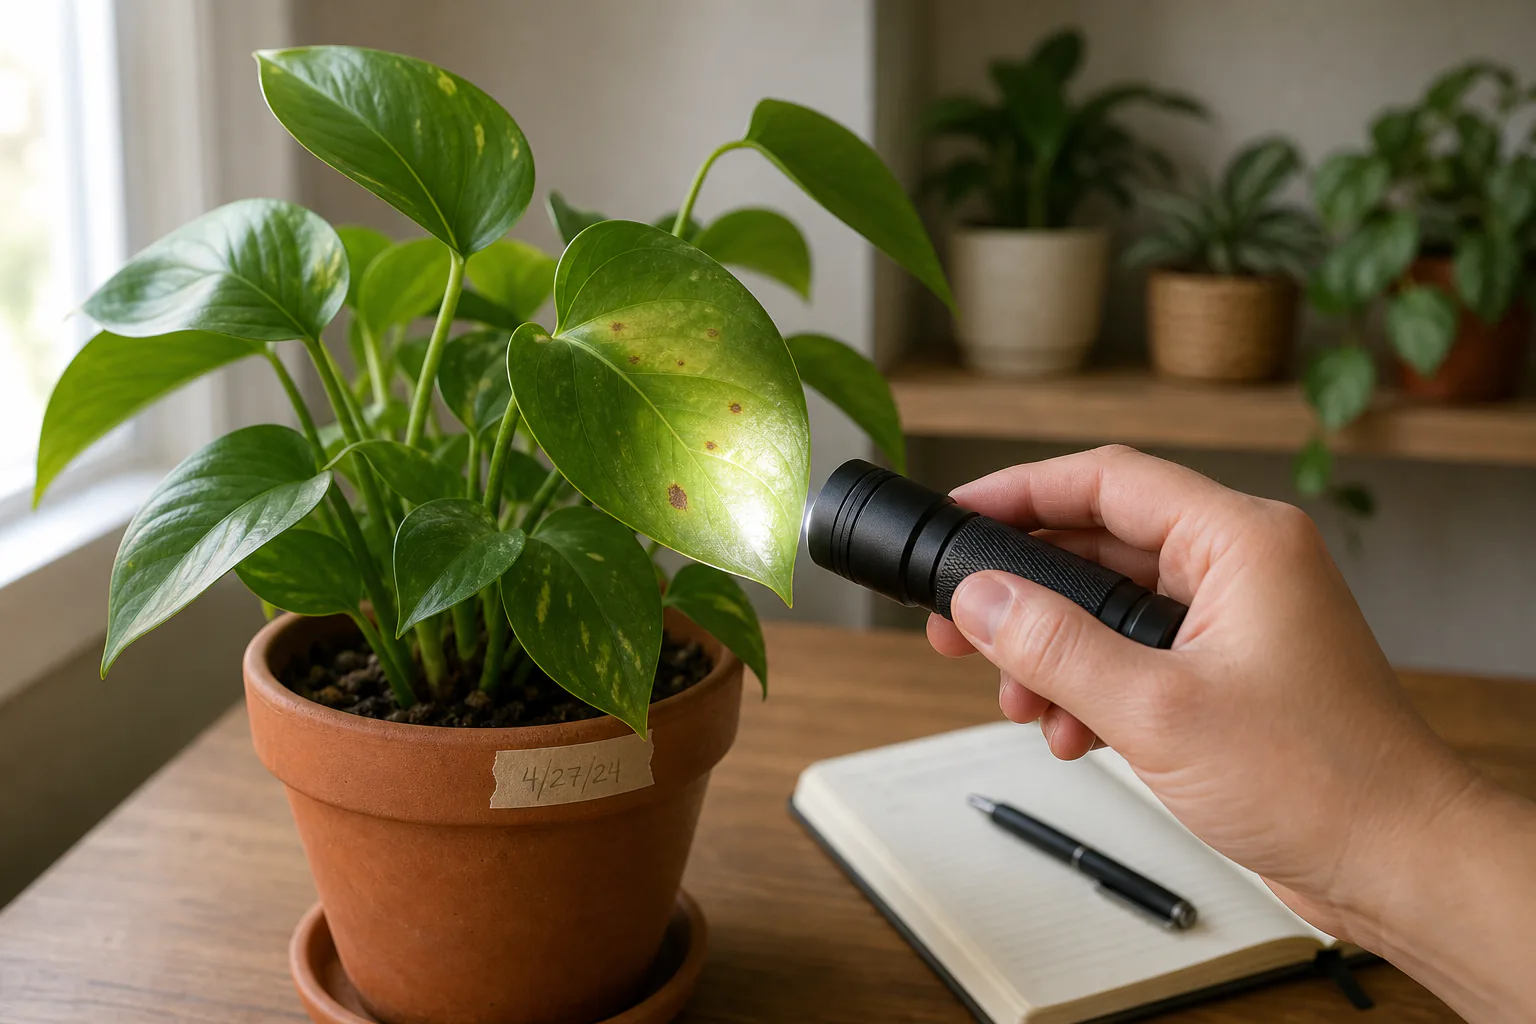
Count the spots. Count the leaves. Then write the date on a piece of tape and stick it near the plant.
A single spot on a single leaf that is not changing over several days is the low-urgency case. Multiple spots across multiple leaves, or new spots appearing every couple of days, raises the urgency toward isolation or local consultation. Oregon State Extension and Ohio State’s 20 Questions framework both use this kind of pattern-and-progression question before naming any cause.
The goal is to turn a vague worry into a measurable observation. If you can re-check in three days and the picture has not changed, you have useful information. If the picture has changed, you have useful information in a different direction.
Check 2: What changed recently — light, water, move, new plant
Houseplants do not develop leaf spots in a vacuum. Something usually changed, even if the change felt small.
Recent changes worth listing in plain words:
- Light. Was the plant moved closer to a window, or did seasonal sun start reaching a previously shaded leaf? Direct sun that did not touch the leaf a month ago can scorch patches that look like spots. If the plant’s light has changed recently, our guide to reading the natural light in your room walks through what to actually observe.
- Water. Did you start watering more, less, on a schedule, or with a different source — tap, filtered, softened? Hard water and softened water leave residue marks that are easy to mistake for spots. For a closer look at moisture before you change anything, our overwatered vs. underwatered guide walks through what to check.
- Pot and soil. A recent repot, a change in potting mix, or a change in pot size all change how water moves through the root zone.
- New plant or new arrival. Did another plant come into the room in the last few weeks? Some problems show up after a plant has settled in for a bit, not the day it arrived.
- Temperature and humidity. A new heating vent, a draft from a window, or a room that has just gotten drier — winter especially — can each show up on the leaf.
Iowa State Extension starts a houseplant diagnostic conversation by asking whether the plant’s environment matches its needs. If the answer is “no, we just changed something,” that is itself a useful starting point.
Check 3: Moisture on the leaf surface, not just in the soil
This is a different variable from how wet the soil is. Leaves can stay visibly wet for hours after misting, after watering that splashes the foliage, or from condensation near a cold window — especially where air circulation is poor. You are observing an environmental variable here, not diagnosing a cause.
You are not diagnosing a disease here. You are noting one environmental fact: do the leaves stay visibly wet for many hours after watering or misting? If yes, that is worth adjusting regardless of what is causing the spots. If no, that fact rules out one contributor and is useful information for whoever helps you later.
Check 4: Pest signs you can see without a magnifier
Several common indoor pests produce marks that look like leaf spots but are actually feeding damage. The cleanest way to tell the difference is to look for the pest, not for the shape of the mark.
Check these without any equipment:
- Undersides of leaves. UC IPM’s spider mite note describes early damage as fine stippling on upper surfaces, with webbing showing on the undersides as feeding continues. A flashlight and your eyes are enough.
- Sticky residue on leaves or on the surface below the plant. This is a separate signal pointing at sap-sucking pests. Our sticky leaves and honeydew guide covers that pattern in more detail.
- Visible insects or cottony tufts. Aphids, mealybugs, scale, and whiteflies can show up on stems, leaf joints, or undersides without magnification.
- Tiny dark specks on the leaf or nearby surface — which can be frass from pests such as thrips — are worth noting.
If pest signs are present, the triage has just shifted: the plant should be physically separated from the rest of the collection while you figure out what is feeding on it. Pests are contagious — the insects or mites themselves can move to other plants — while abiotic leaf spotting generally is not, because there is no organism to transfer.
From the four checks to one of three next steps
After the four checks, you are usually in one of three situations:
- Nothing is spreading, no pest signs are visible, and you can identify a recent care change. Branch A.
- Pest signs are visible, or spots are appearing on new leaves quickly. Branch B.
- You are not sure, the plant is valuable to you, or the pattern looks unfamiliar. Branch C.
Most readers fall into Branch A, and that is fine.
Branch A — Keep watching: what to look for over the next 7–14 days
Watching is not doing nothing. It is doing less, with a small notebook.
For the next one to two weeks:
- Re-check the marked leaf and its neighbors every two or three days.
- Adjust the variable that changed most recently if it is reasonable to do so — move the plant back out of direct sun, return to your previous watering amount, switch to unsoftened water, or improve airflow.
- Avoid spraying anything on the leaves until you know what you are treating.
- Note whether new spots appear on new leaves, on the same leaves, or stop appearing altogether.
If the situation stays stable or improves, the pattern is consistent with an abiotic cause and the care adjustment was likely the right response — though only an in-person expert can confirm that. If new spots keep appearing on leaves that were previously fine, it is worth moving to Branch C.
Branch B — Isolate the plant: how to separate it without stressing it further
Isolation is a separate decision from adjusting care. The goal is to put physical distance between this plant and the rest of your collection while not changing its light, humidity, or temperature drastically. A different room with similar light is better than a far corner that happens to be empty.
For a practical walkthrough of what to actually do — what to look for on the isolated plant, when to check on it, and when it is safe to bring it back — our guide on inspecting and quarantining a new houseplant covers the same steps in the context of a new arrival. The actions are nearly identical when the plant you are isolating is one you already own.
Branch C — Ask for local help: what to photograph and write down
Both a good independent nursery and a university extension office or Master Gardener program can help with leaf spots, and they are set up for different parts of the job. A nursery is well suited to species-specific care questions and to looking at the plant in person. An extension office is set up for a longer diagnostic case history and can route a sample to a plant disease clinic when needed.
To make either visit useful, prepare before you go. Extension diagnostic frameworks, including Oregon State and Ohio State’s, treat a written case history as the foundation of any diagnosis. Bring or send:
- The plant’s name (common and, if you have it, the cultivar).
- When the spots were first noticed and how they have changed since.
- Recent care changes in plain words: light, watering, repotting, new plants in the room.
- Photos of the whole plant, the affected leaf from above, and the underside of the same leaf.
- A photo of the soil surface, including any visible residue.
- A short care log if you keep one.
Photos plus a written history is the standard intake. Diagnosis is not a one-image, one-question event, and treating it as one is how readers end up with conflicting guesses from strangers online.
What this guide deliberately won’t do: name a disease or recommend a spray
This article does not name the disease your plant has. It cannot. Bacterial, fungal, and viral leaf spots can look similar in a single photo, and abiotic patterns can mimic all three. Clemson HGIC’s houseplant disorders fact sheet is explicit that distinguishing among these categories requires more than a casual look.
This article also does not recommend a pesticide, fungicide, or home-remedy spray for leaf spots generally — not neem oil, not horticultural oil, not baking soda, not hydrogen peroxide, not milk. UC IPM and ANR materials describe pesticide use as following the exhaustion of non-chemical options, with the diagnostic step happening first. For generic leaf spots without a confirmed cause, that means no spray yet. If a local expert eventually recommends a product, follow its label exactly and ask for species-specific guidance.
A short checklist you can save before you act
- Count the spots and the affected leaves. Mark the date.
- List anything that changed in the last month: light, water, pot, new plant, temperature, humidity.
- Check the leaf undersides for webbing, residue, or insects.
- Decide whether you are in Branch A, B, or C.
- Adjust one environmental variable at a time, not three at once.
- Do not spray anything until a cause is identified.
- Prepare photos plus a short written history before contacting a nursery or extension office.
When in doubt, the safest next step is usually the smallest one: mark the leaf, write down what changed, and give the plant a quiet week or two before deciding anything else. If you need help beyond that, take it to a local human with your notes ready.