Plant care
How to attach a Monstera to a moss pole without breaking it
· Updated
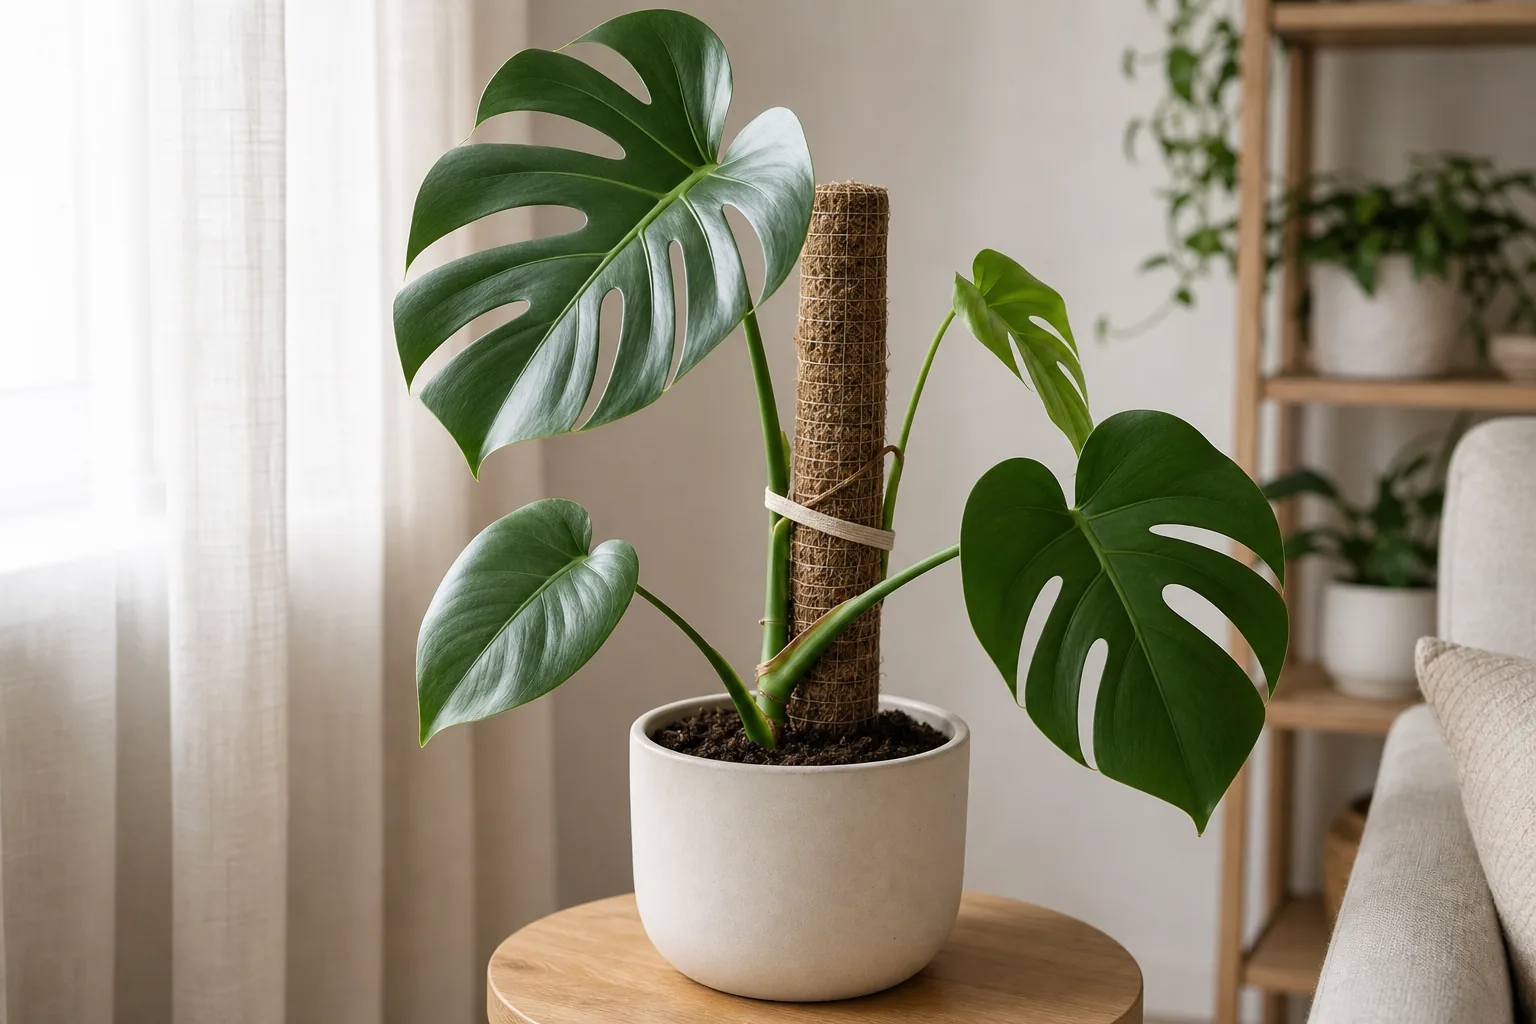
Adding a moss pole to a Monstera works best when you can put it in at potting or repotting, sink the base deep into the root ball for stability, and tie only the main stem with a soft, wide tie every 15–25 cm. Leave the petioles (the leaf stalks) free to move, treat aerial roots as gentle guides rather than things to force into the moss, and watch the plant for steady new growth and stable positioning over the next two to four weeks before you tighten anything.
That sequence is what holds the plant up without breaking stems, choking petioles, or turning a simple support into a problem.
When a Monstera is actually ready for a moss pole
A moss pole is an optional structural aid, not a requirement for a healthy Monstera. The most useful time to add one is when you can see two or three of these signs on the same plant:
- The stem is leaning or toppling out of the pot.
- New leaves are noticeably smaller than the previous ones in the same light.
- Aerial roots are emerging along the stem but have nowhere to attach.
- You are already planning to repot within the next few weeks.
If none of those apply, the pole can wait. A Monstera in a bright, indirectly lit spot with a stable root ball will not be harmed by being left to sprawl or trail in the meantime. The light and watering context that should already be in place is covered in our general Monstera care guide, and Iowa State University Extension also notes that most indoor aroids prefer bright, indirect light.
What to look at first: stem, petiole, and aerial root
Before you attach anything, look at the plant and name three different things on it.
The stem is the central, thickening axis the leaves grow from. It is the part you will tie to the pole. Botanist Dr. Tom Croat describes the stem as the main axis of the plant, with each leaf connected to it by its own petiole.
The petiole is the individual stalk that attaches a single leaf to the stem. Petioles are widely reported to reorient through the day to track light, and community guides consistently warn against tying them down for that reason. They need room to move so each leaf can settle into the brightest available angle.
The aerial root is the brown, sometimes pale, root that emerges from the stem rather than from the soil. Aerial roots are how a Monstera anchors itself to a tree trunk in the wild. Indoors they may or may not grow into a moss pole on their own.
Naming these three parts out loud when you look at your plant is the simplest way to avoid the most common mistake: tying a petiole, or even an aerial root, to the pole by accident.
Choosing a moss pole: height, diameter, and material
Most indoor moss poles are a stake wrapped in sphagnum moss, sometimes with a plastic mesh or hardware cloth holding the moss in place. A few practical choices for a Monstera:
- Height. Aim for a pole that is roughly the current height of the plant from soil level, not its eventual mature size. You can extend or replace the pole later, and a shorter pole is easier to keep stable in the pot.
- Diameter. A pole roughly 5 to 8 cm across is a common practical range that gives the stem something to lean against without taking over the pot. Wider is fine; much narrower is harder for the stem to rest on.
- Material. Sphagnum moss poles hold moisture, coir (coconut fiber) poles are fibrous and usually kept dry, and cedar or wooden planks give a rigid flat surface. All three are structural supports. The main difference is whether you want a moist, textured surface or a dry one. None of these is required for a Monstera to climb; they are reader-preference trade-offs around moisture, mess, and durability.
For a fuller comparison across climbing houseplants, our general guide to supporting climbing houseplants walks through the same options and is a useful companion read.
The best time to add the pole
The most stable install is at repotting or during a partial soil refresh, because you can sink the base of the pole all the way to the bottom of the root ball and firm fresh soil around it. If you are weighing whether the timing is right, our guide to deciding whether your Monstera needs repotting can help you tell whether to combine the two jobs.
Adding a pole to a settled, root-bound plant without repotting is possible but usually less stable. The base has to push through existing roots, and the pole can wobble until the next repot. If you go this route, push the pole in slowly and watch for the plant shifting in the pot, which is a sign the root mass is moving instead of the pole. Either way, our guide to what to expect after repotting covers the lighter watering and steadier light conditions that help a freshly worked Monstera settle.
How to position the pole in the pot
The pole goes slightly behind the main stem as it leans, so the stem rests against the pole rather than away from it. The base should reach the bottom of the pot, with several centimeters of pole still above the tallest leaf you plan to attach today. Firm the soil around the base so the pole does not rock when you wiggle it. If it rocks, add more soil or push it deeper before you start tying anything.
Mulhall’s nursery describes the same approach, with the pole base inserted deep into the soil and the pole positioned slightly behind the plant in the pot so the stem has something to lean into.
Attaching the main stem without breaking it
Use a soft, wide tie: velcro plant tape, soft garden tape, a fabric strip, or a piece of cloth at least a centimeter across. The goal is to keep the stem near the pole, not to clamp it tight. A finger’s width of slack between stem and pole is a common practical guideline.
A few specifics:
- Tie the stem only. Do not run ties across a petiole or around a node where a new leaf is unfurling.
- Place the first tie just below the lowest leaf you want to support, then add another tie every 15 to 25 cm up the stem as it grows.
- Avoid wire, fishing line, thin twine, and twist ties with a metal core. A tie that looks loose on day one can cut into the stem as it thickens over the following weeks, and the damage is not always obvious until the stem starts to swell above the tie.
- Re-check existing ties every few weeks. Anything that was comfortable at install can become tight once the stem puts on growth.
If a tie starts to bite into the stem, remove it, let the stem rest for a week, and reattach it looser or one node higher.
What to do with aerial roots
Aerial roots are the easiest part to overthink. Most of the time you do not need to do anything with them. Aerial roots will sometimes grow toward a moist moss pole on their own and bury themselves into the surface. Aerial roots that wander into the air are also normal and do not need to be cut off or forced.
If you want to encourage contact, you can gently lay a wandering aerial root against the pole and hold it there with a soft tie or a small clip for a few weeks. This is a gentle option, not a verified best practice. Extension-grade sources on this topic do not describe a required routine for stuffing or pinning aerial roots into moss; that advice mostly circulates in commercial and hobby guides. Treat it as something to try, not something the plant needs.
Two things to skip:
- Do not cut aerial roots just because they look untidy. They are part of how the plant stabilizes and feeds itself.
- Do not bend an aerial root sharply back toward the pole. If it does not reach, leave it.
The first two to four weeks after attachment
The first month is mostly an observation window. What you are watching for:
- The pole stays upright when you water or rotate the pot.
- The stem is not rocking inside its ties.
- New leaves continue to emerge at roughly the same pace as before attachment.
- Petioles are still moving freely to track light.
What is not a useful signal in this window: leaf size or fenestration. Both are driven mainly by light intensity, root room, and overall plant health, not by the presence of a pole. If new growth slows for more than a couple of weeks, the more likely causes are a light change, a watering shift, or root disturbance at repotting rather than the pole itself.
Signs the attachment is not working
A few patterns are worth reassessing:
- The pole rocks or leans after watering. The base is not deep enough, or the soil was not firmed around it.
- A tie is leaving a visible line on the stem. Loosen or replace it before the stem thickens further.
- A petiole is bending downward or a leaf is wilting directly above a tie. The tie is too tight or is on the petiole by mistake.
- New growth has stopped and the soil stays wet longer than it used to. This is usually a watering or light issue, not a pole issue, but it is a good prompt to check the basics.
Frequently asked questions
How tight should the ties be? Loose enough that you can slide a fingertip between the tie and the stem. If you cannot, the tie is too tight.
Do I need to keep the moss pole wet? No. A moist moss surface gives aerial roots something to grow into, but extension sources on indoor aroid care do not treat moss moisture as a requirement, and community reports note that keeping moss constantly wet indoors can sometimes encourage fungus gnats or surface mold in poorly ventilated rooms. If you do moisten it, do so lightly and let it dry between waterings. The pole works as a textured climbing surface even when dry.
Is a moss pole better than a coir or cedar plank? All three are reasonable supports. Moss is the most moisture-retentive and easiest for aerial roots to grip; coir is fibrous and usually kept dry; cedar or wooden planks give a rigid flat surface. The choice mostly comes down to how much moisture and mess you want to manage.
Will attaching the pole give me bigger, fenestrated leaves? Not on its own. Leaf size and fenestration respond to light intensity, plant maturity, root room, and overall health. A pole provides a climbing surface; it does not trigger fenestration by itself. If you have not already, our guide to reading the natural light in your room is a useful first step, since light is the variable most often behind small new leaves.
What if the pole is too short already? That is normal, since Monsteras outgrow poles faster than most people expect. A common practical approach is to add a second pole alongside the first and tie the two together at the overlap, then guide the stem onto the taller one as it grows. Re-tie the stem as you go and leave the lower pole in place.
Sources
- Iowa State University Extension — All about aroids: https://yardandgarden.extension.iastate.edu/how-to/all-about-aroids
- UConn Home & Garden — Philodendron: https://homegarden.cahnr.uconn.edu/factsheets/philodendron/
- Exotic Rainforest — What is a stem? What is a petiole?: https://www.exoticrainforest.com/What%20is%20a%20stem.%20%20What%20is%20a%20petiole.html
- Mulhall’s — How to train a Monstera on a moss totem pole: https://mulhalls.com/garden-home/blog/how-to-train-a-monstera-on-a-moss-totem/
- Rachel the Gardener — Velcro plant ties (and how flat ties beat thin ones): http://rachel-the-gardener.blogspot.com/2020/02/velcro-plant-ties-fail.html