Plant care
How often to change propagation water (and the cues that tell you when to change it now)
· Updated
The short answer: there is no single right interval
There is no calendar day that applies to every propagation jar in every room. The most credible extension and horticultural guidance treats water changes as observation-led rather than schedule-led: change the water often enough to keep it clear, cool, and unscented, with most jars in normal indoor conditions falling somewhere between roughly 2 and 7 days. Observable cues — cloudiness, a sour or sulfurous smell, slime on the submerged stem, darkening at the cut end — should override any fixed day of the week.
The advice you’ll find online ranges from “change it every day” to “never change it, just top it off.” Neither extreme matches what university extension services actually publish for home propagation. The Ask Extension service treats propagation water changes as an open question, weighing the small risk of disturbing young roots against the more visible risk of bacterial colonization on the stem, and stops short of a single mandated number. Read on for the conditions that pull you toward the short or long end of the range, the cues that justify changing now, and a routine that keeps a jar healthy without over-handling it.
What actually changes how often you need to change the water
Five conditions make a meaningful difference, and most jars sit at some combination of them.
Jar shape and surface area. A narrow-neck jar has less air–water contact per unit volume than a wide-mouth jar. Because dissolved oxygen enters water by direct absorption from the atmosphere at that interface, a narrow neck means slower gas exchange and a faster drift toward conditions that favor bacteria. Wide-mouth jars are also easier to inspect and rinse.
Room temperature and light. Water in direct sun on a windowsill will sit several degrees warmer than the rest of the room. Warmer water holds less dissolved oxygen, and warmer temperatures also accelerate bacterial growth. The same cutting in bright indirect light on a shelf can comfortably sit at the long end of any range.
Stem type. Soft-stem cuttings like pothos, heartleaf philodendron, tradescantia, and spider plantlets typically stay clean longer. If you want a closer look at how heartleaf philodendron and spider plantlets behave through the rooting window, the heartleaf philodendron care guide and the spider plant care guide both cover the early stages. Semi-woody or sap-prone cuttings — mature monstera nodes, ficus, dieffenbachia, begonias, coleus — leach more sap and oxidize faster, so the same jar with these species clouds sooner.
Crowding. Multiple stems in a small jar leach more organics into the water and shade the interior from light, which compounds warmth. A single cutting in a wide-mouth jar is the easiest configuration to keep clear.
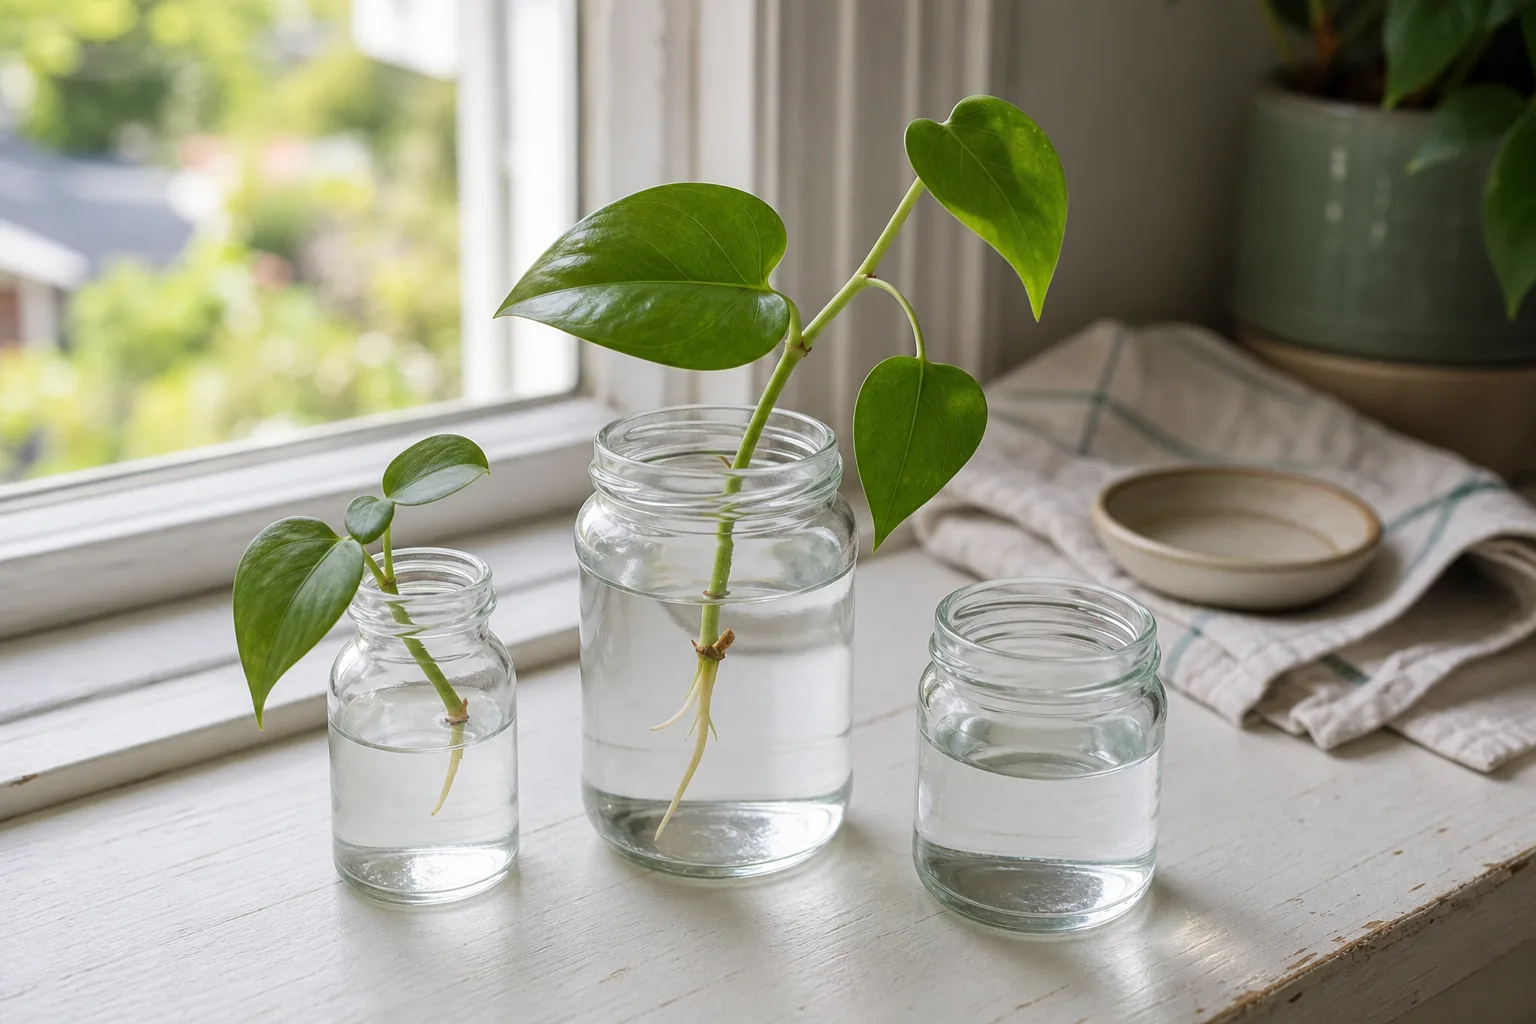
Leaf contact with the water. Any leaf sitting at or below the waterline breaks down quickly, clouds the water, and feeds bacteria. Trimming leaves so nothing touches the surface is one of the simplest ways to extend the interval.
A practical cadence for an ordinary kitchen jar
For an average setup — a single soft-stem cutting in a small clear jar, in indirect light, at normal room temperature — checking every 3 to 5 days is a reasonable starting point. That is the same range most popular houseplant guides converge on, even though extension services do not publish a single number.
Push toward the shorter end (every 2 to 3 days) when:
- the jar sits in direct sun or a warm, south-facing window
- you have multiple cuttings crowded into a small jar
- the cutting is sap-prone or semi-woody
- the room runs warm in summer
- you’ve already noticed cloudiness within 24 hours of a previous change
Push toward the longer end (5 to 7 days) when:
- the jar is wide-mouth with a single cutting
- the spot is cool and shaded with bright indirect light
- the water source is clean and the jar has stayed clear through prior changes
- you’ve gone a full week with clear, unscented water and a clean stem
Topping off versus a full change. Topping off means replacing water lost to evaporation. It preserves any biofilm already established on the submerged stem and any dissolved organics that have leached from the cutting. A full change means pouring out the old water, rinsing the jar, gently rinsing the stem end, and refilling with fresh room-temperature water. Treat topping off as appropriate between scheduled changes when the water still looks and smells clean; treat a full change as appropriate when any cue in the next section appears.
The cues that tell you to change now, regardless of the calendar
These signals override any schedule. If you see or smell any of them, change the water.
- Cloudiness, haze, or a faint milky cast in water that was clear an hour ago.
- A sour, sulfurous, “pond,” or generally off smell when you bring the jar near your nose.
- Slime on the submerged portion of the stem — usually a translucent film, sometimes with stringy strands that wipe off with gentle friction under running water.
- Darkening at the cut end: brown or black creeping up from the bottom of the stem.
- Yellowing leaves at or just above the waterline, especially when paired with any of the above.
That last cue, slime on the stem, deserves its own note. Bacterial biofilm is a slimy matrix of microorganisms that adheres to submerged surfaces and can be wiped or rinsed off. Healthy callus tissue, the plant’s own wound response at a cut end or node, looks different: pale, firm, slightly bumpy or swollen, and it does not wipe off. If you can rub it away with a finger under running water, it is biofilm. If it stays put and feels like plant tissue, it is callus and is generally a healthy sign that the cutting is responding to its environment.
How your water source changes the answer
Tap water. For most common houseplant cuttings — pothos, philodendron, tradescantia, spider plant, monstera — modern municipal tap water is generally fine. Drinking-water treatment keeps residual chlorine at low levels by the time water reaches your tap, and at those concentrations chlorine does not meaningfully harm these species. If your tap is very hard (high in calcium and magnesium), you may see a faint mineral haze appear on the inside of the jar after a few days; that haze is harmless to the cutting and rinses off the glass. For more on reading your own tap water, the guide to tap water for houseplants covers what to check before you switch sources.
Filtered water. A simple carbon filter (pitcher or faucet-mount) tends to produce the clearest jars and the slowest biofilm buildup. If your tap leaves a haze or carries an obvious chlorine smell, this is the most predictable change.
Distilled or rainwater. Both can be used. Distilled water behaves much like tap water in a small open jar; any practical difference between distilled and tap is small compared with the effects of temperature and how often the water is refreshed. Rainwater is fine as long as it is collected cleanly and used within a few days; sitting rainwater can develop its own microbial life.
Common misconceptions about changing propagation water
A few absolutes show up repeatedly online. None of them are supported by extension publications or horticultural research, and treating them as rules can lead to either over-handling or neglect.
“Change it every day for fastest rooting.” Daily changes are not supported by extension publications, and frequent handling can disturb very young root initials. The peer-reviewed horticultural literature on dissolved oxygen discusses commercial propagation irrigation, not home jars, and does not endorse a daily schedule.
“Never change it once roots form.” The opposite extreme is just as unsupported. Long intervals let biofilm accumulate and roots sit in stagnant water. Once roots are visible, the cues above still apply; check the jar on the same cadence as before.
“The water runs out of oxygen in a few days.” This is the most repeated piece of folklore in propagation guides, and it does not match how a small open jar actually behaves. Dissolved oxygen enters water continuously by absorption from the atmosphere at the air–water interface. Warm water holds less of it, which is the more meaningful variable; sitting in an open jar on a counter is a very different situation than sitting in a sealed bottle.
“You must add something to keep it fresh.” Honey, willow water, crushed aspirin, hydrogen peroxide at home dilutions, and rooting hormone are all recommended somewhere online for water propagation. None of the supplied university extension sources treat any of these as necessary for ordinary indoor cuttings. Plain water changed on the cues above is the supported approach.
A simple two-minute routine for a jar on the windowsill
This is the routine that fits most setups and takes very little time.
- Lift the cutting out and set it on a clean surface or paper towel.
- Pour out the old water. Rinse the jar with room-temperature tap water; a bottle brush helps on narrow-neck jars.
- Gently run room-temperature water over the submerged portion of the stem and rub the cut end with a clean finger to remove any film. Do not yank or pull at the stem.
- Refill the jar with room-temperature water so that 2 to 4 centimeters of stem are submerged and no leaves touch the surface.
- Place the cutting back. Note the date you changed the water, either on a small tag or in a phone note.
Do this when one of the cues above appears, or on the cadence that has worked for your particular jar — whichever comes first. If you want a sense of what a healthy pothos cutting looks like once it has rooted and been potted up, the pothos care guide walks through what to read in the plant after the jar work is done.
When the cutting is failing, not the water schedule
Some signs look like water problems but are really signs that the cutting itself is in trouble. If the stem is mushy or collapses when you lift it, if the cut end is black and the blackness is spreading upward, or if the entire stem has been sitting for weeks with no callus and no roots in any condition, the cutting is likely not going to recover no matter how often you change the water. Trim back to firm green tissue above the node, take a fresh cut with a clean blade, and start over in a clean jar. This is also the moment to consider a different propagation method (a moist medium, for example) if the species has not responded to water after several weeks. University of Illinois Extension describes rooting as taking “several weeks” depending on variety, conditions, and technique, so a patient window is reasonable; mushy or black tissue is not.
Sources
- Ask Extension — Is it necessary to change propagation water? (FAQ #922869)
- NC State Extension — Propagation chapter, Extension Gardener Handbook
- Michigan State University Extension — Moisture management during vegetative cutting propagation
- University of Illinois Extension — Learn to propagate your plants
- Master Gardeners of Northern Virginia — Rules of Propagation
- U.S. EPA — Dissolved Oxygen overview
- HortScience — Oxygenation of irrigation water during propagation and production