Plant care
Spider plant care in a real room: light, water, and what to do with the plantlets
· Updated
The short answer
A spider plant (Chlorophytum comosum) does best in bright, indirect light near an east, west, or filtered south window, in a pot with a drainage hole and a well-draining mix. Water when the top inch or two of the substrate is dry and the pot feels lighter than usual, and always empty the saucer afterwards. The small plantlets that form on long stems are a sign of a healthy, mature plant. You can leave them attached, or detach them once you can see small root nubs at their base and root them in water or pot them into fresh mix.
Everything below is a closer look at how to read those three signals: how bright the spot really is, how dry the substrate actually is, and what the plantlets are doing.
What kind of plant a spider plant actually is, in plain terms
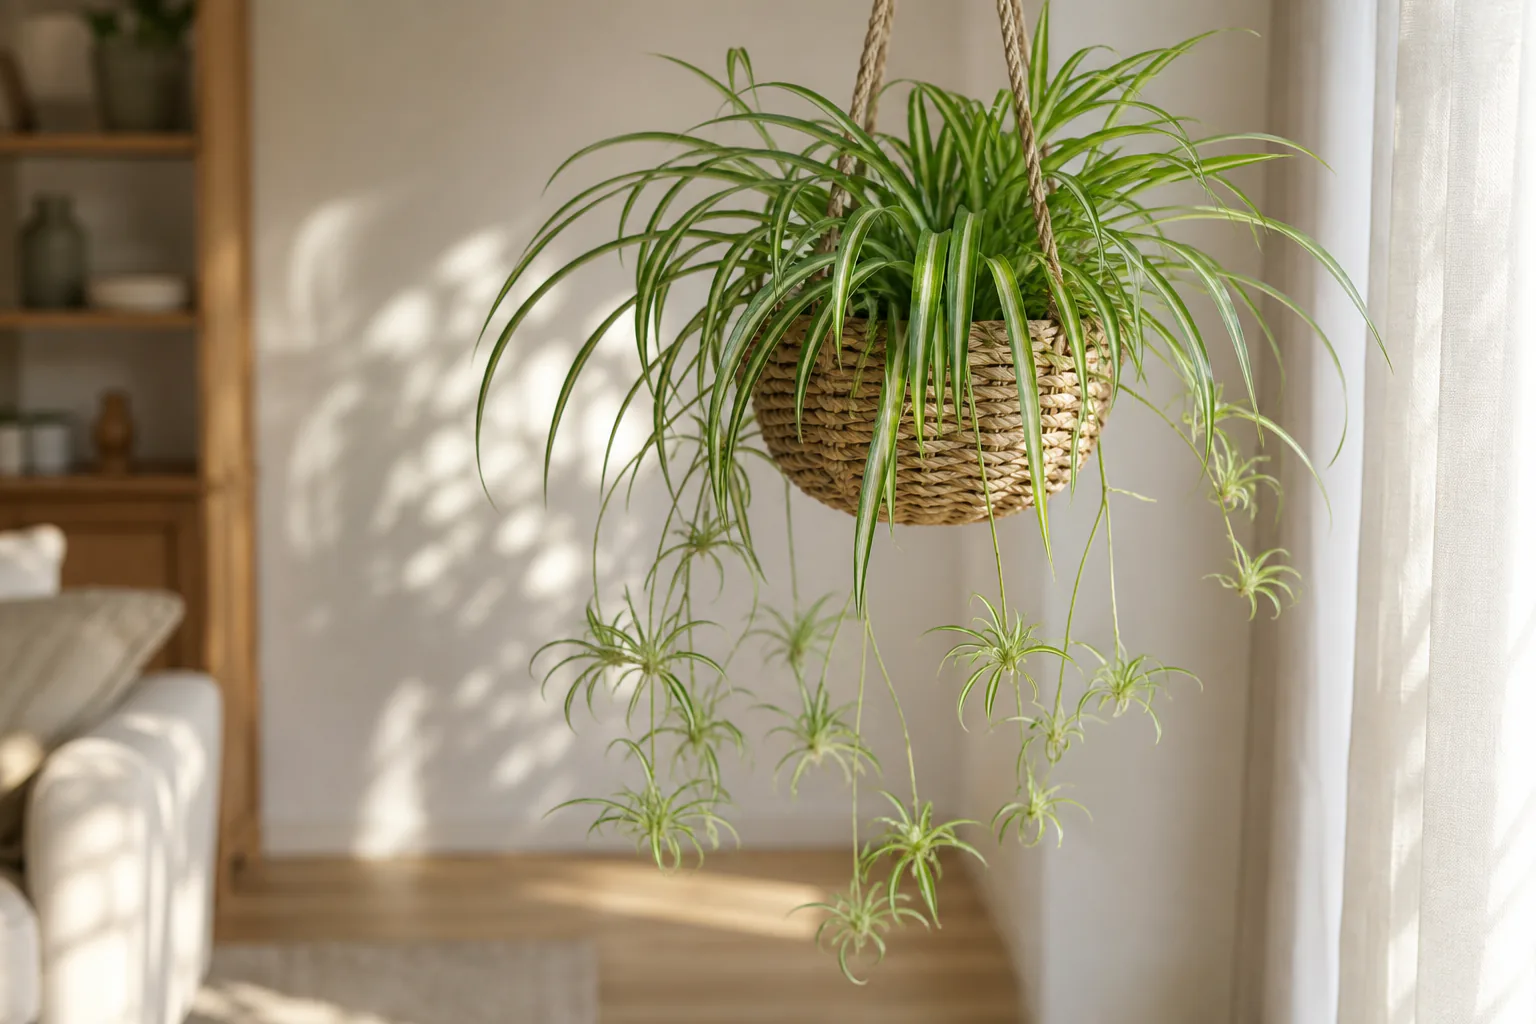
A spider plant is a clump-forming evergreen perennial grown indoors for its strappy, often white-striped leaves and for the small plantlets it sends out on long, arching stems. Those stems are sometimes called stolons or runners, and the little clusters at the end of each stem are sometimes called babies, plantlets, spiderettes, or offsets.
It grows from a thick, white, partly tuberous root system that stores water. That storage capacity is why a spider plant forgives an occasional missed watering, and also why it can quietly rot if it sits in wet soil for too long. The root system is the part of the plant most worth respecting, even though it is the part you see least.
Where to place it: bright, indirect light and what “bright” looks like in a real room
Spider plants are often sold as tolerant of less-than-ideal light, and they are, but the wording matters. They are not true low-light plants. University extension services and botanical garden sources describe bright, indirect light as the ideal, with dimmer spots tolerated but rarely ideal.
In a real room, “bright, indirect” usually means a short distance from an unobstructed east, west, or filtered south window. A north-facing window can work in a brighter home if the plant sits close to the glass. The New York Botanical Garden recommends indirect light a short distance from the window, with some morning sun acceptable but harsh midday and afternoon sun likely to bleach or scorch the leaves.
A quick check you can do without any tools: hold your hand flat, palm down, between the window and the spot where the plant sits. A soft but defined shadow of your hand on the surface underneath usually means bright, indirect light. A faint, blurry shadow means medium light. No visible shadow at all usually means the spot is too dim for a spider plant to grow or produce offsets well. If you want a more thorough method, the shadow and reading approach in our guide to reading natural light in your room walks through the same idea in more detail.
If the plant’s leaf color is fading to a uniform pale green, growth has stalled, and there are no plantlets on long stems, the single most useful change to try is usually a brighter spot, not a different watering schedule.
Watering a spider plant by feel, not by schedule
Spider plants do not want a calendar. They want a check. University and horticultural society sources frame watering around substrate feel and seasonal growth rather than a fixed interval.
A workable check looks like this:
- Stick a finger into the substrate up to the first knuckle. If the top inch feels dry and the mix below is just barely damp, it is time to water. If the top still feels cool and moist, wait a few more days.
- Lift the pot right after a thorough watering and notice how heavy it is. Lift it again a few days later. When it feels noticeably lighter and the top inch is dry, that is the cue, regardless of how many days have passed.
- Water slowly until you see a little water run out the drainage hole. Wait a minute, then empty the saucer or outer pot. Standing water under the pot is one of the surest ways to push a spider plant into root trouble.
- In winter, when growth slows, expect to water less often. A plant in a dim corner in a cool room may go two or three weeks between waterings; a plant in a bright, warm room in a small terracotta pot may want water every few days in midsummer.
Pot size and mix matter as much as the room. A small pot in a bright window dries out much faster than a large pot in the same room. A dense, peat-heavy mix that stays wet for more than a week is a stronger risk factor for a struggling spider plant than the room being a few degrees cooler than ideal.
Pot, drainage, and a light, airy substrate
The single most important choice after light is the pot. Use a container with a drainage hole. A decorative cachepot without drainage is fine if you keep the plant in its nursery pot inside it and remember to lift the inner pot out, empty the cachepot, and put it back after each watering.
A standard indoor potting mix is a sensible default. If the mix stays wet for more than a week between waterings, or if the plant looks heavy and slightly yellow despite being in a bright spot, a grittier mix helps. Adding a portion of perlite, orchid bark, or coarse sand to a standard bagged mix shortens the wet window and gives the tuberous roots more air.
Avoid going the other way. A very sandy or mostly inorganic mix will dry out so fast that the plant wilts between waterings, and you will spend the summer chasing moisture. The goal is fast drainage, not desert conditions.
Temperature, drafts, and humidity in an ordinary home
Spider plants do well in ordinary indoor temperatures and average household humidity. The University of Wisconsin Horticulture Extension describes them as happy in cool to warm room temperatures with average humidity, which is essentially the range most living rooms and bedrooms sit in already.
Two environmental things tend to show up in the leaves before they show up anywhere else: cold drafts from a window that does not seal well in winter, and very dry air from forced-air heating. Both can contribute to brown leaf tips, which is the symptom most people notice first.
If your plant sits on a windowsill and the leaves closest to the glass brown at the tips in January, moving it a foot back from the glass usually helps more than anything else you can do that week.
Offsets, plantlets, and stolons: what they are and what they tell you
The long, arching stems that emerge from the centre of the plant are how a mature spider plant reproduces asexually. Each stem ends in a small cluster of leaves that can grow its own roots and become a self-supporting plant. In plain terms, the plant is making copies of itself at the tips of those stems.
In practical terms, three observations matter:
- A mature plant that is getting enough light, water, and nutrients tends to produce these stems readily. Seeing them is a sign of a happy plant, not a problem to solve.
- In a dim corner, the same plant may produce few or no stems, even when it is otherwise alive. Few plantlets on a healthy-looking plant is usually a light problem, not a feeding problem.
- A plantlet left on the stem will often start to swell at its base and form small, pale, bumpy root initials. Those bumps are what you are waiting for before you do anything with the plantlet.
How to root or pot up an offset, and when to leave it alone
You have three reasonable choices with each plantlet, and none of them is wrong.
Leave it on the stem. This is the lowest-effort option and a good default. The mother plant continues to feed the plantlet while it forms roots, and you can enjoy the trailing stems as part of the plant’s look. You can detach plantlets later if you change your mind.
Root it in water. Once you can see small root nubs at the base of a plantlet, snip the stem a couple of centimetres above the plantlet and set the base in a small jar of room-temperature water so the nubs are submerged but the leaves stay dry. Change the water every few days. In a bright, indirect spot you should see white roots lengthen over a few weeks. Pot the plantlet into a small container of fresh, lightly moist mix once a small root system has formed.
Pot it directly into mix. The same plantlet, with visible root nubs, can go straight into a small pot of fresh mix. Keep the mix lightly moist (not soggy) and the pot in bright, indirect light. This skips the water step but asks more patience, because you cannot see the roots developing.
Plantlets without visible root nubs can still root, but success is less predictable. If you want to try, do not expect the same confidence you would get from a plantlet that already shows bumps.
Reading the leaves: brown tips, pale color, limpness, and leaf curl
Leaves are how a spider plant tells you what it needs. A few common patterns:
- Dry, brown leaf tips with otherwise healthy green leaves. The usual suspects, in roughly this order, are low indoor humidity, the substrate drying out completely between waterings, mineral or salt buildup from fertilizers or hard water, and fluoride or chlorine in tap water. University extension sources consistently list these as overlapping causes rather than a single diagnosis, so treat brown tips as a checklist.
- Pale, washed-out leaves and slow growth, with no plantlets. Almost always a light problem. Move the plant closer to the window or to a brighter window before changing anything else.
- Limp, yellowing lower leaves with soft, dark roots when you slide the plant out of the pot. Usually a watering or drainage problem. The mix is staying wet too long, the pot has no real drainage, or both. Repot into a grittier mix in a pot with a drainage hole and water less often.
- Curled, wrinkled leaves that feel thin. Usually a thirst problem, either an underwatered plant or one whose roots have been damaged and can no longer take up water well.
If brown tips bother you aesthetically, you can trim them off with clean scissors, following the natural shape of the leaf. Trimming does not fix the cause, but it does remove the visible damage while you work on what is behind it.
Repotting, refresh, and when to leave a healthy root system alone
Spider plants actually prefer to be slightly snug in their pots. A plant that is sending out lots of plantlets and still has white, firm roots is usually fine where it is.
Consider repotting when roots are circling the bottom of the pot, when water runs straight through without wetting the mix, or when the pot cracks from the pressure of the swollen root mass. Move up one pot size at a time, refresh as much of the old mix as you can without tearing the roots apart, and water lightly until the plant settles in.
If you want more plants without buying them, dividing a crowded clump at repotting time is often easier than rooting individual plantlets. Slide the root mass apart gently into two or three sections, keep any section that has healthy white roots and at least a few leaves, and pot each section into its own container.
A short care checklist you can save
- Place the plant a short distance from an east, west, or filtered south window. Aim for a spot where your hand casts a soft, defined shadow.
- Use a pot with a drainage hole and a standard, well-draining indoor mix.
- Water when the top inch of substrate is dry and the pot feels lighter than usual, then empty the saucer.
- Expect to water less in winter and more in summer, and less in dim rooms than in bright ones.
- Treat brown tips as a checklist: humidity, dry soil cycles, salt buildup, and tap water chemistry.
- Leave plantlets on the stem until you see small root nubs, then choose: leave attached, root in water, or pot into fresh mix.
- Repot only when the pot is crowded, watering has become difficult, or you want to divide the plant.
Sources
- Clemson University Home & Garden Information Center, Spider Plant factsheet: https://hgic.clemson.edu/factsheet/spider-plant/
- University of Wisconsin Horticulture Extension, Spider plant, Chlorophytum comosum: https://hort.extension.wisc.edu/articles/spider-plant-chlorophytum-comosum/
- New York Botanical Garden LuEsther T. Mertz Library, Spider plant (Chlorophytum comosum): https://libguides.nybg.org/spiderplant
- Iowa State University Extension, Why does my houseplant have brown leaf tips and edges? https://yardandgarden.extension.iastate.edu/faq/why-does-my-houseplant-have-brown-leaf-tips-and-edges
- Royal Horticultural Society, How to grow spider plants: https://www.rhs.org.uk/plants/spider-plants/growing-guide