Plant care
How to propagate a Hoya from a stem cutting
· Updated
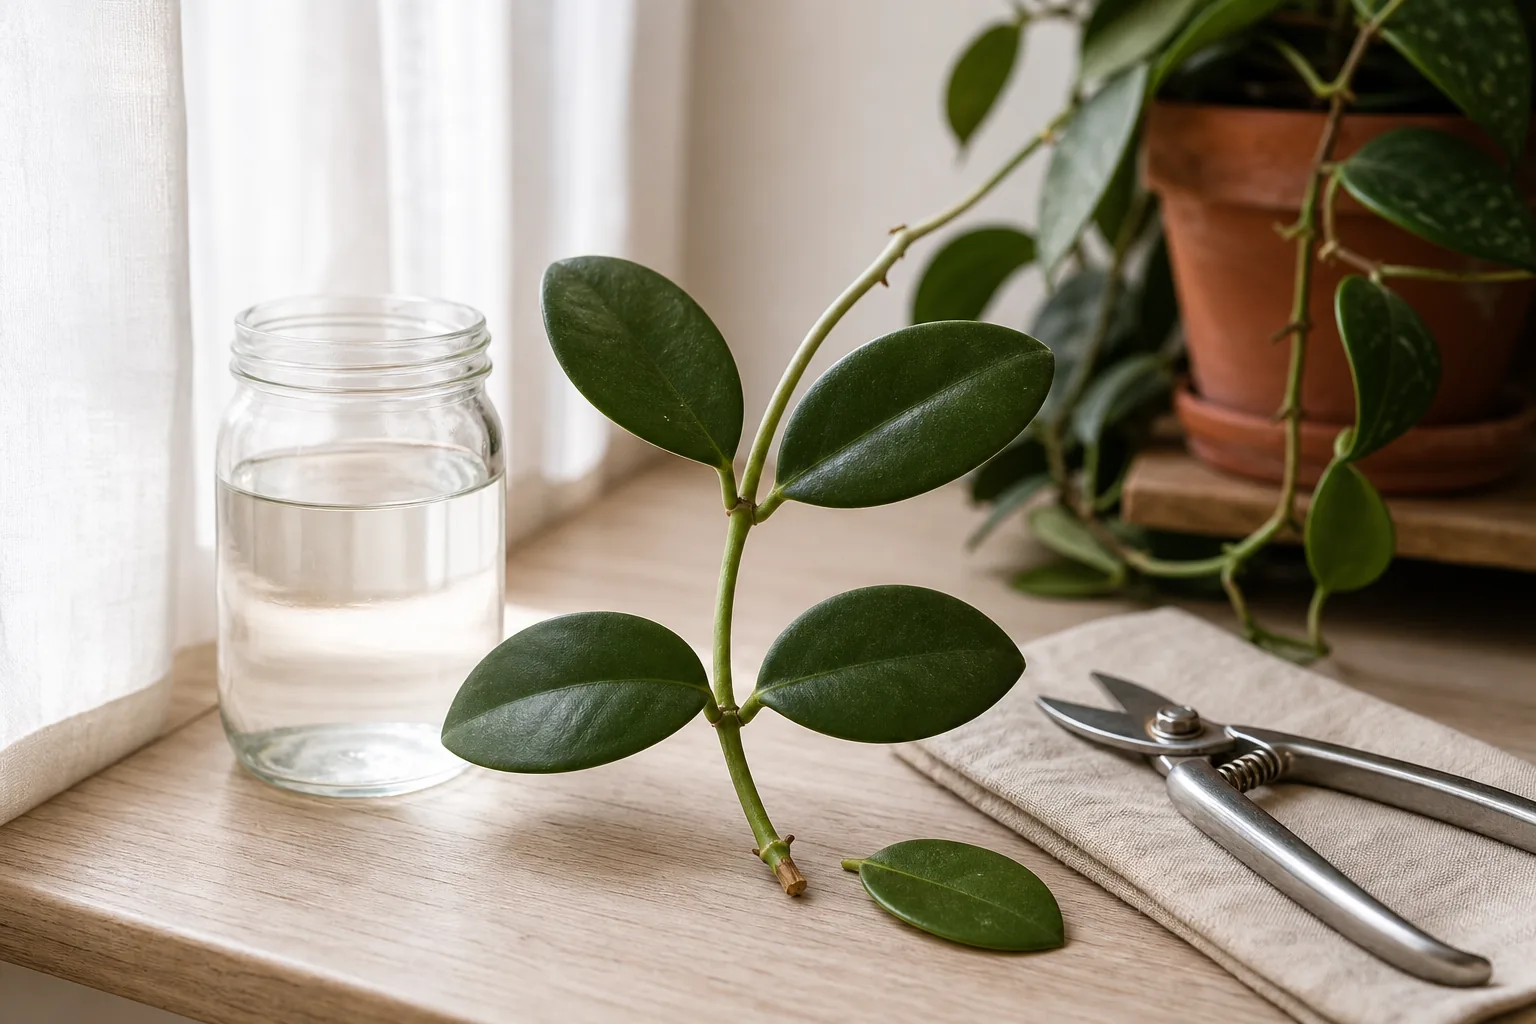
Hoya propagation is slower and more particular than pothos or philodendron propagation, but the method itself is straightforward once you know where to cut. Take a stem cutting that includes at least one node and ideally one or two pairs of leaves, let the cut end dry and callus for roughly 12 to 24 hours, then root it in plain water, moist sphagnum moss, or a very airy mix. Keep the cutting in bright indirect light and steady room warmth. Visible roots usually take several weeks to a few months to appear, and the cutting may sit still for even longer before pushing new top growth.
The rest of this article walks through what to check on the mother plant, how to find a node on a Hoya vine, the honest tradeoffs between the three most common rooting methods, and how to pot a rooted cutting up without snapping the fragile new roots.
Why Hoya propagation deserves its own approach
Hoyas are semi-succulent epiphytes. In their native range they climb trees and store water in their thick leaves, which is part of why they tolerate dry indoor air and the occasional missed watering. That same leaf texture and slow growth habit also means they root more slowly than thinner-leaved tropical vines like pothos or heartleaf philodendron.
A Hoya cutting can sit in a glass of water for weeks with no visible change and still be healthy. That slow pace is normal, not a sign of failure. Treating a Hoya cutting like a pothos cutting is the most common reason first attempts feel discouraging.
The other thing that makes Hoyas their own topic is the node. On a Hoya vine the node is subtler than the knobby aerial root nubs on a pothos or the obvious segmented joints on a Monstera stem. If you cut a vine into pieces without locating the node, you can end up with segments that look like cuttings but have no place to grow roots from.
What to check on the mother plant before you cut
Start with a healthy, mature plant. The mother plant should be free of pests, actively holding its leaves firm, and putting out new growth or at least looking like it has energy to spare. If the plant is struggling, dropping leaves, or showing signs of pests, address that first. A weak mother plant tends to produce weak cuttings, and a pest problem on the source plant often travels with the cutting.
Take a moment to inspect the whole vine before you snip. Look under leaves and along the stem for sticky residue, webbing, mealybugs, or scale. If the plant has been outside for the summer, give it a closer look before bringing cuttings indoors. The same inspection principles in the guide on how to inspect and isolate a new houseplant apply just as much to a vine you are about to cut as to a plant you just brought home.
Choose a firm, mature section of vine rather than the softest newest tip. Semi-hardwood sections hold their shape during callusing, root more reliably, and leave the mother plant with a sturdier stub that is more likely to branch back.
Tools and setup
You do not need much. A clean, sharp pair of scissors or pruning snips, a small jar or glass, and fresh room-temperature water cover the basics. Wipe the blades with rubbing alcohol before you start, especially if you also use them on other plants, since Hoyas share the same pests and pathogens as many tropical houseplants.
Have a clean tray or paper towel ready to set the cutting on while the cut end calluses. For sphagnum or direct-mix rooting you will also want a small clear container, a bag of long-fiber sphagnum moss, or a small nursery pot and a chunky, well-draining blend such as perlite, orchid bark, or an epiphyte-style mix. The guide on how to choose a potting mix for houseplants walks through what “chunky and well-draining” actually means in practice.
How to find a node and take a usable stem cutting
A node is the point on the stem where leaves, roots, and flower peduncles can emerge. With the exception of Hoya imbricata, Hoyas grow opposite leaves, so two leaves sit directly across from each other on the vine and the node sits exactly between them, at the point where the leaf petioles meet the stem.
On a Hoya the node looks like a small bump or slight swelling rather than a dramatic joint. Run a finger along the vine and you will feel it as a subtle raised point. That bump is where new roots will form.
A usable cutting should include at least one node and ideally two or three. A single-node cutting can root, but a cutting with two to three nodes is more forgiving. It has more stored energy, more opportunities to push roots, and a backup node if one fails. A typical home cutting is roughly 10 to 15 cm long with two to four leaves.
Make the cut a short distance below a node so the node sits near the bottom of the cutting. Trim the cutting so the bottom node is bare, with no leaf attached, since it will sit in water or be buried in medium. Upper leaves stay on to photosynthesize. Stripping the bottom leaf or two is common because submerged leaves tend to rot.
Three rooting methods and their honest tradeoffs
There is no single best way to root a Hoya cutting. Each of the three most common methods has tradeoffs, and the right choice depends on what you can observe and maintain.
Water rooting
A clear glass or jar of room-temperature water is the most beginner-friendly method because the node and any emerging roots are easy to watch. Keep the bottom node submerged and the leaves above the waterline. Refresh the water every week or whenever it looks cloudy, and keep the jar in bright indirect light.
The main tradeoff is the type of root you get. Water roots are adapted to water and can be more fragile at the move into soil. They usually transition fine if you pot up when the roots are several centimeters long and lightly branched, but they need gentle handling.
Moist sphagnum moss
Long-fiber sphagnum moss holds moisture evenly around the node without sitting in a puddle. Dampen the moss so it feels like a wrung-out sponge, fluff it around the node in a small cup or propagation box, and check it every few days so it does not dry out or stay soggy.
The tradeoff here is visibility. You cannot see the roots the way you can in a clear jar, so you rely on feel and on the cutting staying firm. Some growers feel that roots started in sphagnum transition to an airy mix more readily than long water roots, though this is community observation rather than an established rule, and all three methods can work with patience.
Airy mix directly
A very open mix such as perlite, orchid bark, or a chunky epiphyte blend mimics how Hoyas grow in the wild. Bury the bottom node in a moistened mix in a small nursery pot with drainage holes, and keep the mix lightly moist. This method can produce roots that are already used to a mix-like environment, though the tradeoff is reduced visibility and a medium that is easier to over- or under-water than a jar of water.
Where to put the cutting while it roots
Hoyas root in ordinary indoor conditions. A spot with bright indirect light and steady room warmth, somewhere in the range of typical household temperatures, is enough. Direct sun through a window can cook a cutting or dry the medium too fast, so filtered or indirect light is the safer default.
Spring and summer are easier times to root Hoyas simply because warmth and longer days support active growth on the mother plant and faster root development on the cutting. Cuttings taken in fall or winter can still root, they just tend to take longer and are more likely to sit dormant.
Resist the urge to seal the cutting in a bag or humidity dome unless your home is unusually dry. Hoyas are adapted to short dry periods in their native habitat, and a sealed bag can trap moisture against the leaves and stem and invite rot.
What healthy rooting looks like, and what rot looks like
Healthy rooting starts with a firm cutting and a callused cut end. After 12 to 24 hours of air-drying, the cut surface should look dry and slightly papery rather than wet and shiny.
New roots appear as small white or pale tan nubs directly from the node, then lengthen into fine pale threads. They can be slow and irregular. One root this week, two more next month is normal.
Rot shows up differently. The cut end or the buried node turns soft, dark, or mushy, the stem may take on a translucent or blackish look, and the water or medium may develop a sour smell. If you see rot, lift the cutting, cut back to firm pale tissue above the affected area, let the new cut callus again, and restart in clean water or fresh medium. Treat the old container and water as contaminated.
How long rooting actually takes, and what to do in the meantime
Hoya cuttings typically take several weeks to a few months to produce visible roots in ordinary indoor conditions. The range is wide and depends on temperature, light, species, and the maturity of the cutting. Hoya carnosa is the most common and forgiving species for home growers, while Hoya kerrii, the sweetheart Hoya with the heart-shaped leaves, is often described as especially slow.
It is normal for a cutting to root first and then sit for a long time before pushing obvious new top growth. Months of apparent stillness with firm leaves and a slowly lengthening root system is a healthy cutting, not a stalled one.
Use the in-between weeks to refresh the water, check the medium, and resist pulling the cutting out to look. Constant tugging damages the delicate new roots and resets the clock.
Potting up a rooted cutting without breaking the new roots
A water-rooted cutting is generally ready for soil when the roots are several centimeters long, lightly branched, and pale rather than dark and mushy. A sphagnum- or mix-rooted cutting is ready when a very gentle tug meets clear resistance and the roots have grown into the surrounding medium.
Move the cutting into a small pot, only slightly larger than the root ball, with drainage holes and a chunky, well-draining mix. A small volume of airy mix dries out more evenly around the small root system, and drainage holes protect against the most common rookie mistake of overwatering a fresh cutting.
Water the freshly potted cutting lightly to settle the mix around the roots, then return it to bright indirect light. Reading moisture in a small pot is easier with the guide on how to tell when a houseplant actually needs water than with a fixed schedule. Hold off on fertilizer for several weeks. The cutting has limited roots and is more interested in establishing than in being fed. The article on what to do after repotting a houseplant covers the first weeks in more detail.
The first few months after potting: realistic growth
A newly potted Hoya cutting often loses a leaf or two while it redirects energy into its small root system. This is common and not a reason to panic. The same pattern is described in the guide on why a houseplant drops leaves after a move or change, and a freshly potted cutting is essentially going through its own small version of that adjustment.
New vine growth, when it comes, usually appears as a small tendril from an existing node rather than a full new branch. Treat the cutting as a long-term project rather than a quick win. Many home growers see their first new leaf or two a few months after potting, and a fuller vine in the following growing season.
Once the cutting has clearly rooted into its pot and started pushing new growth, it can be cared for like a mature plant. The main Hoya care guide covers light, watering, and mix for an established Hoya once you are past the propagation stage.
A quick note on the kerrii single-leaf cutting
Many gift shops and plant sellers sell a single heart-shaped Hoya kerrii leaf stuck in a small pot. That leaf often roots. It usually does not become a full plant, because there is no node attached, and roots without a node cannot grow a vine. A rooted kerrii leaf can stay alive for years as a single leaf, but it is unlikely to ever produce the climbing or trailing growth you are hoping for. Iowa State University Extension notes the same in its Hoya overview.
If you want a full Hoya kerrii plant, the answer is a stem cutting that includes a node.
Sources
- Iowa State University Extension, All About Hoyas: https://yardandgarden.extension.iastate.edu/how-to/all-about-hoyas
- NIH/PMC, Vegetative Propagation of Hoya imperialis and H. verticillata: https://pmc.ncbi.nlm.nih.gov/articles/PMC9132552/
- Joy Us Garden, 5 Ways Of Propagating Hoya Plants: https://www.joyusgarden.com/4-ways-to-propagate-hoyas/
- Homestead Brooklyn, The Ultimate Hoya Care Guide: https://homesteadbrooklyn.com/all/2019/4/8/the-ultimate-hoya-care-guide
- UBC Botanical Garden Forum, Hoya propagation: https://forums.botanicalgarden.ubc.ca/threads/hoya-propagation.11957/